


How do you use Wingman in a DAW?
Load Wingman in a supported DAW and configure the host so Wingman receives the audio you want to capture. Use Record Audio while that phrase plays, choose the musical task, audition the result, then export MIDI or WAV back to the session. Plugin placement and audio routing depend on your host.
See the workflow in Wingman 3
Follow the relevant part of the official walkthrough, then use the steps below with your own audio.
Watch this section in the official Wingman 3 walkthrough. The demonstration uses Logic; the musical controls are shown inside Wingman.
When to use Wingman in your DAW
Use Wingman when you have an audio idea in your session and want to turn it into something more useful: chords, basslines, stems, MIDI, rhythm patterns, sounds, or exportable parts.
Good starting points
- A vocal recording
- An acapella
- A melody or synth riff
- A loop or sample
- A full track section for stem separation
What you can create
- Chord progressions
- Basslines
- Audio-to-MIDI parts
- Separated stems
- MIDI or WAV exports for your session
What you need before you start
Wingman installed on your computer.
A supported DAW where you can open Wingman as a plugin.
An audio track, MIDI idea, loop, sample, vocal, acapella, or track section you want to build from.
Set the tempo and grid before recording
Set the project tempo to match the audio and align the phrase with the DAW grid before capturing it. In the official walkthrough, the first beat is moved to the start of the session before Wingman records. Wingman 3 can warn when captured audio does not match the DAW tempo.
Check the source timing when that warning appears; do not assume a warning automatically fixes the audio. Once the capture is aligned, you can build chords and bass, add a Drums part or audition recorded guitars. The walkthrough demonstrates Logic; plugin placement and routing still depend on your DAW.
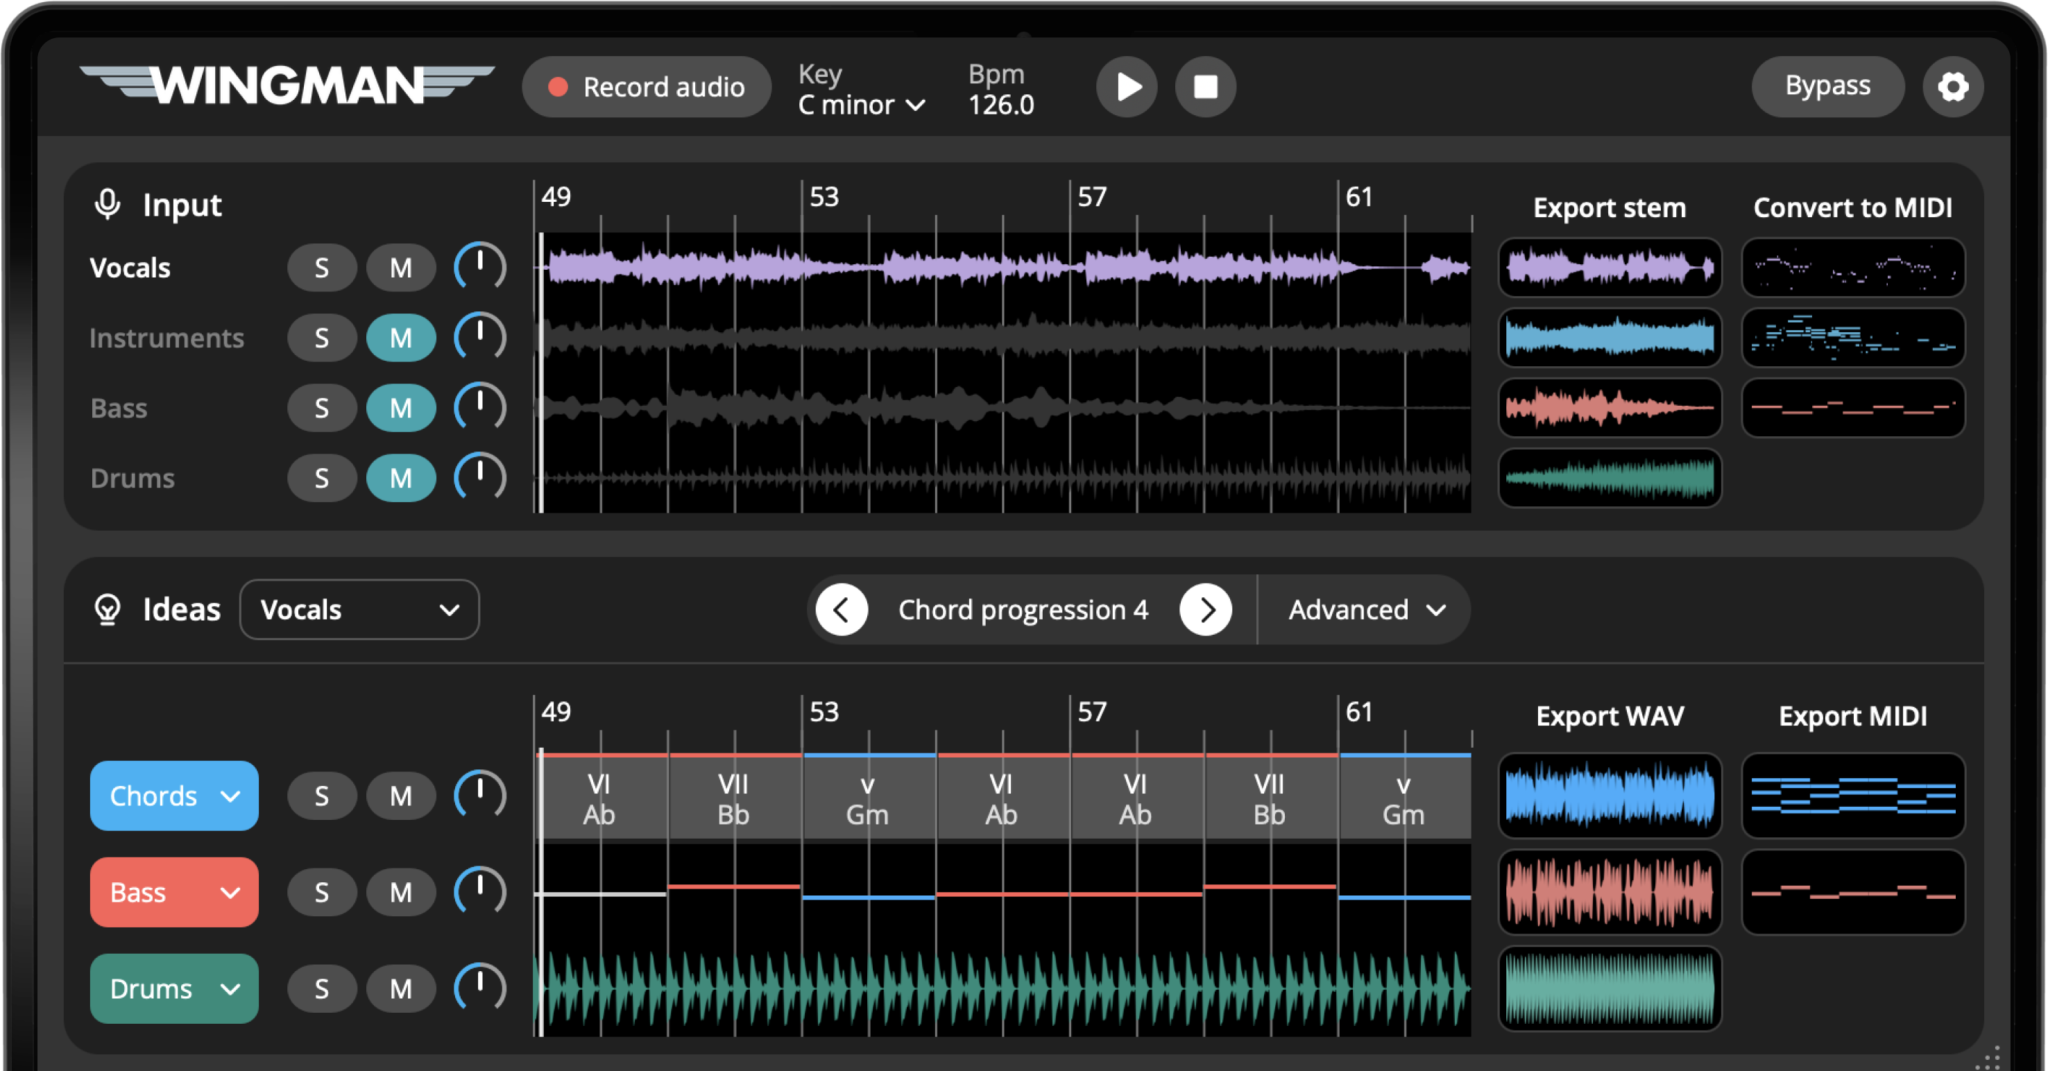
How to use Wingman in your DAW
Open your DAW session
Match the DAW tempo to the source and align the phrase with the grid before capturing it. If Wingman 3 reports a tempo mismatch, check the project tempo and source alignment, then record the phrase again.
Start by opening the project you want to work on. This could be a new beat, remix, vocal session, song idea, or unfinished production.
Choose the audio track or section you want Wingman to listen to.
Add Wingman as a plugin
Load the supported Wingman plugin format using your DAW’s plugin browser. Configure the audio feed for that host so Wingman receives the vocal, melody, loop or track section you want to capture. Check the current setup information on the Wingman product page for plugin-format and host requirements.
Record audio into Wingman
Choose a clear phrase, start Record Audio in Wingman, and play that section in your DAW. Check that the capture contains the intended audio before generating a part. If the capture is silent, check the source track, playback and the audio feed into the plugin.
You can record a short phrase, 4-bar loop, 8-bar idea, vocal hook, melody, acapella, or full track section depending on what you want to create.
Choose what you want Wingman to create
After recording audio, choose the workflow that matches your goal. You can generate chords, create a bassline, separate stems, convert audio to MIDI, add rhythm, change sounds, or shape the idea with effects.
Preview the idea in context
Play the Wingman result with the rest of your session. Listen to how the chords, bassline, MIDI, or stems work with the vocal, drums, loop, or original audio.
The goal is not only to create something technically correct. The result should feel useful in the track.
Edit the result inside Wingman
Refine the idea before exporting. You can try different chord options, adjust rhythms, add accents, change sounds, use compatible VST synths, or add effects like reverb, delay, and filtering.
This helps the idea feel more connected to your track before it leaves Wingman.
Export MIDI or WAV
When you like the idea, export it back into your DAW. Use MIDI if you want to keep editing notes, chords, basslines, or instruments. Use WAV if you want to capture the sound as audio.
Continue producing in your DAW
After exporting, keep working in your DAW. Edit the piano roll, arrange the parts, layer sounds, add drums, automate effects, mix the audio, or build the full track around the Wingman idea.
Wingman helps you get from audio to musical material faster. Your DAW is where you finish the production.
What can you do after recording audio?
Once Wingman has captured audio from your DAW session, you can choose the workflow that fits your goal.
Generate chords
Use a melody, vocal, loop, or sample as context for chord progressions that fit the idea.
Create a bassline
Build low-end movement that supports the chord progression and groove of the track.
Convert audio to MIDI
Turn vocals, synth loops, melodies, and samples into editable MIDI for your piano roll.
Separate stems
Split a track into vocals, drums, bass, and instruments for remixing or production.
Shape rhythm and bounce
Use rhythm tools and accents to make chord and bass parts feel less static.
Choose sounds and effects
Change instruments, use compatible VST synths, add effects, and export the final result.
Tips for using Wingman in your DAW
Start with a short section
A short 4-bar or 8-bar idea is easier to record, test, edit, and export than a long section of audio.
Judge every result in context
A chord progression, bassline, or MIDI part should be judged with the original audio and the rest of the track, not only by itself.
Export before overthinking
Once an idea feels useful, export it into your DAW and keep producing. You can always edit the MIDI, change the sound, or adjust the arrangement later.
Frequently asked questions
Wingman works as a plugin in supported DAWs. Check the current plugin-format and host requirements on the Wingman product page, and follow the routing setup for your host.
You can use vocals, acapellas, melodies, synth loops, samples, full track sections, and unfinished ideas as starting points.
Yes. You can export ideas as MIDI or WAV and continue editing, arranging, and mixing them in your DAW.
Export MIDI for editable note-based parts; export WAV to keep a result as audio. Follow Export MIDI and WAV from Wingman for the next step.
Yes. You can use Wingman to separate stems, build around vocals, create new chords and basslines, convert audio to MIDI, and export remix ideas into your DAW.
Use Wingman inside your DAW workflow.
Record audio, create chords, basslines, stems, MIDI, rhythm ideas, sounds, and effects, then export everything back into your session.