Sidechain Compression – 7 Tips for Better Mixes.
Sidechain compression is a powerful tool for developing clarity in mixes. It can be a subtle space-creator, or it can be a dramatic effect more akin to a modulation plugin. These 7 sidechan compression tips will help you get the most out of sidechain compression!
What is sidechain compression?
Let’s start with regular compression. This is when an audio signal is told the maximum volume threshold it’s allowed to reach before the compressor engages. Once the incoming signal passes this threshold, the signal reduces in volume so it never goes above the threshold level. Compressors have various parameters that inform the way the compression is applied, which shape the character, speed of reduction and how quickly the compression ‘releases’ the signal compression.
The overall effect is some degree of squashing the signal. Reduce the volume of the loudest parts of a channel, and you can raise the overall volume. Which is a good thing, because you get louder mixes.
Furthermore, the compressor itself folds the compressed signal on top of itself in order to execute the compression, which makes the sound fatter and more impactful.
For this reason, it’s been a fundamental tool of producers and engineers for decades.
Sidechain compression is when a compressor is triggered by a secondary sound source, instead of its own incoming channel audio.
In effect, this acts as a ducking mechanism, by which an incoming signal tells the compressor to duck the volume of the channel signal by a fixed amount. This leaves more space for the incoming audio to be heard, even if the two signals occupy similar frequency ranges.
To achieve sidechain compression, you’ll need a compressor with sidechain ability. Stock compressors in Logic, Ableton, Pro Tools and FL Studio 20 are all capable of this, as are many other DAWs I’m less familiar with.
Headphones or studio mnitors are highly recommended for listening to the audio examples in this article.
Tip #1 – Sidechain your bass drum to bass instruments.
Probably the most obvious use for sidechain compression is sidechaining a bass drum to a bass instrument. By carving out space for the bass drum, the bass instrument can avoid fighting for supremacy.
Setting up the sidechain is simple:
- 1. Add a sidechain-capable compressor to the bass instrument channel (or bass buss).
- 2. Set the compression source to External.
- 3. In Sidechain settings, set the sidechain source as Bass Drum.
- 4. Adjust Threshold, Ratio, Attack & Release to taste.
If your intention is to sharply duck the bass whenever the bass drum plays at the same time, use a fast Attack setting. You’ll need to solo bass and bass drum to check for pops or unwanted artefacts which can creep in. Often these can be mitigated against by adjusting the Release (try a slower release). Playing with the threshold, compression ratio and release can elicit very different results. For example, the ‘sucking/pumping’ bass effect made popular by French House artists like Daft Punk came from very aggressive, fast sidechain compression on the bass. By this method, a definitive pumping motion was applied, which had previously been considered ‘wrong’. Which goes to show how there are no real rules other than ‘if it sounds good, it is good!’
This clip has bass and bass drum lightly side-chained together. It’s fairly transparent, but the kick drum is still dominant.
This technique has been applied aggressively here, with much higher threshold, ratio and a super fast attack. This creates a much more pronounced pumping effect.
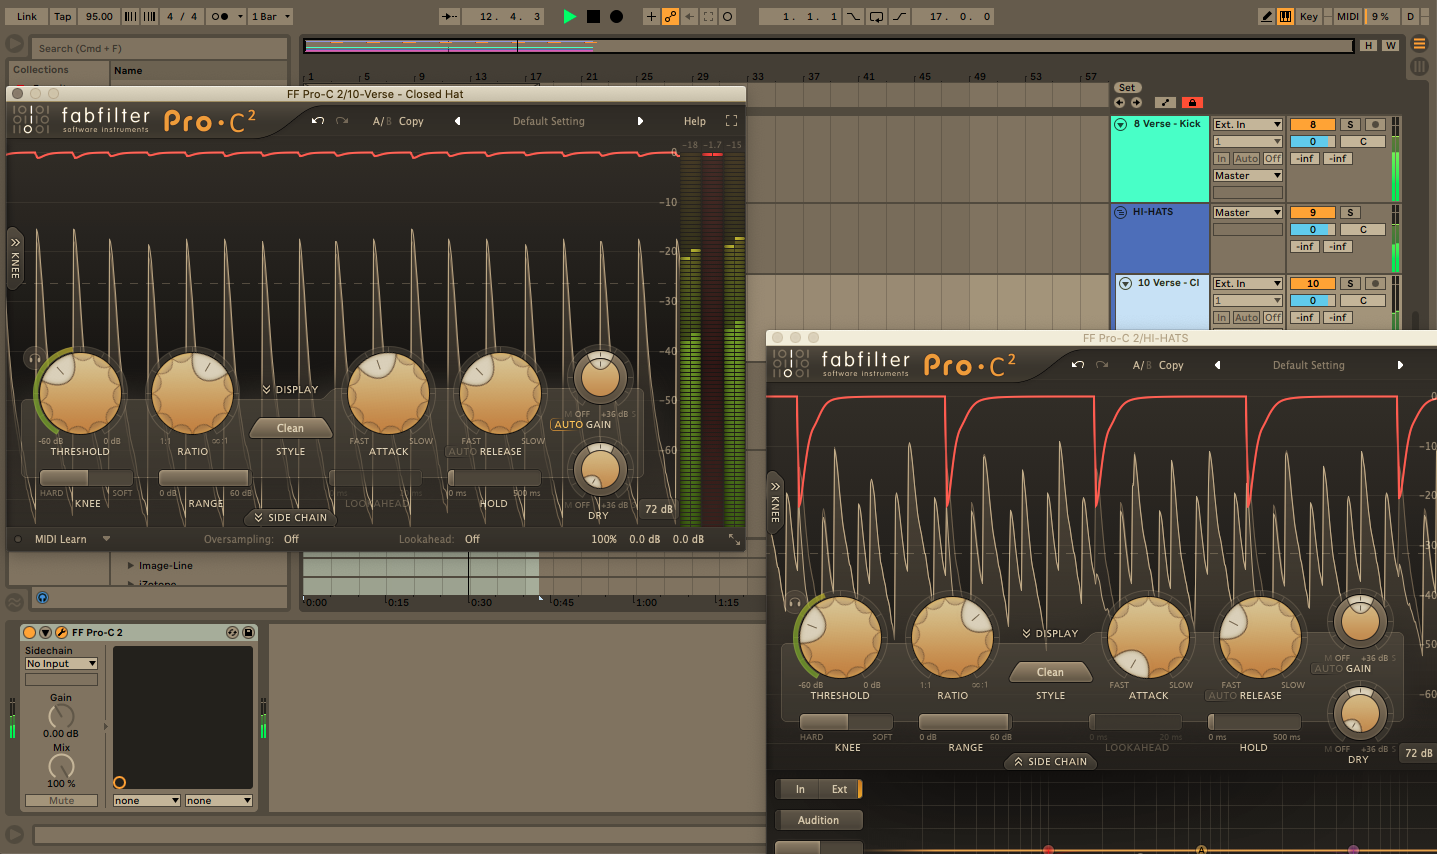
Tip #2 – Sidechain Hi-Hats and Overheads to the Snare.
This technique was discovered by Hip-Hop producers like J Dilla back in the ’90s. By sidechaining hi-hats., overheads and/or metals to the snare or snare bus, it’s possible to create a noticeable separation when the snare hits. That means a bigger impact and more of that neck-snapping snare groove. The methodology is exactly the same as Tip #1, simply set the source as Hi-Hats/overheads etc. You may want to try a short Release so the hats come back in promptly after the snare, but this will entirely depend on how it sounds together.
You should definitely be soloing the two parts to check how it sounds as a whole, but be sure to also test the ensemble mix, too.
Compare the following clips. The first has no sidechain compression between the hi-hats and the snare. The second does. The difference is fairly sybtle, but effective.
Tip # 3 – Sidechain the Vocals to the WHOLE TRACK!
No, I haven’t had a bump to the head… you can sidechain channels to the entire track for added clarity. This is particularly effective on vocals, since we almost always want vocals to occupy pride of place in the mix.
Here’s how:
- 1. Group every channel and bus in the mix except vocals to a new bus.
- 2. Set the compression source to External.
- 3. Apply a compressor to the newly created bus.
- 4. Set the incoming source as the vocal bus.
- 5. Gently apply compression.
This technique should be used with caution – the key word is ‘gently’. Too heavy-handed, and there will be noticeable ducking to accomodate the vocals which will sound unnatural. However, as with the Daft Punk example above, maybe you can make heavy sidechaining here work to your advantage! Certainly, I’d recommend starting out with very light compression, until the vocals are nice and clear all through the track, but the effect of the sidechain is otherwise transparent. By all means, push the boundaries afterwards – who knows, you might create the new ‘in’ sound!
By gentle, we mean a relatively low ratio, perhaps 2:1 or slightly higher. Then, a mild threshold, say -10db, a natural Attack – usually around 20ms, and a medium Release, possibly around 200ms. These are merely guidelines, but hopefully will help you to discover how effective this technique can be.
In the audio examples below we can hear this in ation. I’ve deliberately overplayed the technique so it’s really clear how the music is ducking for the vocals.
A: No sidechain compression:
B: Sidechain compression activated:
Tip #4 – Layer sidechain compression with regular compression.
Compressing the signal either side of the sidechain compressor can be effective. Apply a regular compressor prior to the sidechain, and you can be assured that the signal being affected by the sidechain is exactly the level you would ant it to, if there was no sidechain.
Likewise, try a compressor afterwards, too. This gives you an opportunity to fine-tune the overall compression effect.
Of course, too much compression will drain the life from a sound, so you may want to use lower compressin ratios than you would with one compressor, to mitigate the effects of using two or three here.
Tip #5 – Get the EDM sound by sidechaining more instruments to the bass drum.
You can get a real sense of rhythm from a sidechain compressor. By applying it aggressively to groups and busses, the pumping sound we discussed in relation to bass instruments can sound great on other instruments.
Check this example by Flume:
WATCH: How to write music in the Dorian mode using Captain Plugins.
By sidechaining the synths in the chorus to the bass drum, Flume gets a pronounced sucking motion from them. This effect could be achieved without compression – you could simply draw in volume automation each time. But the advantage of using a sidechain here is you don’t need to draw in new automation for every kick. The compressor will take care of that for you, leaving you with more time to produce!
In my example, the instruments have all been grouped together, for the snare to act as a sidechain source for. However, the compressor is off in the first clip:
Switch it on, with heavy settings, and you can hear how powerful the results are.
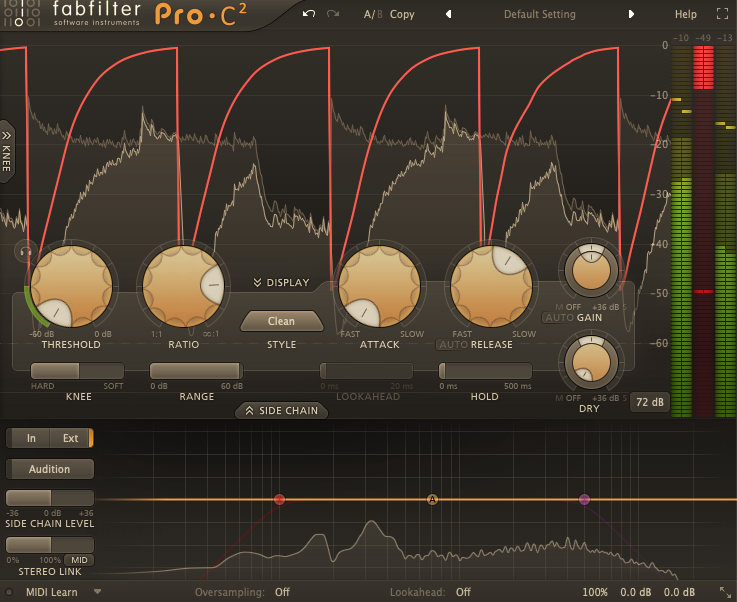
Tip #6 – use Sidechain EQ to pass certain frequencies.
This is a useful technique for bus compression, mainly. Let’s say your Guitars bus is sidechained to your Synths bus. The balance is perfect and providing clarity for the guitar by ducking the synths. However, occasionally there is a pronounced, unnatural sounding pumping of the compressor. It could be caused by the guitarist playing a lower, more bass-heavy note. Bass carries more weight than mids and highs, so it could be engaging your compressor too hard, compared to the other frequencies in the guitar parts. Try applying Sidechain EQ – assuming your compressor has this capability. You’re telling the compressor to ignore frequencies below a certain range. This means the low guitar parts won’t trigger the compressor – only the mids and highs will, which you’ve already got sounding great.
Frequencies below this Hi-Pass filter won’t trigger the sidechain compression.
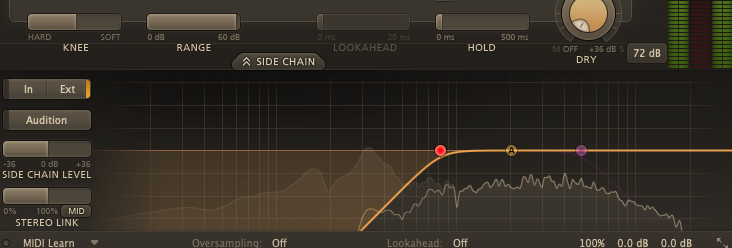
Tip #7 – use Multiband Compression to leave some frequencies untouched.
This technique is often effective on samples. You might want to keep the majority of frequencies, but allow, say, a new kick drum to replace the one from the sample. By setting a Multiband Compressor to sidechain from the new kick drum, you can tell it to focus compression on specific frequencies, such as the impact points of the new kick.

This Multiband compressor is only compressing inside the two designated frequency bands, leaving the rest of the signal intact.
About the author: