Following up on our popular article and podcast ‘Killer Sound Design Tips and Tricks’, we bring you 5 (More) Killer Sound Design Tips and Tricks to use in your tracks!
It’s surprisingly common to discover that today’s cutting edge sound processing tricks are actually derived from the work of long-dead physicists. Such is the case with the Haas effect, and so it is with grain delay. Inspired by a paper from 1946 by a certain Dennis Gabor, the principle of grain delay is (fairly) simple. Break a sound down into microscopic slices, or grains, and put them back together again. Extending this theory, we can put the sounds back together at different frequencies, and at different stages of delay, as Greek-French composer and musical theorist Iannis Xenakis began to experiment with. By cutting recordings into tiny slices of tape and sticking them back together in new patterns, he crystallized Gabor’s principle and grain delay was born.
But you don’t need to know any of that.
All you need to know is that forward-thinking DAWs such as Ableton, and plugin manufacturers like Output, SoundBridge and ArgotLunar have embraced digital incarnations of grain delay and unleashed them on the masses!
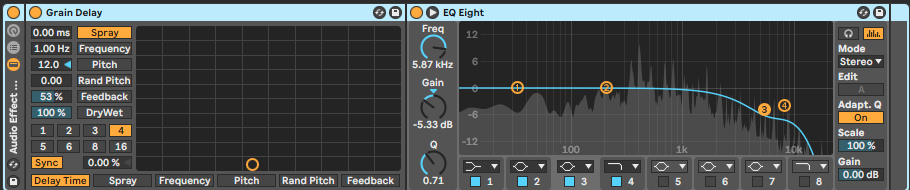
Grain delay, in a sense, is a type of granular synthesis. Granular synthesis is the act of breaking a soundwave down into tiny pieces and re-composing it with the help of numerous parameter controls. It’s wild and fun, and quickly leads to some highly creative and unique sounds. Grain delay itself uses some of the principles of granular synthesis, but retains its focus for delay-based effects. Usually, grain delays have controls for the following parameters:
Delay time.
Grain size.
Dry/Wet.
Pitch/Frequency.
Spread.
Feedback.
Depth.
Grain size is usually defined in terms of ‘Hz per second’ – so a larger value equals a smaller grain, and vice versa. Generally, larger grains are easier to harmonically control, and since this is easily the most complex form of delay in town, starting with larger grains is advisable. By combining delay with pitch manipulation, and even spray/random pitch modulations, ordinary sounds can quickly transform.
These functions alone can create some truly wild new sounds, whether blended with the original audio or entirely replacing it.
I’m yet to find a better, more concise explanation of Grain Delay than this video from Underbelly (You Suck At Producing):
As you can see, it’s a powerful effect, and a welcome part of Ableton Live’s stock plugin menu. Yet some manufacturers have taken it even further.
Portal, by Output, hit the shelves in June 2019, and takes the principles of granular delay to new levels. With additional oscillators modulating every conceivable parameter, grain delays becomes an evolving effect with a life of it’s own!
Ableton’s Grain Delay, applied to a synth chord progression. The shimmering, granulized delays add an extra dimension.
2. Automate pan modulation.
Let’s assume we’re all up to speed with the basics of panning ie embracing the stereo field
We can balance our mix nicely, with a good spread of instruments dotted around the stereo field, and everything is hunky-dory. But, have you considered modulating the panning of some of your sounds? It’s a simple process that can inject life into your tracks, fast.
Any DAW worth its salt can automate panning, while there are some 3rd party plugins that can take the basic principle and run wild with it. However you choose to use it, pan modulation is a neat way of exciting the listener, by moving sounds around in front of their ears. With any luck, the listener tracks the sound as it pans across the stereo field and back, eliciting little subconscious waves of excitement when they ‘find’ it.
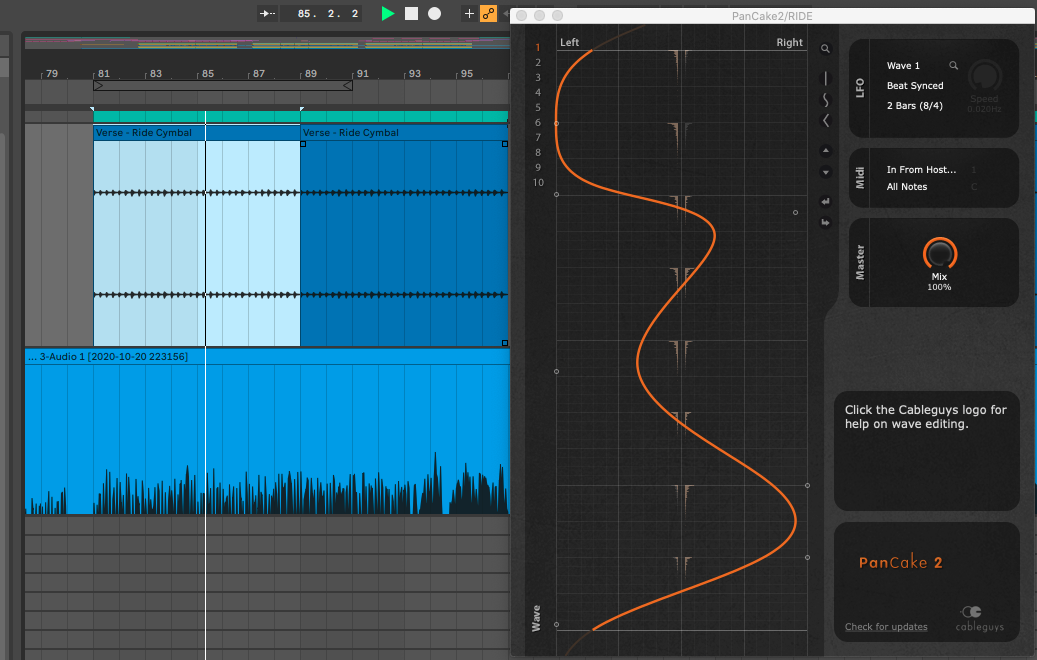
This is particularly effective on metal percussion, toms, claps, SFX/risers and, in some cases synths. You don’t want to turn excitement into chaos or confusion, so avoid moving fundamental sounds around, like snares,. bass instruments and so on. However, send a ride cymbal panning around the stereo field over a drum loop and marvel at how much excitement is added:
The primary functions of automated panning are:
Speed/rate. How fast the pan action occurs from left to right.
Amount. How far left and right the modulation travels.
Phase. WBy default, left pan and right pan will occur at directly opposite timings – so when left is all the way right, right is all the way left at the same time. Phase control adjusts this so one signal is later or eralier to reach its destination.
Shape. How smooth the transition between hard left and hard right is.
Hz/Tempo. Whether the pan tempo is dictated by Hz per second, or by a division of the master clock.
PRO TIP: Check for phasing in Mono
Try applying a Mono-izing plugin after the pan modulation effect. If the instrument sounds brittle or lacking in body at any point when mono, you can deduce that the effect is introducing phase cancellation. Try tweaking the phase, shape or amount until you’ve hot the sweet spot. You want no phase cancellation and simultaneously, an even transition from left to right and back effect.
3. Duplicate and Pitch Shift.
A popular trick among all kinds of producer, from experimental sound designers to Rock and Pop producers. This simple trick has a wealth of potential applications, and is great for emphasising sounds, adding width and body, or enabling heavy processing while retaining clarity.
Perfectly suited to any guitar, synth, bass or other ‘full-bodied sound, it’s also pretty easy to set up:
1. Decide the track to duplicate.
2. Create 1 or 2 x additional tracks. If two, pan one hard left, one hard right.
3. Leave the original track as before.
4. Pitch-shift the newly created track(s) up or down to taste. If using 2, they should be the same as each other in most cases.
The degree of pitch-shifting is dependent on taste and application, but to retain the original pitch of the sound and not get funky with harmonics, try up or down one octave (12 semitones). Lower will create a thicker, bassier version of the track, and higher will create reedier, airier versions. Of course, this massively depends on the instrument.
Once created, mix the duplicate(s) in with the orignal until you find the sweet spot. Bingo! Added depth, body, air and/or width in an instant!.
PRO TIP: Expand with additional processing.
You can get crazy with your duplicate track(s) now… try heavy saturation, delay, reverb or filtering. Because your original track is unaffected, you can create the impression that it is heavily saturated, for example, yet the listener still hears all the detail in the clean original.
A fairly straightforward arp.
Now, having duplicated the arp and paned one hard left, one hard right, then applied all manner of saturation and delay, we have a much wider, bigger sounding arp.
4. Field recording, sample manipulation & sample layering.
We all want to stand out from the crowd, and one way to do that is to find and create your own sounds. It’s not as hard as it might seem. We’re surrounded by cool sounds, they happen all around us, and we’ve almost always got our phones. Whip it out and record anything you like the sound of. Then try layering it over snares, synths or any other instrument you fancy.
While of course it would be preferable to record via a higher quality mic than your phone, it’s still totally possible to capture sounds good enough for sample layering and sound design.
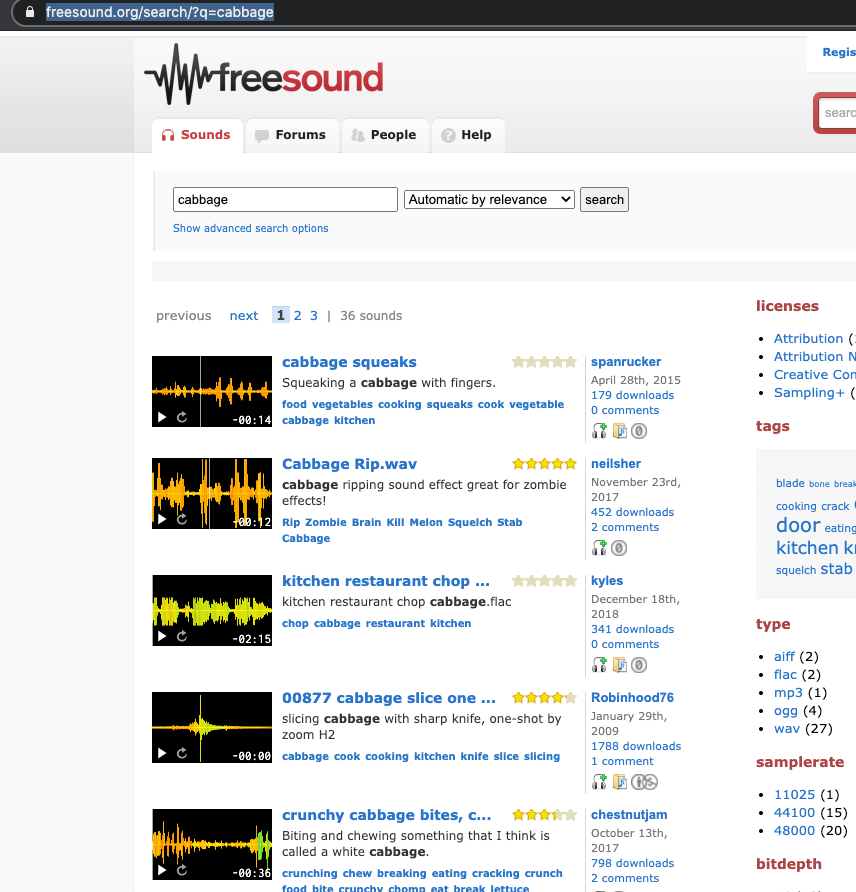
It’s also not always necessary to cpture the sound yourself. Sites like Freesound have thousands of free field recordings, ranging from musical instruments to sounds of nature; field recordings of all kinds and from all corners of the globe. Let’s try something fun…
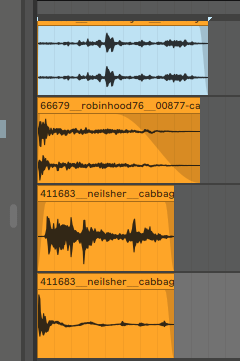
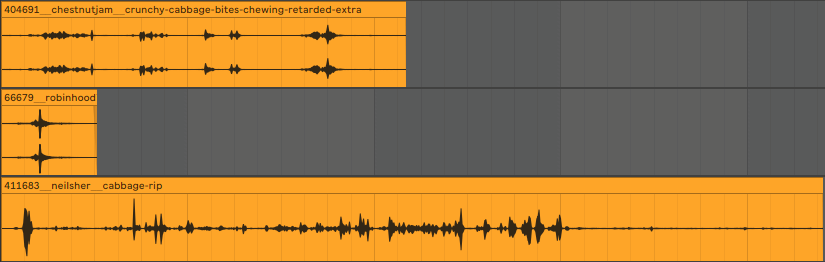
I’ve gone to Freesound to find some audio samples I might be able to use to create a brand new snare drum. I’m going to want to find sounds with transient impact, an interesting sound and ones with cumulatively provide enough body at the crucial points of a snare. Ie a spike around 200Hz, a good spread of noise from there ap until about 8kHz, and then a little high density for air and presence. Emulating a classic method of creating low-budget horror SFX, I’ve searched for some cabbage recordings… it’s a peculiarly charismatic sounding vegetable!
Creating a snare drum, using a cabbage!
The raw sounds (no pun intended).
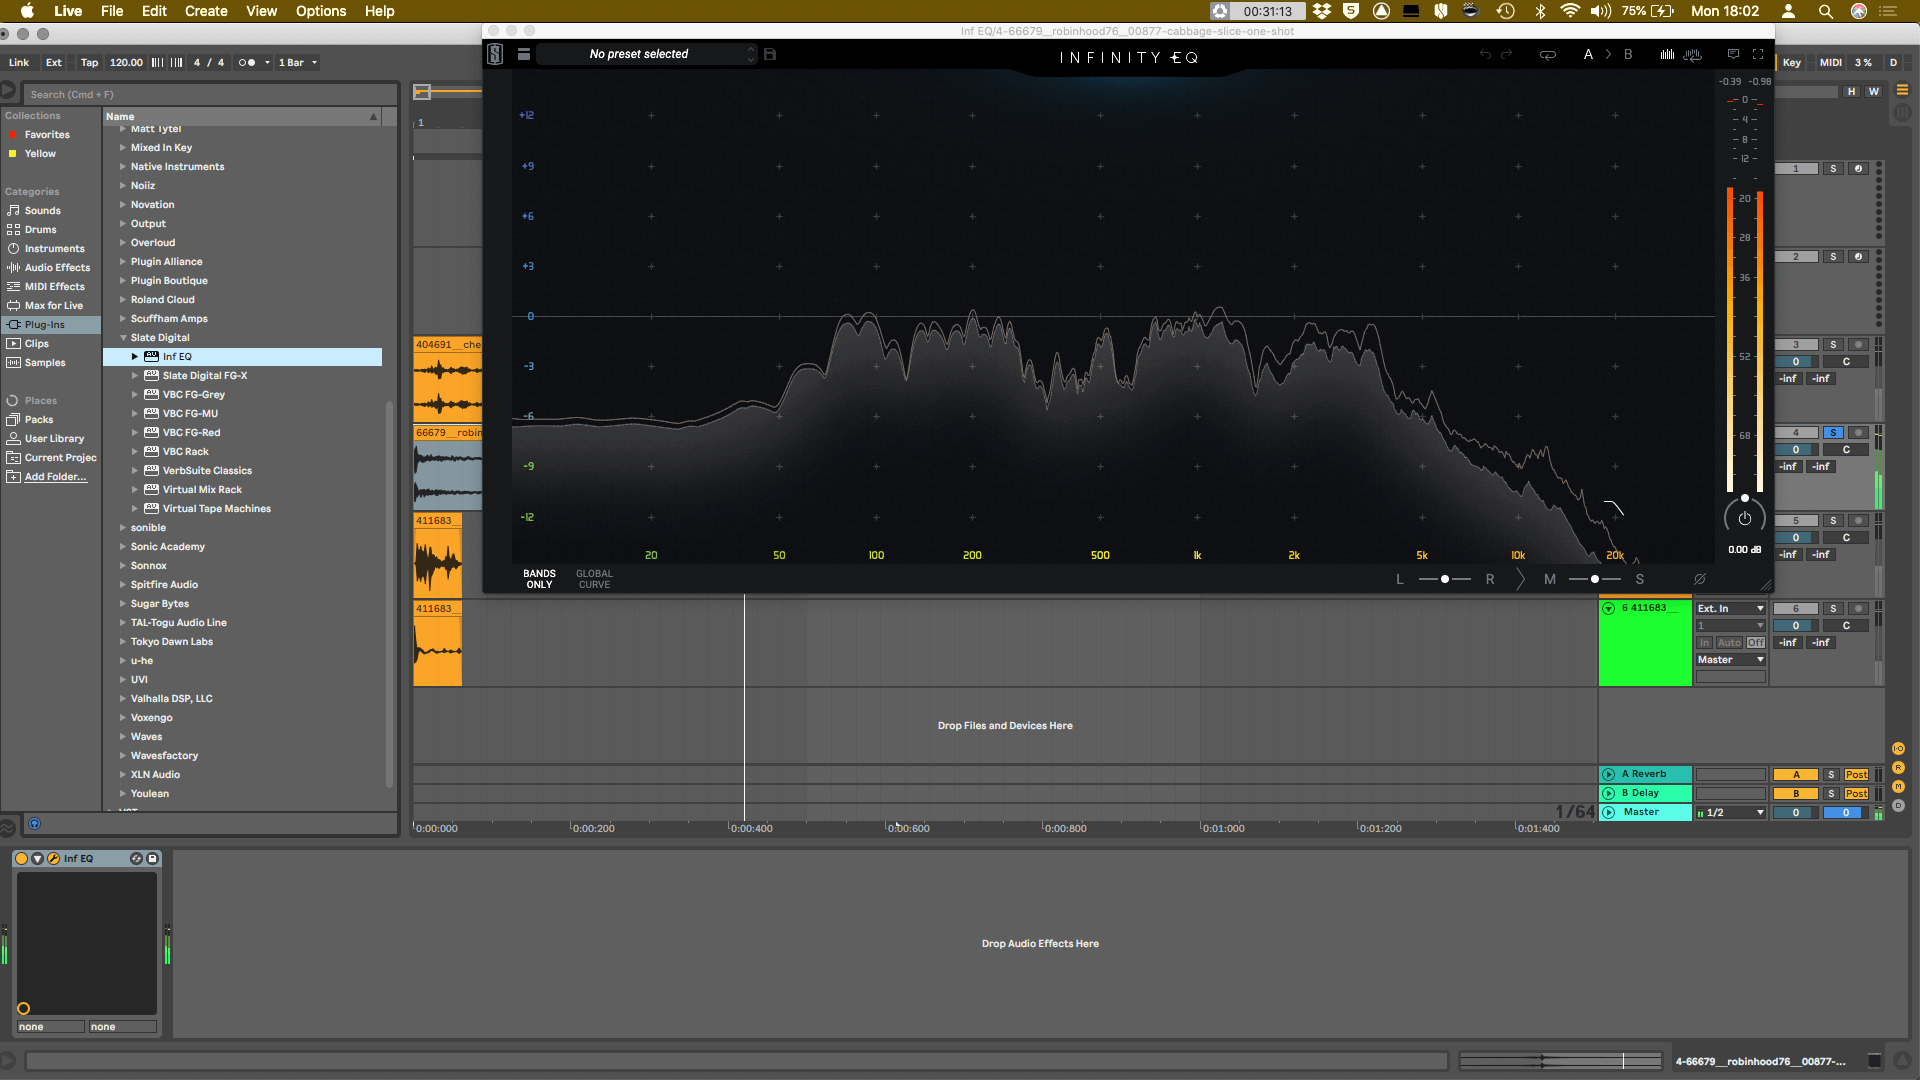
Here’s the frequency response of the layered sounds:
It’s getting there. We have a definite low impact, and some nice crunchy upper harmonics. But, we need to refine it further.
By boosting the impact at around 200Hz, and filtering with a wide bell curve around 1600Hz, the impact part of the sound has better body and tone. This leave the crunchier sounds free to fill up the other frequency bands. Add some compression and additional EQ, and we have a legitimate snare sound, cooked up in under 10 minutes!
Here it is, as part of a full pattern in Captain Beat:
PRO TIP:
You can re-pitch sounds, add an exciter, saturation, chorus or any other effects processing you wish. There’s really no limit except your imagination!
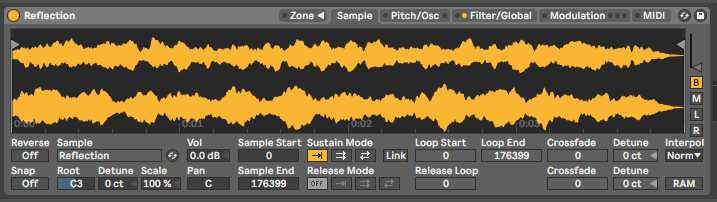
5. Freeze and resample early reverb reflections and create new instruments with them.
Using similar methodoogy to tip 4, you can create ethereal new sounds by freezing early reflections of reverbs. Once you’ve captured the reflections, simply render it and create a new instrument using your DAW’s sampler. Voila! You have a cool new synth to play!
Let’s put this into practice:
1. Choose an instrument or sample as a source.
2. Add a reverb plugin with a Freeze function as a channel insert. (After your usual insert plugins).
3. Play a C note in the source instrument/.
4. Freeze the reverb wherever it sounds best.
5. Resample the frozen reflection to a new audio track or as a new audio file.
6. Create a Sampler Instrument in your DAW.
7. Add your newly created sound, and play!
The first rule of sound design club is… there are no rules.
I hope you can see that most of these tips are mutations of expected production behavior. There is creativity in using a plugin in the ‘wrong’ way, or applying a technique to an ‘incorrect’ part of your production. Just because it’s expected that we use a snare sample, for instanc, doesn’t mean we can’t make our own unique snare sounds. Just because it’s calld a guitar amp, doesn’t mean you can’t send a drum bus through it. All that really matters is whether it sounds good afterwards, and whether you can create something exciting with it.
About the author:
Adam Hignell is a music producer, mastering engineer, DJ and label-owner based in Brighton, UK. When not providing content and tech support for Mixed In Key, he produces music under the alias Don Dayglow, provides professional mastering and mixing services, and runs the independent Disco/House label Particle Zoo.