Get special upgrade deals!Sign in to see if you qualify for deals.
Your cart is empty
There are no items in your cart
Taxes:Calculated at checkout
Subtotal:$0.00
Keep shopping
You own this software | Purchased on
Included Software:
Get special upgrade deals!Sign in to see if you qualify for deals.
Join Mixed In Key
Please log in again to continue.
Please sign in to view your owned products.
or
Email address
Please enter a valid email address.
By signing in, you consent to receive marketing emails and text messages from Mixed In Key. You may opt out at any time.
To verify your email, we've sent an email to . This code will expire in
You can resend your code in ()
Didn't get a code?
You've entered an invalid code. Please try again
Your code has been resent, check your inbox. If you're having trouble check your junk mail.
Tell us about yourself
Please enter your first name
5 Killer Sound Design Tricks to use in your DAW.
Sound Design is no longer the sole preserve of experimental ‘mad scientist’ types. From its early days involving sliced up tape loops and gigantic modular systems to today’s biggest pop hits, sound design has fully integrated into mainstream culture. Entire genres of music like EDM, Dubstep and Future Pop rely as much on beautifully crafted sounds as they do the actual music.
Sound Design is here to stay, and any electronic music producer would benefit from embracing it. These 5 Killer Sound Design Tricks to use in your DAW will help your music level up!
This topic and some of the techniques here were discussed at length in our Mixed In Key Podcast, so check it out!
Also, be advised to use headphones or good studio monitors to evaluate the audio examples below.
You can use sidechain as an instrument in its own right. Or, perhaps more accurately, you can use it as an enhancement feature to add character to any instrument or drum sound.
You may be familiar with the concept of sidechaining kick drums to bass instruments. This technique helps your bass and bass-drum sounds sit happily in the mix together, and it can be an audio effect in its own right. Consider the following example from a classic French House track ‘Sound Stream – Freakin’:
The pumping effect on the bassline is created by aggressively sidechaining a compressor on the kick drum to the bass instrument. It ducks the bass sound dramatically whenever the kick hits, and then releases the ducking effect at just the right speed so a rhythmic pumping effect is achieved.
We can take this principle further and apply it to other instruments.
The French House movement gets a lot of the credit for this, too. Many of its proponents started to experiment with sidechaining compressors and gates to whole busses, or even the master bus itself, from the kick. High Fidelity, by Daft Punk, is a great example of this:
In this example, Flume aggressively sidechains his chorus’ main chord progression to a compressor on the kick drum, to create the rhythmic ‘sucking’ effect that gives the track its unique feel.
We can take this principle and apply it to almost any part of our musical creations. In the below example, the sidechain compression is applied to the chords, and triggered by the snares. You could also try it on hi-hats to clear space for the snare.
PRO TIP: Sidechain… anything!
Why stop at compression? You could sidechain an EQ notch to engage whenever another instrument plays. Or, sidechain reverb, saturation, chorusing from synths or drums to… anything at all, to be honest! Extending well-worn principles and applying them in new ways is a common way of finding your own unique sound effects.
No Haas effect, the stereo signal is equally balanced.
Now with Haas effect applied, right channel is clearly later than the left.
First discovered by Dr Helmut Haas in 1949, the Haas effect is an audio phenomenon that works by tricking our ears into perceiving a duplicated sound as one single sound, if the duplication occurs within 40ms of the initial.
In music, the best application of this principle is to create the impression of additional stereo widening. We like width in our mixes as it helps separate sounds from each other and gives a more full-bodied aesthetic. As a result, it’s easy to see why it’s such a desirable effect. We get the impression that a sound is equally present in the left and right fields. And, the impression is perceived as fuller and more dense thanks to the Haas effect.
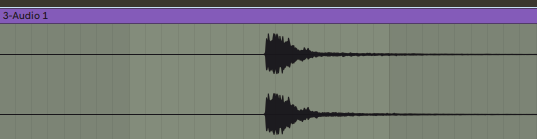
In the above example, we’ve applied a Haas effect to a clap drum. This exact same principle can be very effective when applied to hi-hats, synths, vocals, or any instrument where width is desirable. Here’s how it’s achieved:
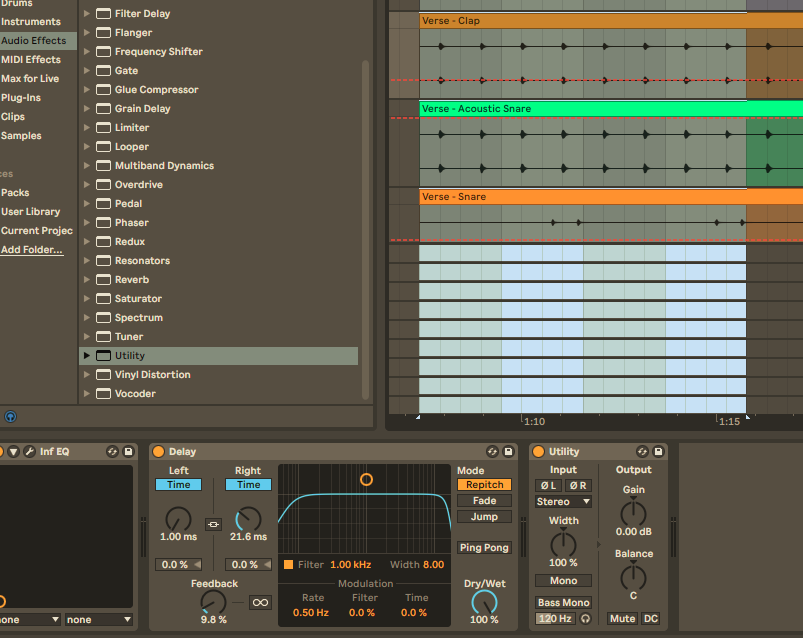
1. Add a stereo delay plugin to the channel.
2. If linked, unlink the stereo delays so Left and Right are independently controlled.
3. Set the delay amount to Time-based control, not divisions of tempo.
4. Set the Dry/Wet ratio to 100%.
5. Set the Feedback to very low, around 5-15%.
6. Set the Left (or Right, but not both) delay time to the lowest available setting.
7. Slowly increase the Right Delay amount to no more than 40ms.
8. Try and find a sweet spot where it sounds nice and wide, with full frequency range.
9. Check for phase cancellation (see “Pro Tip” below).
PRO TIP: Check for phasing in Mono
Try applying a Mono-izing plugin after the Haas effect. If the instrument sounds brittle or lacking in body when mono, you can deduce that the Haas effect is introducing phase cancellation. Try tweaking the delay time until you’ve hot the sweet spot. You want no phase cancellation and simultaneously, a nice and wide-sounding Haas effect.
PRO TIP: Try using Reverb instead of Delay
Delay will provide a clean duplicate of the initial sound for your Haas effect. However, try using reverb instead. Reverbs can carry more tone and character, since they’re affected by the architecture of the reverb unit. Therefore by using a reverb’s early reflections, with the duration trimmed to under 40ms, the same Haas effect can be achieved, but potentially with a thicker and warmer tone.
3. Phase Distortion.
Phase distortion is a relatively simple, yet powerful tool for use on many central elements, such as snares, kicks and bass.
By creating phase and then distorting it, we get an exciter-style effect. This is because exciters and saturators work by essentially smearing the sound across its frequency spectrum, which creates a sense of thickness. Meanwhile, phasing processes parts of the signal at different speeds than others, creating a similarly smeared effect.
In all honesty, phase distortion is an extremely complicated subject, with all sorts of caveats about waveforms, capacitive/resistive circuits and so on. If you want to get deep, check out Test and Measure Tips detailed analysis.
The rest of us can just experiment with a phase distortion plugin to create some fabulous effects. I like to use it on central, mono elements particularly, as it seems to create rich new tones which help them stand out in the mix. This is because it can create raised crests, similar in a sense to the way resonance creates frequency spikes. These crests can be tamed with further compression if required, and need to be carefully managed so you don’t end up with unpleasant spikes in your sounds. But, when used effectively, the effect can be impressive. Check out how phase distortion on this snare drum helps it stand out in the mix:
This technique is most likely to be effective on kick drums. Sometimes samples or synthesized kicks can struggle to cut through in a mix. They may have plenty of low energy, but getting the significantly quieter attack transient to cut through can be tricky. This attack transient is the part of the sound which we perceive as the most percussive. Without it, the kick may be less perceptible, and thus seem to be missing.
One way to counter this is to apply an EQ boost to the part of the kick sound with most attack transient energy. However, drawbacks to this can be over-emphasising neighboring frequencies and spoiling the tone.
A smarter alternative can be to attach the transient energy from a more impactful sound to the kick sound. Since we’re only after the click part of the new sound which lives in the upper mids, we can filter out everything below and above it. That way we avoid clashing frequencies but get the increased transient energy from the combo.
The kick on its own.
And now, with a tom’s transient energy added.
The transient energy of the added sound may seem weak on its own, but we only want the click part to adorn the body of the kick drum. Here, some additional bitcrush has given the click extra bite.
PRO TIP: Use a sampler/drum machine to duplicate the exact kick pattern.
Even if you prefer to lay samples on your channel timeline manually, it’s a good idea to try this technique with a drum VST or sampler, such as Captain Beat. This will ensure an exact copy of the kick drum’s rhythm and avoid any discrepancies, which could cause an unnatural sounding effect. You can also easily filter ut the unwanted frequencies of the new sound.
5. Use Send channels to parallel process effect chains.
This is a fun one… you can create wild, weird and wonderful effect chains on a Send channel, then send incremental amounts of any channel’s output signal to it. This can result in a limitless array of modulation effects that correlate with the regular audio signals in your track.
Here, I’ve added a whole bundle of filter and modulation effects to my Send channel, such as Arturia’s Mini-Filter, Output’s Portal, and Cableguys’ (free) panning plugin Pancake. By using a Send, I can dial in the amount of these wild effects that enter that track in parallel to the Captain Chords sequence which is being affected by them.
PRO TIP: Resample the Send effects channel as its own instrument.
For added interest, you can set a new audio channel to record the output from your creative FX chain Send channel. You’ll only record the FX signal and none of the original instrument, leaving you with a new recording that tracks the original, yet may sound incredibly different..
The sky’s the limit.
Hopefully these 5 tricks will inspire you to experiment with them in your own music projects. Don’t be afraid to break the rules in any way you want. The only caveat, as always, is ‘does it sound good?’
Sound Design is an art in its own right, and it may take some time to train your ears to hear the nuances of each technique. But, sound design is a vital part of most music producers’ skill sets, and will help you create tracks that stand out from the crowd.
About the author:
Adam Hignell is a music producer, mastering engineer, DJ and label-owner based in Brighton, UK. When not providing content and tech support for Mixed In Key, he produces music under the alias Don Dayglow, provides professional mastering and mixing services, and runs the independent Disco/House label Particle Zoo.