As with all Captain Plugins, Captain Chords is an AU/VST/AAX* instrument plugin and as such should be opened in your DAW using the same method as any other 3rd party instrument plugin.
If using Logic Pro X as your DAW you should choose create ‘Software Instrument’ and select from the appropriate menu to create an instance of Captain Chords.
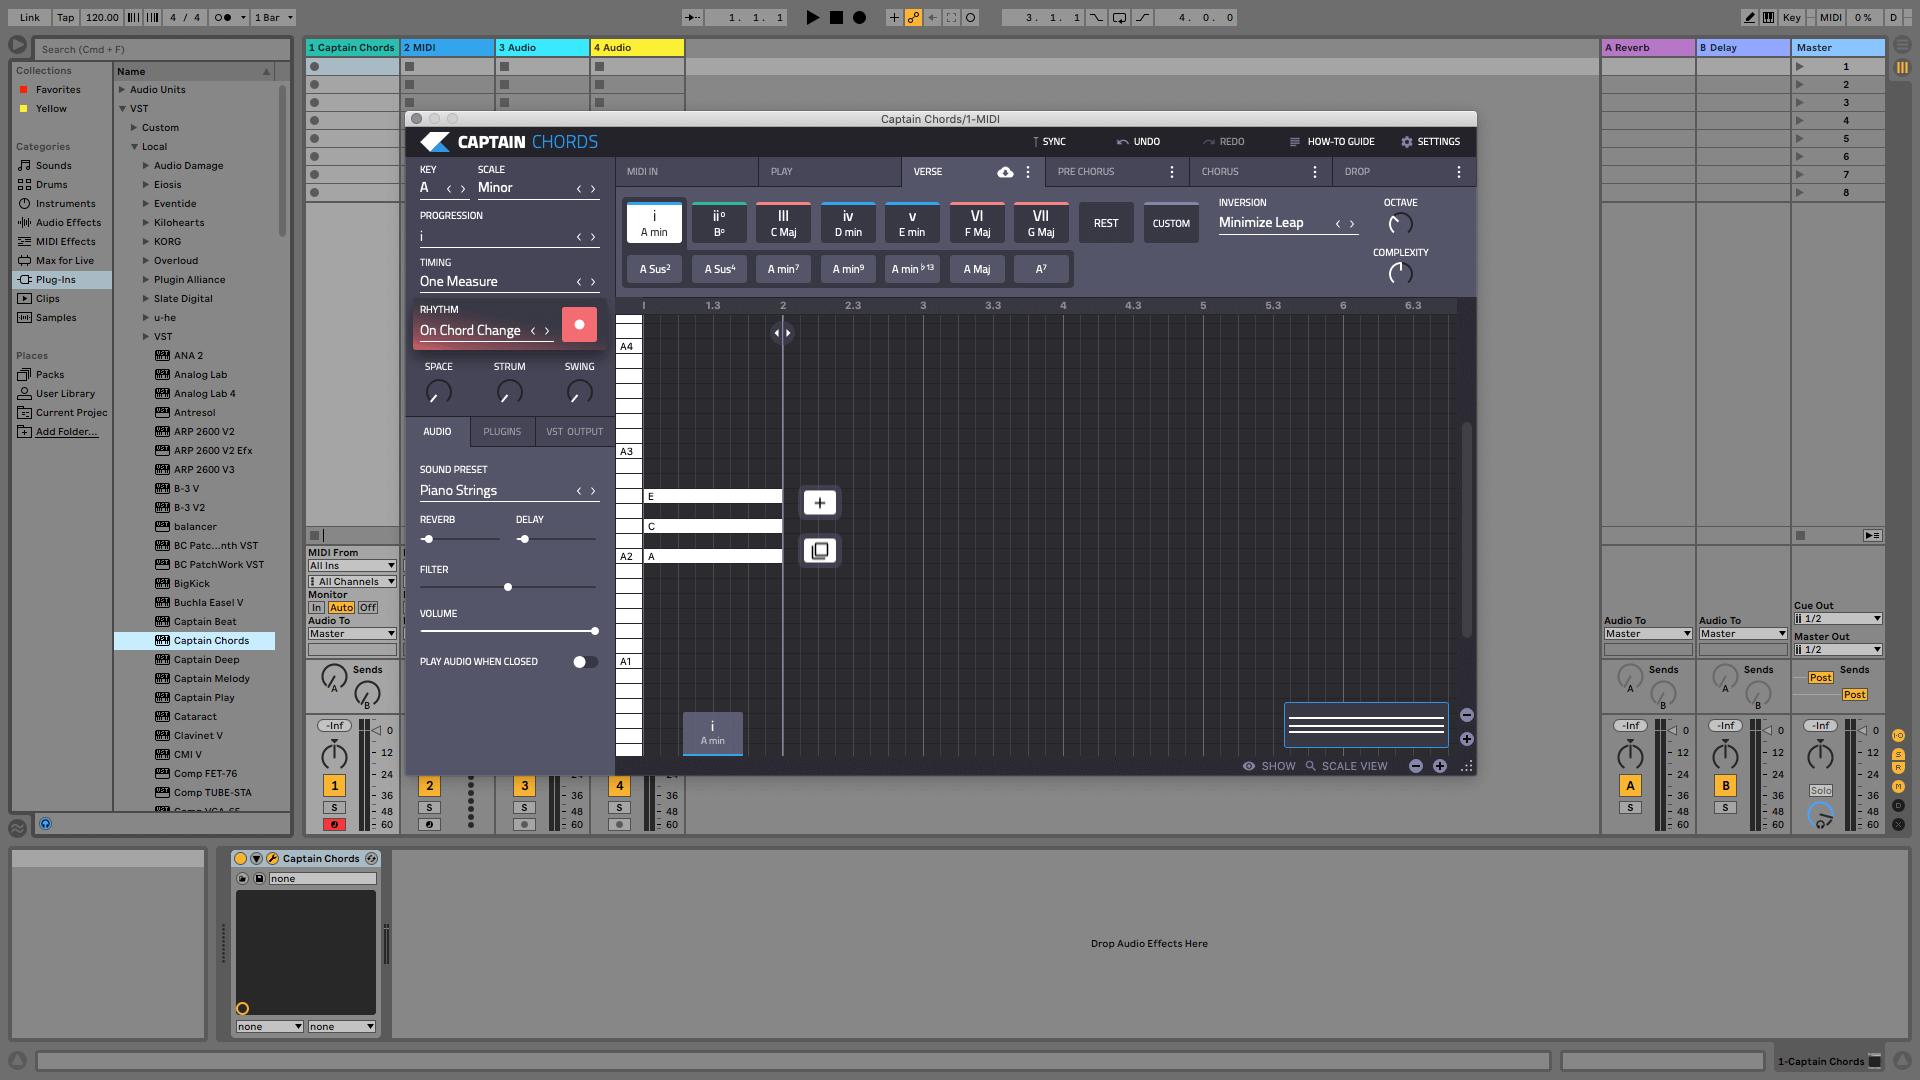
If using Ableton Live, this can be done by clicking on the plugin devices tab within the main window and either double clicking on the Captain Chords plugin within the list, or dragging and dropping it onto a specific instrument track.
The same method works for FL Studio 20 and other supported DAWs, while Cubase and Studio One Four put their VST/AU plugin instruments into an ‘Instruments’ folder.
Meanwhile, Pro Tools uses the AAX format.
We created tutorial videos to give a deeper understanding of integrating Captain Plugins with Ableton Live, Logic Pro X, FL Studio, Studio One Four and Pro Tools. You can access the videos from the below playlist.
* AAX is available on Mac only.
Selecting key & scale
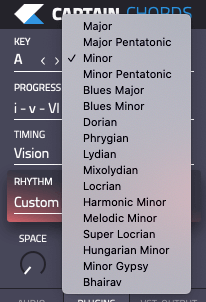
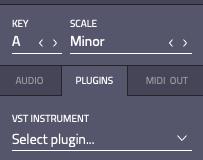
When Captain Chords’ user interface opens you will be presented with options for setting the song ‘KEY’ and “SCALE’. If you already know what key & scale you will be composing in, then adjust the fields to your choice and select ‘GO’.
lightbulb_outline
Tip: A major scale will sound bright and happy, whereas a minor scale will sound more somber or melancholic. Most electronic based records are composed in a minor scale; Pop music on the other hand, tends to lean more toward the use of major scales. This is only a rule-of-thumb and as such there will be examples which do not follow this rule. Try experimenting, and also note which scales are used in other records within your chosen genre.
Best Practice: If you are unsure of which key and scale to use then it would be wise practice to consider whether you are composing chords to match a vocal you intend to use, or any other pitched elements you may already have in your project. This is because most elements within a musical recording will be comprised of various pitches or notes which fall within a set key & scale, by ensuring the song’s key & scale match these pitches, you can ensure all elements in the song will be harmonically compatible.
lightbulb_outline
Tip: If you are unsure of the key & scale of your existing vocals or backing track, then drop them into Mixed In Key or Mixed In Key Studio Edition, which will provide you with the key & scale results, e.g 2A. This result can then be converted to traditional musical terms by using the Camelot Wheel included in the Harmonic Mixing guide.
Creating a chord progression.
Adding chords to create a chord progression can be done in a number of ways:
Using the ‘+’ icon, then clicking on your chosen chord along the top menu. Press ‘Duplicate’ instead and the previous chord(s) will duplicate.
Using computer keys 1 – 7, Q – U, A – J, or Z – N. Moving left to right, pressing these keys will enter the corresponding scale degree, ie in A Minor, ‘1’ triggers i and ‘7’ triggers VII.
Using your MIDI keyboard, you can play any notes and Captain Chords will decipher what chord you are playing and enter that to the progression in the selected chord spot.
Using a preset chord progression.
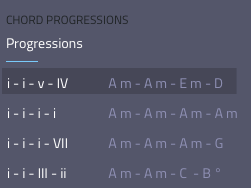
To aid creativity, Captain Chords includes numerous chord progressions, these can be accessed from the ‘Progression’ tab, underneath Key/Scale.
Click on the menu to open up the full browser or use the arrow keys to quickly scan through the various presets. The first chord in the key & scale is denoted by (i) with the following chords also in roman numerals denoted by their position within the key & scale.
Once selected, you can edit the progression in the same ways as with a bespoke progression.
lightbulb_outline
Tip: When using the ‘Progression’ browser, click on each preset to hear a preview of how the progression sounds.
Using chord voicings.
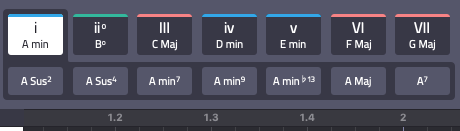
In Captain Plugins 5, the voicings and inversions available in Captain Chords have changed. Previously, each key and scale had a set list of alternate voicings. Some of these are still present for all chords, such as First and Second Inversions.
However, we have refined the list of available voicings to reflect a more musical palette for each key and scale. Rather than the exact same voicings in each key and scale, you can now choose from an intelligently curated range of chords that sound particularly good together. For example, in the key of A Minor, the root chord has both Sus2 and Sus4 chord options, while scale degree iv, D Minor, offers only Sus4, but an additional Dm Aug chord.
All chords, regardless of key and scale, have a 7th chord and the relative Minor/Major within its chord palette.
Whatever your level of music theory understanding, these ‘smart voicings’ will help you write chord progressions that flow together more beautifully, conveying a wider range of emotions.
lightbulb_outline
Tip: You can execute additional chord voicings by pressing ‘Shift’ and using the computer keyboard. Shift + 1 – 7, Shift + Q – U and Shift + Z – N call up different chord voicings – great for fast experimentation!.
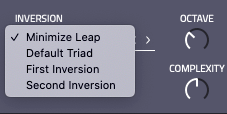
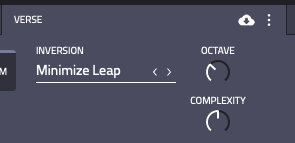
Using Inversions.
An ‘inversion’ is a chord with the same notes as the default triad, with the order re-arranged the order within each chord. First Inversin takes the root note and raises it an octave. 2nd Inversion takes the root note and the 3rd, and raises both an octave. By changing the inversion you will give the chord a different “feel”, so it’s advisable to experiment until you find the setting to suit your taste. (Default Triad) is the standard 3 note chord.
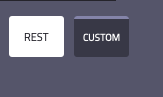
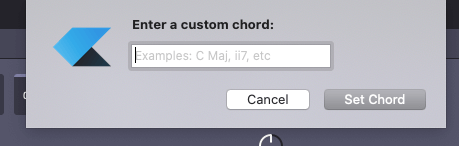
Using Custom chords.
If you know the name of a chord, and don’t see it in the chord palette of your chosen key and scale, you can input it usng the Custom button. E.g Adding a B Flat Minor to a chord sequence in A Minor is achieved by pressing Custom, then entering Bbm.
MIDI Editing.
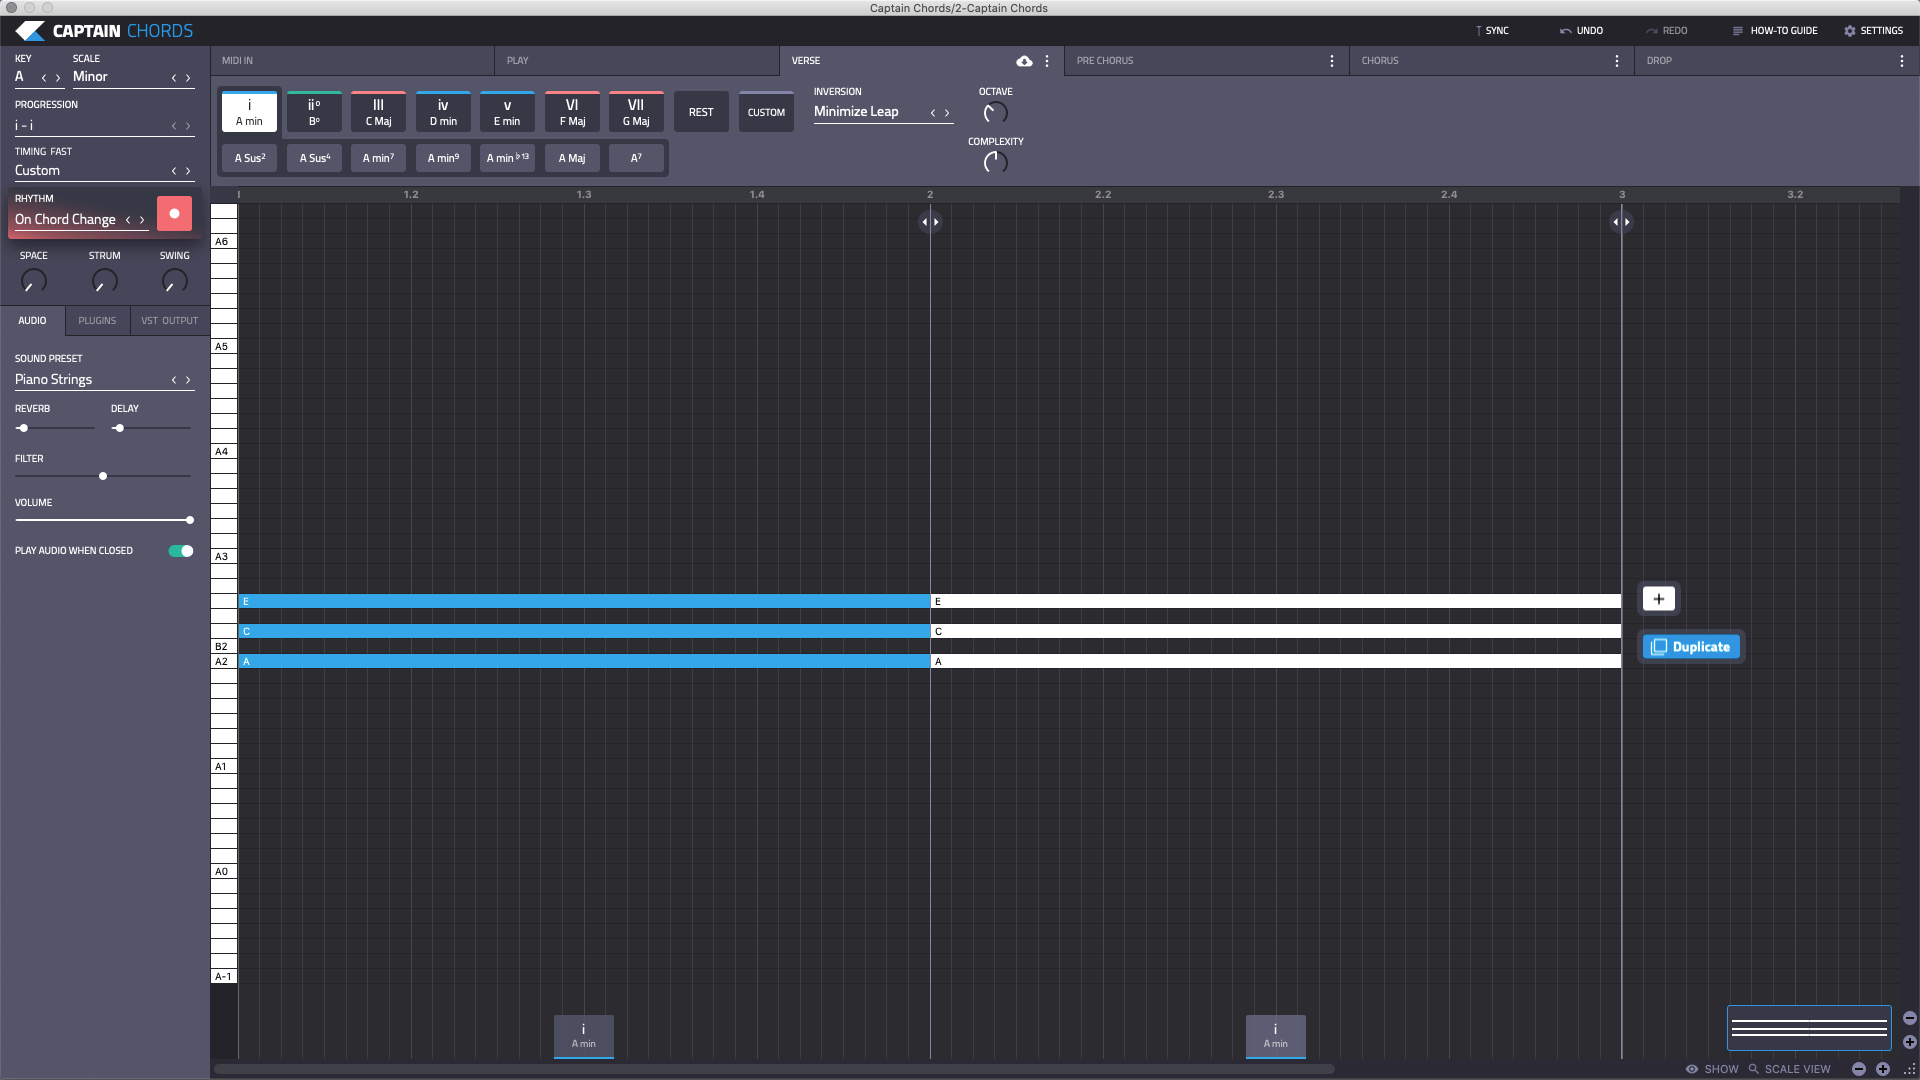
Captain Chords now supports MIDI editing. You can ‘grab’ any note in your chord sequence, and pull it up or down the scale within the selected chord boundary. Moving a note creates a new chord, whose name replaces the old chord name. So, dragging the ‘E’ in A Minor’s ‘A-C-E’ triad up to ‘F’ creates F Major First Inversion (A-C-F).
Grabbing a note is as simple as clicking, holding, and dragging the desired note. You can undo any time.
Changing Octave.
To the right of the plugin window are two rotor knobs; Complexity and Octave.
Moving chords up or down octaves is controlled by turning the knob up or down from 1-8 available octaves. The behaviour of other chords in the sequence depends on each chords’ Inversion setting.
For example, if Default Triad is selected for all 4 chords in a 4-chord progression, changing the octave of an individual chord will affect only the selected chord. The other chords will stay in their current octave. However, if a chord has Minimise Leap selected, changing the octave of the preceding chord also affect the Minimise Leap-enabled chord. This is because Minimise Leap changes the way chords follow each other to simulate how a real pianist would play it. A pianist would likely use different inversions of a selection of chords to reduce the overall span of notes in the progression.
lightbulb_outline
Tip: You can ‘break’ Minimise Leap by forcing the chord up or down the octave range, thus making minimise leap redundant. Default Triad will become the new chord type, in its new octave.
lightbulb_outline
Tip: First or Second Inversions are not compatible with Minimise Leap. However, the nature of Minimise Leap means a First or Second Inversion could be triggered in order to execute a minimised leap.
Changing Complexity.
‘Complexity’ refers to the number of chord tones in each chord. A complexity of 1 is a single tone – the elected chord’s root note. Meanwhile, a complexity of 7 is a chord of 6 notes – 2 identical triads, one an octave down from the other.
lightbulb_outline
Tip: Adding complexity is great for giving chords weight and gravitas. Generally, it’s less effective with fast chord changes.
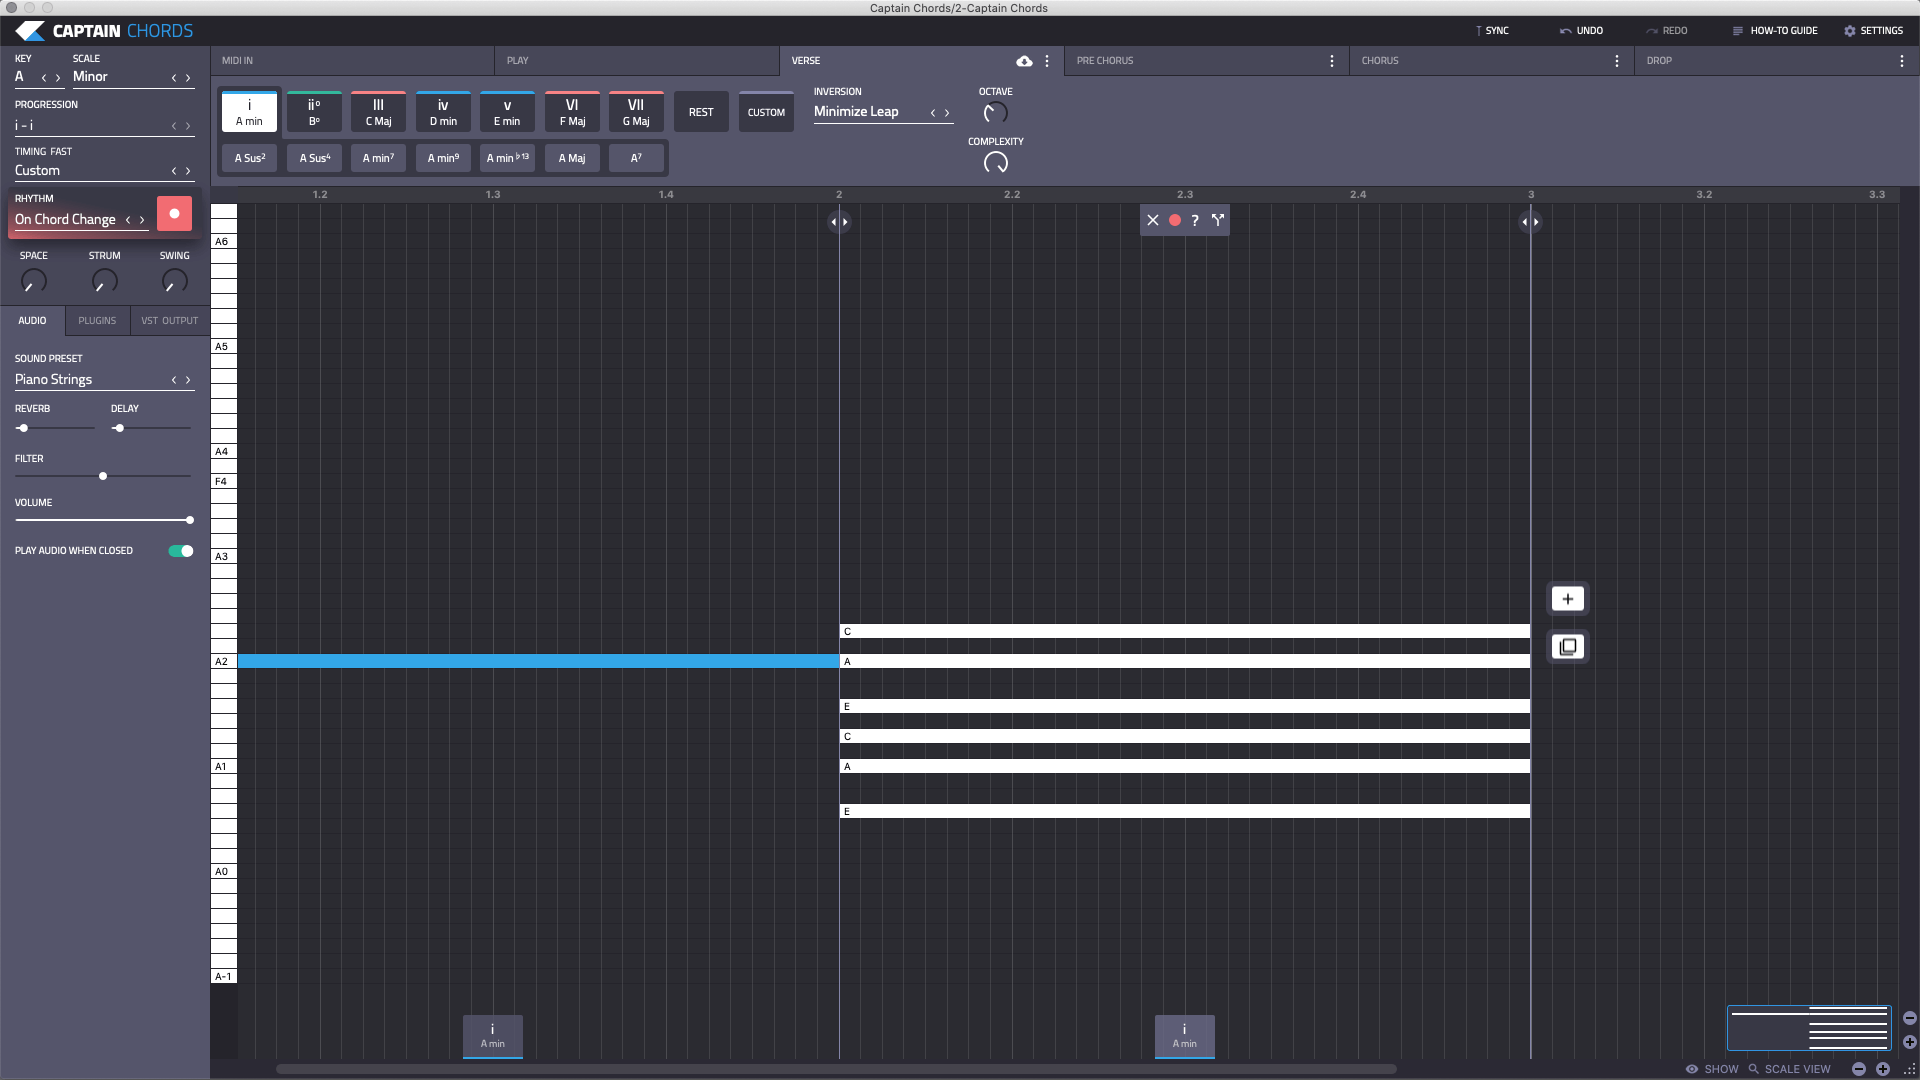
Editing chords
When inputting chords manually, it is possible to edit the length, split the chords, delete, change and also place a rest or gap between chords. In doing so, this offers the option of creating your own chord rhythms and progressions.
To adjust the length of the chords move the “ADJUST DURATION’ markers to the desired length. The markers will snap to either 1 measure or increments of 1/4, 1/8, 1/16 or 1/32 of a measure.
To place a rest or gap between chords, select the chord to be removed by clicking on the chord and choose the ‘REST’ option.
To split a chord in half, select the chord to be split and choose the ‘SPLIT’ option.
To delete the chord, select the chord to be deleted and choose the ‘DELETE’ option.
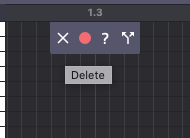
To record a new rhythm over the selected chord, select the chord to be edited and choose the Record icon.
You can also bring up detailed information about the chords in your progression by pressing the ‘?’ symbol.
The info box looks like this:
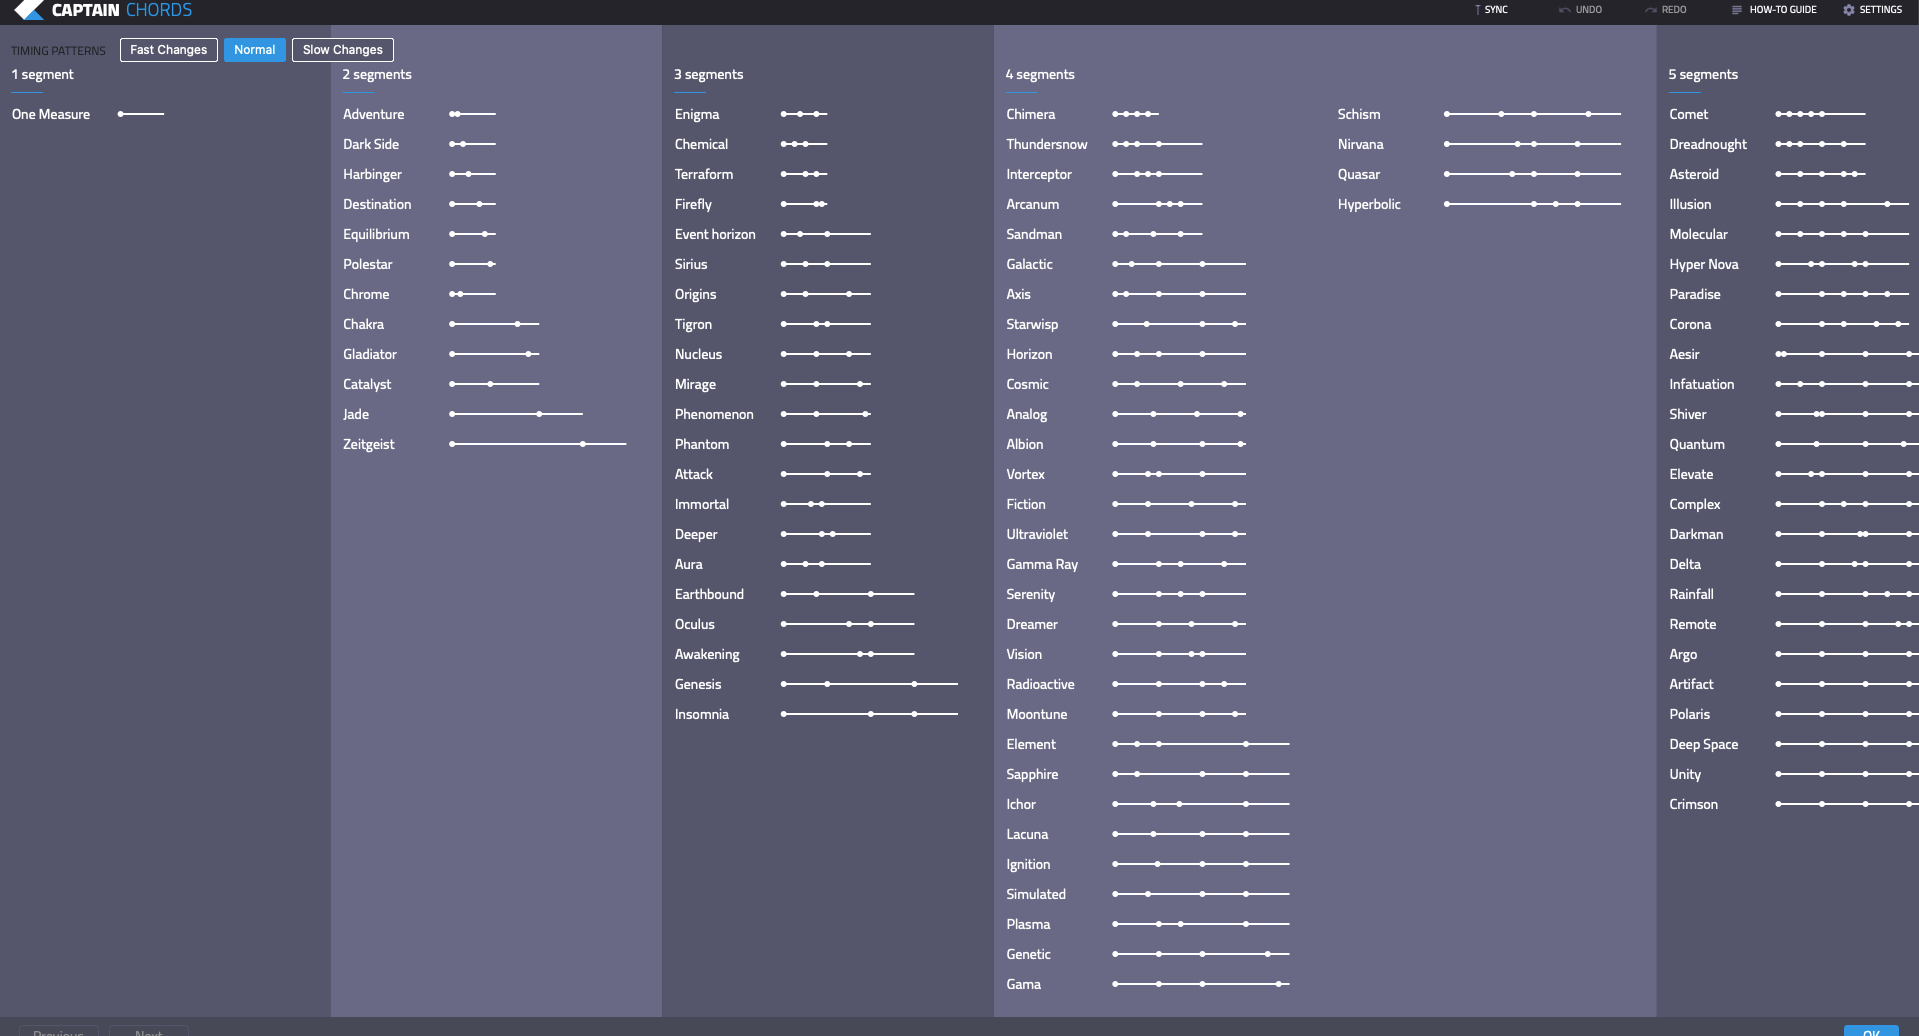
Using Timings.
The Timing tab, underneath the Progression menu, is where you can auto-configure the timing of your chords. In practice, that means changing the strike-point of each chord in your progression, based on a preset timing structure.
Timing structures are categorised in ‘segments’; 1 segment = no change, 2 segments = two moments where the preset timing affects the chord progression, 3 = three moments three moments and so on.
Each Timing option has three types – Fast, Normal or Slow. These affect the speed of the timing changes.
lightbulb_outline
Tip: Depending on the number of chords vs the number of segments, this may cause your progression to extend or retract a bar or two in length. This can cause some pleasing ‘happy accidents’.
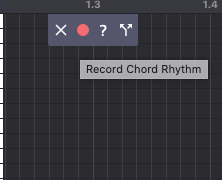
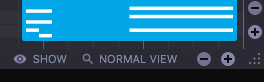
Adjusting the piano-roll view
To enable easier chord editing, the piano-roll interface can be zoomed in or out, changed to different view defaults and simplified by removing grid lines and labels.
To change the zoom level, toggle the + & – buttons for both horizontal and vertical.
Overall piano-roll view can be switched between ‘SCALE’, ‘NORMAL’, ‘FOLDED’ and ‘FIT TO’ views by clicking on the ‘VIEW’ option.
To remove grid lines and labels click on the ‘SHOW’ option and untick the relevant boxes.
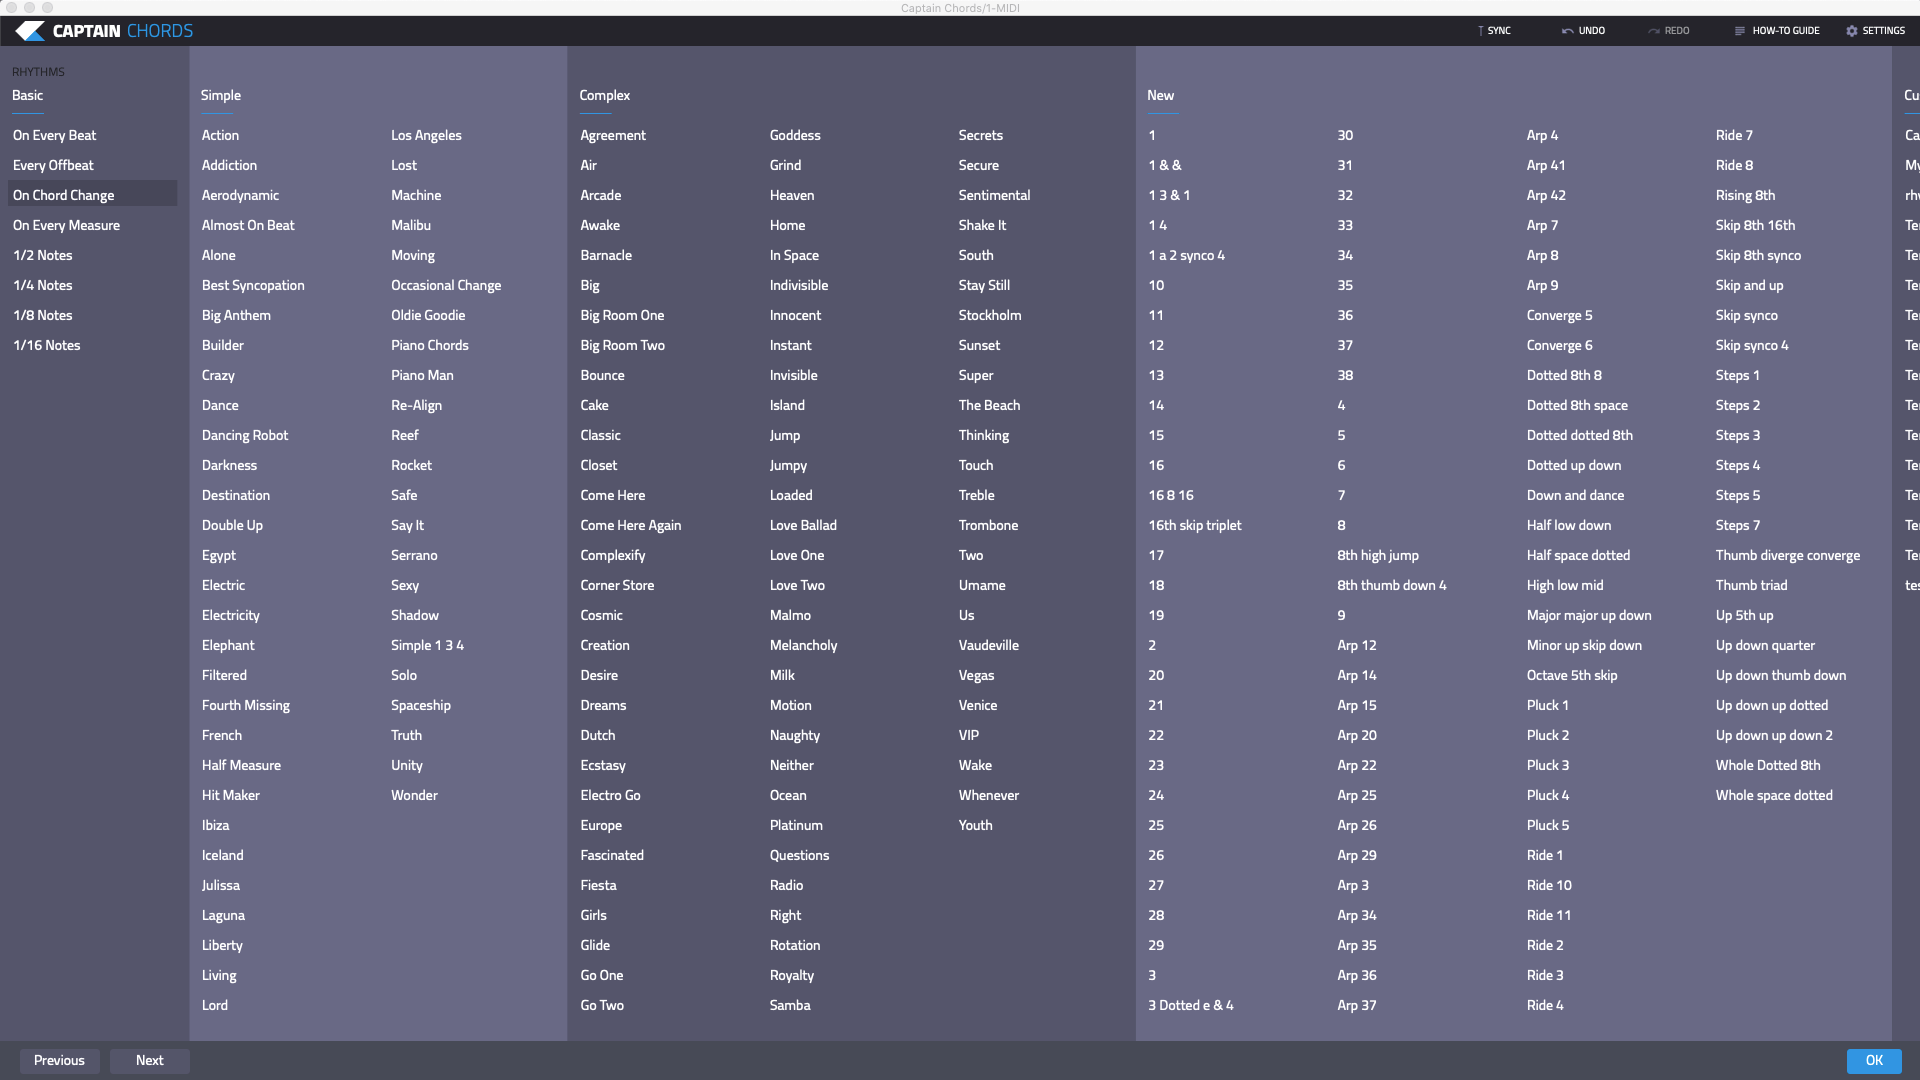
Adding Rhythm to your chords.
You can add all kinds of rhythms to your chord progression – great for givng spice your patterns. There are two main methods; the Rhythm menu, or Rhythm Recording.
The Rhythm menu:
As with Progression and Timing, the menu contains a number of preset option. These make excellent launch points for your own ideas. Use the bottom scroll bar within the rhythm browser to move between several categories such as: Basic, Simple, Complex and more.
Rhythm Recording:
Press the to switch to the Rhthm Record screen. You can now see a blank screen with your chords displayed as ‘ghsot notes’ behind, with some simple controls in the piano-roll, and some additional controls above.
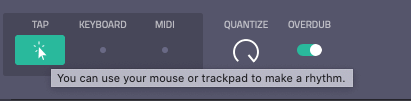
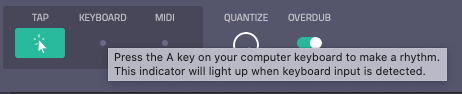
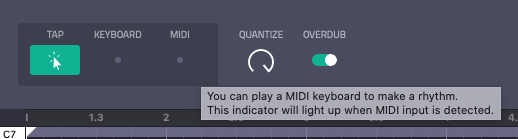
Tap/MIDI/Computer keyboard detection. Check that your computer mouse, MIDI and/or computer keyboard is sending MIDI to the Record window by pressing a key or tapping the Tap icon and ensuring the corresponding LED lights up. You don’t need to specify which you want to use when recording Rhythm – in fact you can use all three at the same time if you wish!
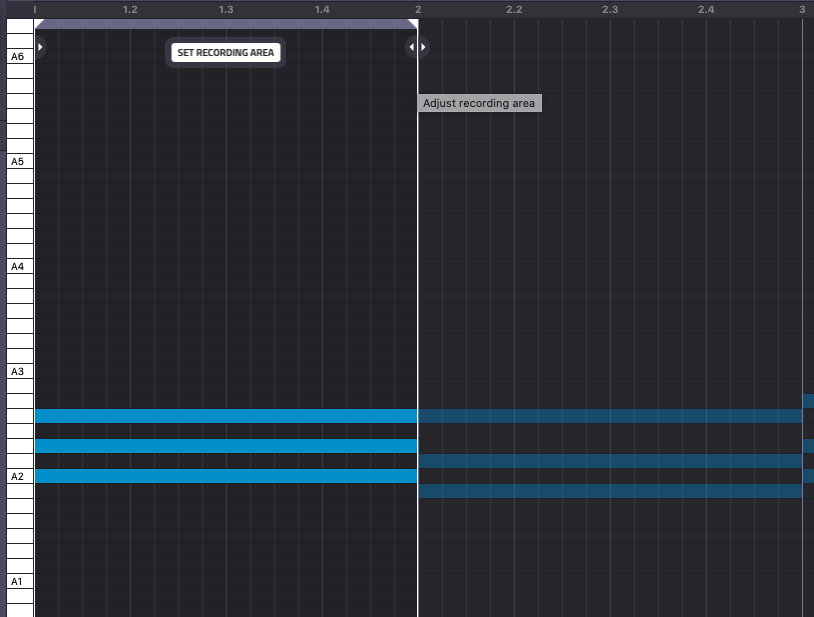
Set Recording Area. You can choose to record a rhythm over the whole progression, or pull the record markers into whatever position you want to work on.
Take 1. As you record, the chord progression will silently loop, as you trigger chord rhythms. As the pattern loops, the Take number increases. To revert to a previous Take, simply press Undo (redo to cycle forwards again).
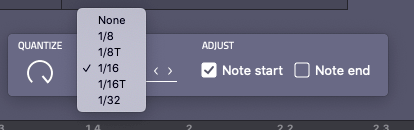
Quantize. Click the Quantize knob to reveal various time divisions, and rotate the knob to add/decrease quantization amount.
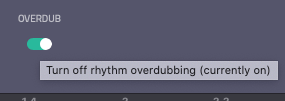
Overdub. With overdub engaged, when the chord progression loops, the previously entered rhythm will stay in place, which you can then add further rhythms to.
Clear. Clears the last recorded rhythm.
Cancel/Done. Cancel returns you to the main plugin window. Done enters the rhythm to the canvas and returns you to the main window.
Space, Strum and Swing.
Space.
Space is all about creating different amounts of space between your notes. Many producers know this as ‘Note Length’, but we’ve taken this idea further and created 8 different settings that affect the amount of space between notes in different ways. You can increase or decrease the amount and hear your chord progression come alive!
We created a short video to give you a brief overview of the 8 different settings. Check it out here:
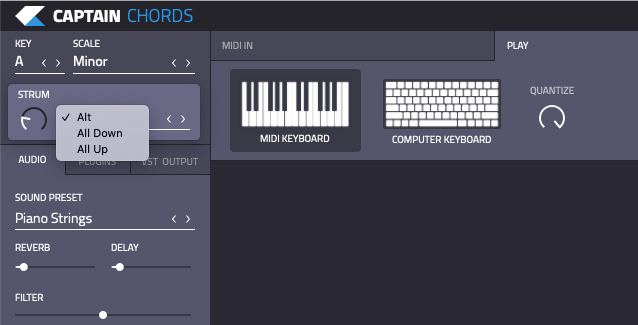
Strum.
Strum emulates the performance action of a guitarist or pianist, by adding subtle variations to the strike-points of each note in each chord instance. This has a similar effect to apianist whose fingers land on the keys at slightly different times, or a guitarist who strums up and down the strings on their guitar.
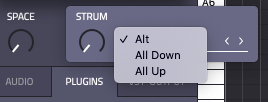
There are 3 options: All Up, All Down, Alt.
All Up: Each strike of a chord has the same amount of strum, and always in the same direction. The lowest note in the chord lands first, and the highest lands last.
All Down: The reverse of All Up. The highest notes always land first, and the lowest last.
Alt: Each chord instance alternates between All Up and All Down.
You can set the total amount of each strum style using the rotary knob.
Swing.
The Swing function emulates classic swing/groove rhythms that have become synonymous with all kinds of modern music.
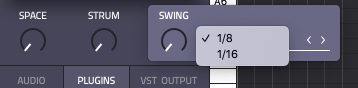
There are 2 Swing divisions: 1/8 notes, or 1/16 notes. Swing itself is a term that defines a slight shift ‘off the beat’. In practice, that means that every chord strike on a 1/8th or 1/16th beat will be subtly shifted in time, a little behind the metronome. This adds humanisation to the performance. The exact amount of ‘off-the-beat’ is dependent on the amount you set the dial.
1/8 notes: the Swing setting here will relate to each beat of a 1/8th note rhythm. So, 16th notes won’t be affected, only the chord timings that fall on 1/8 notes – so 8ths, quarter notes and 2nds.
1/16 notes: the Swing setting here will relate to each beat of a 1/16th note rhythm. So, all notes that hit a 16th will be affected. That means, 16ths, 8ths, quarters and 2nds.
You can set the total amount of the swing per beat using the rotary knob.
lightbulb_outline
Tip: If your chords are playing back from an undesirable point in the DAW project, try clicking Sync. This will re-allign Captain Plugins and the DAW’s timeline and tell Captain Chords to play from the newly identified lauch point.
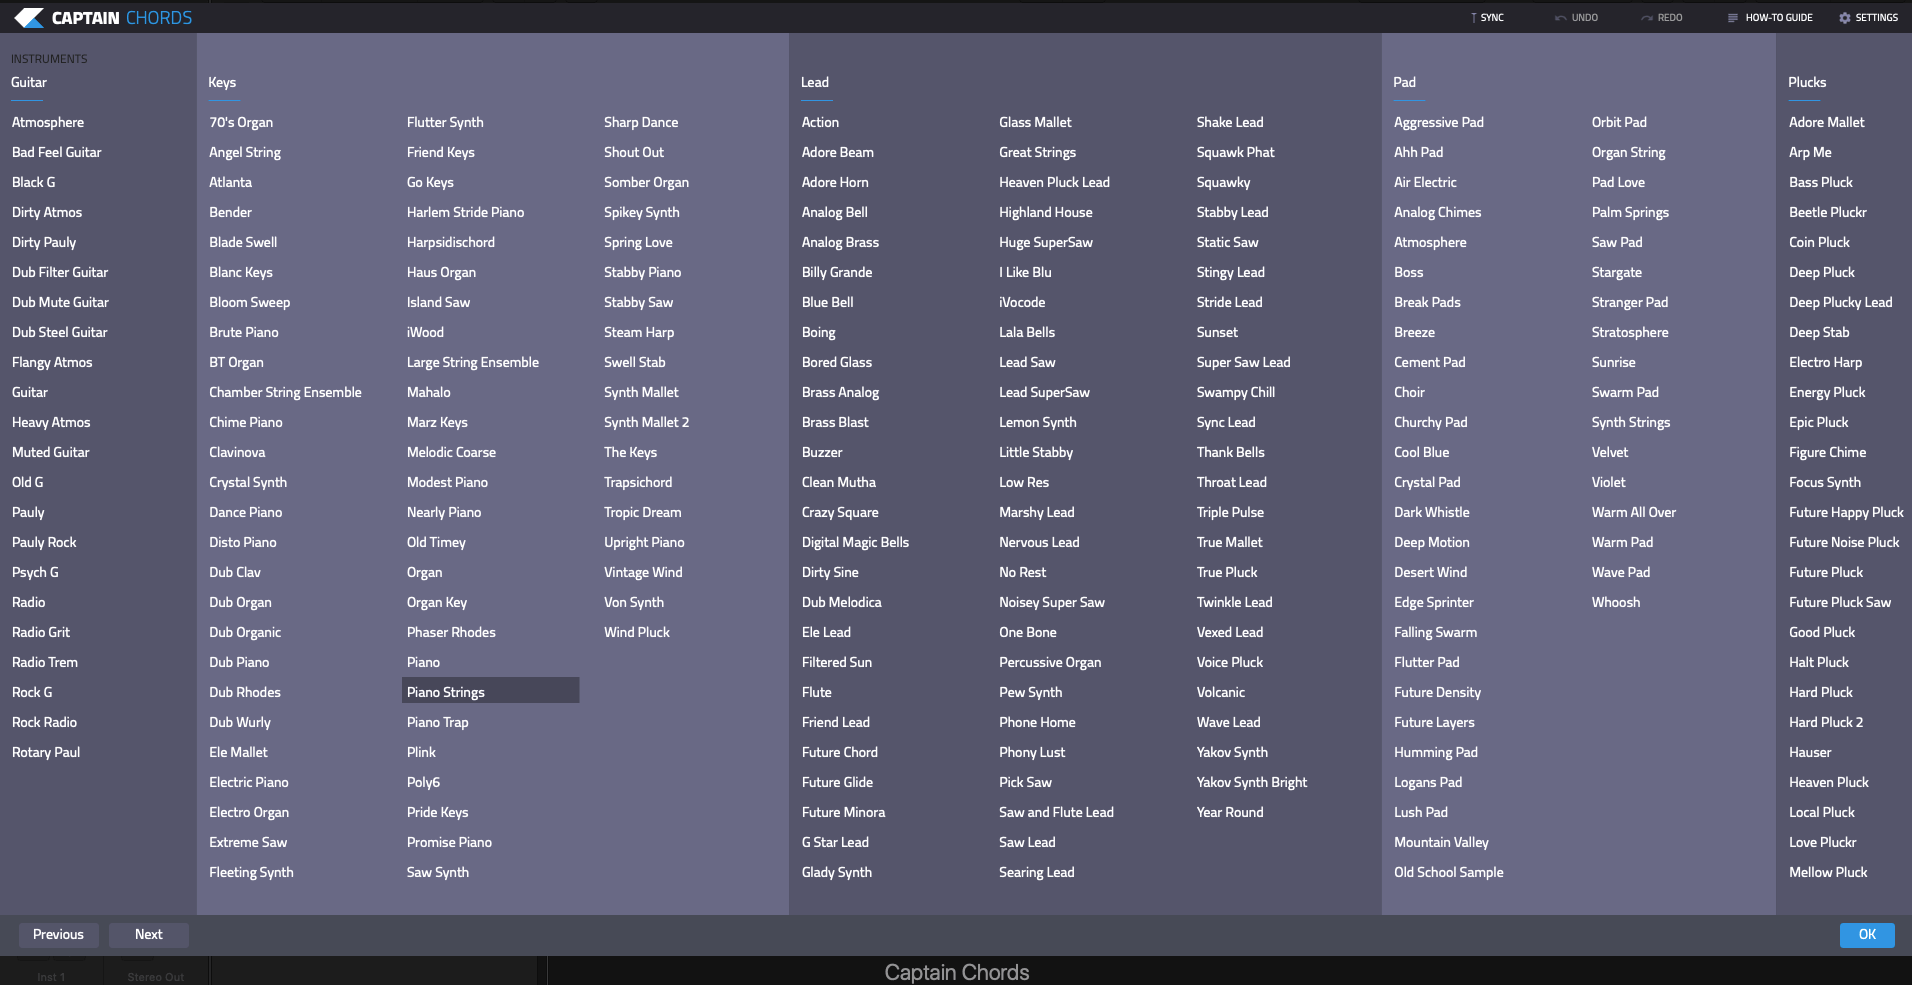
Using the on-board sound presets.
Captain Plugins 5 includes a large selection of sound presets, suitable for many genres. You won’t have to look far to find the right the right timbre for your song, with the presets organised in categories including plucks, bass, keys, leads, pads, strings, voices and guitars.
To access the presets simply click on Audio > ‘Sound Preset’ and make your selection.
lightbulb_outline
Tip: Use the scroll function within the ‘Sound Preset’ browser window to access the full list of available presets.
Using Captain Chords with 3rd party instruments
In Captain Chords 5, we introduced native 3rd-party plugin hosting. Since Plugin Hosting is a brand new feature, we have deliberately only allowed certain plugin instruments to work in this feature as they have been tested and shown to cause no issues.
We will be adding more features within plugin hosting and also whitelisting more 3rd party instruments as we develop the feature.
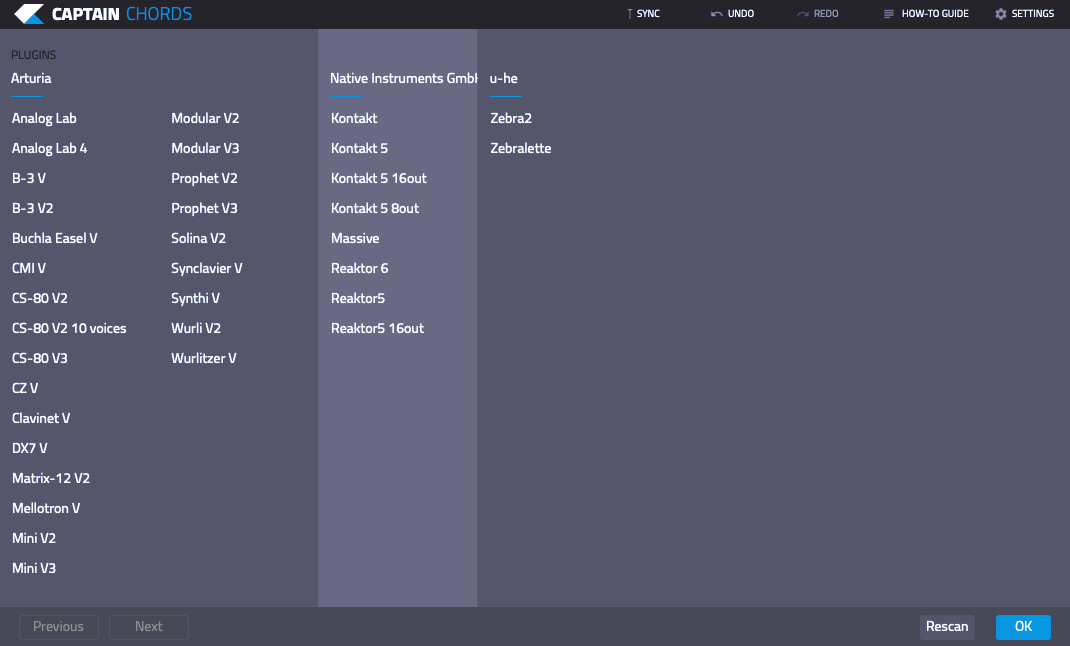
To enable 3rd party hosting, simply open Captain Chords, and select Plugins > VST Instrument, and press Scan. Captain Chords will scan your directories and add all whitelisted plugins to the VST Plugins menu inside Captain Chords.
Once the scan is complete, you will find all whitelisted plugins available in the VST Plugins menu. Simply press ‘Select Plugin’ to open the menu window.
3rd-party Plugin Hosting requires plugins to be located in the following locations on Windows machines: (On Mac OS, file location is not important.)
C:\Program Files\Steinberg\VSTPlugins
C:\Program Files\VSTPlugins
C:\Program Files\Common Files\VST2
C:\Program Files\Common Files\Steinberg\VST2
If your VST instruments are not in any of these locations then they will not be found, regardless of whether they are supported.
3rd-party Plugin Hosting: General operation.
Once you have selected your 3rd-party plugin, whatever you have composed in Captain Chords will be played directly through your selected plugin. Any adjustments you make in your 3rd-party plugin will be instantly reflected.
Dragging your MIDI clip to the Captain Melody channel timeline in your DAW will now result in the melody being played via your 3rd-party plugin.
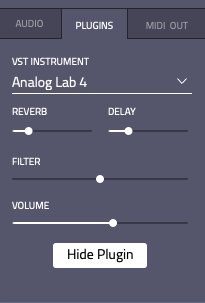
To change plugin, simply click in the name of your currently selected plugin to open the plugins menu.
‘Hide Plugin’ will close the 3rd-party plugin window without disabling the instrument itself.
‘Show plugin’ reopens the plugin interface.
Captain Chords’ Reverb, Delay, Filter and Volume controls can be engaged at any time while using 3rd-party plugins, and will be applied on top of any effects inside the 3rd-party interface.
Should you need to disable or enable ‘Keep Playing Audio When Closed’, click ‘Audio’ next to the ‘VST Instruments’ tab, and toggle the button.
Note: When ‘Audio’ is selected, the 3rd-party Instrument will cease to be engaged, and sound will revert to the selected sound in Captain Chords’ sound library. However, to re-enable the 3rd-party instrument, re-select ‘VST Instruments’ after toggling the ‘Keep Playing Audio When Closed’ button.
3rd-Party Plugin Hosting will be refined and improved in due course. In the meantime, if you have any issues please use the legacy method, detailed below:
Captain Chords can also use the generated MIDI to allow the sound source to come from a 3rd party soft-synth, or external hardware instrument.
lightbulb_outline
Tip: We have added compatibility with most well-known VST Plugin Instruments, from manufacturers such as Arturia, Native Instruments, U-He and more. This list will continually reviewed, so if a plugin of yours isn’t displaying, please email us at [email protected] and we’ll look into it.
Using the on-board SFX.
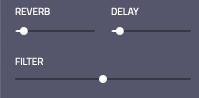
To add extra depth & character to the sound you can apply ‘REVERB’, ‘DELAY’ and ‘FILTER’.
Both ‘REVERB’ and ‘DELAY’ effects have several time and space settings to fine tune the effect to your taste.
These settings are accessed via the white triangle next to the effect. It’s also possible to change the dry/wet amount of the effect by using the adjacent slider.
‘FILTER’ has a fixed option of high-pass or low-pass, this is activated by a left or right movement of the ‘FILTER’ slider.
The overall volume output of the sound can be adjusted by moving the “VOLUME’ slider.
lightbulb_outline
Tip: Multiple parameters within Captain Chords can be automated via the automation lanes within your DAW. If you’re happy with the sound generated in Captain Chords, then the plugin can be used as any other software instrument.
Jamming live with Captain Play
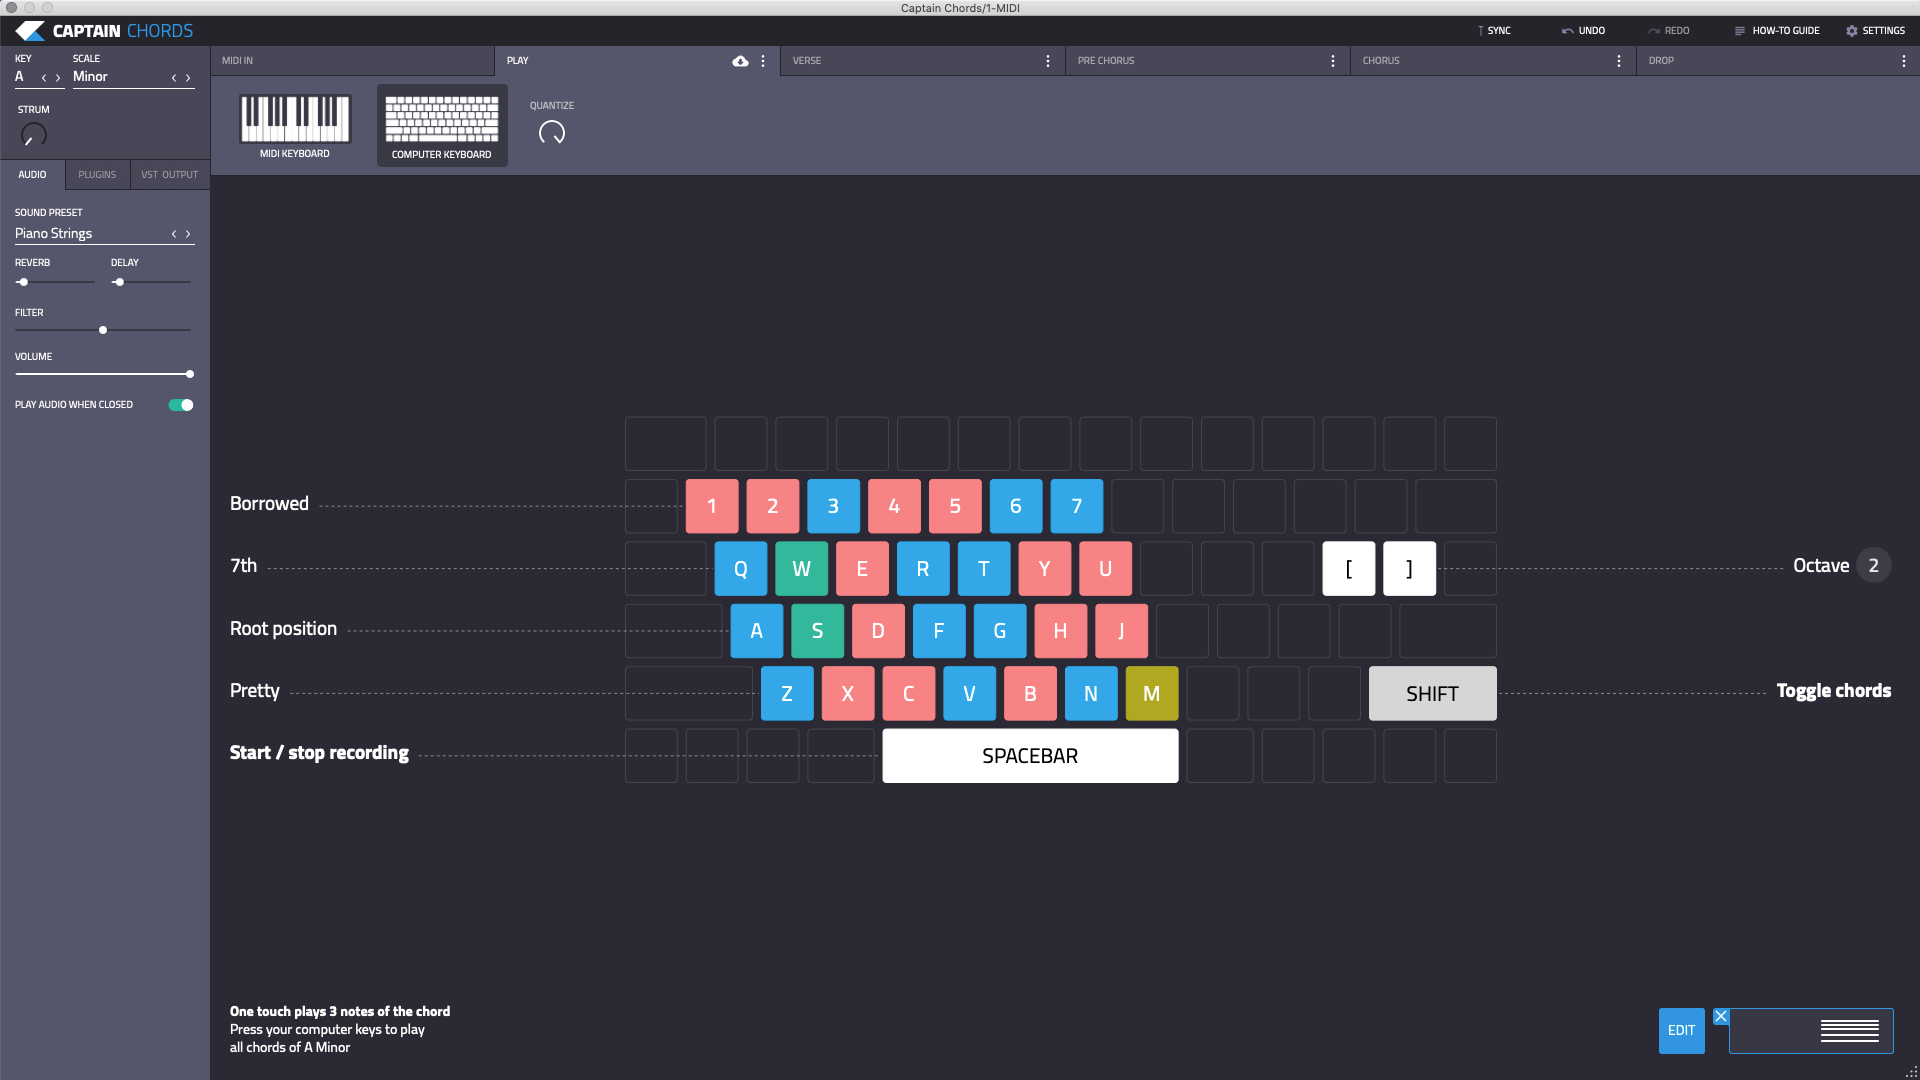
One of the most impressive and fun features of Captain Chords is the ability to ‘jam’ live with the various chords within the chosen key & scale. The feature is called Captain Play and is activated by selecting the ‘Play’ tab (next to MIDI IN). This feature allows the use of your computer’s keyboard buttons or MIDI keyboard to trigger the various chords within the key & scale and audition them in real-time.
You can also use Strum while in the Captain Play window.
Tutorial video about the Captain Play tabs:
Using Captain Play with your computer keyboard:
The most common chords within the key & scale are triggered by pressing the computer keys A – J, with additional and more exotic chords located on the rows above and below.
By using a combination of the common chords with some of the others, you can create interesting and sonically-pleasing progressions.
Both Major and Minor chords indicated in blue or red can be combined to make progressions even more diverse.
Pressing keys Z – M to trigger First Inversion chords, while pressing keys Q – U will trigger Second Inversions.
Keys 1- 7 will trigger ‘borrowed’ chords found outside of the chosen key & scale. These have been intelligently curated and are likely to work nicely as passing chords.
Pressing SHIFT + keys Z – M triggers 7th chords, while pressing SHIFT + keys Q – U will trigger ‘Pretty’ Chords.
We called them ‘Pretty’ chords because they have been intelligently selected as chords likely to sound beautiful within your progression.
To change the octave up or down toggle the bracket [ ] keys on your keyboard.
lightbulb_outline
Tip: Ensure caps lock is switched off, otherwise the chords will not be triggered.
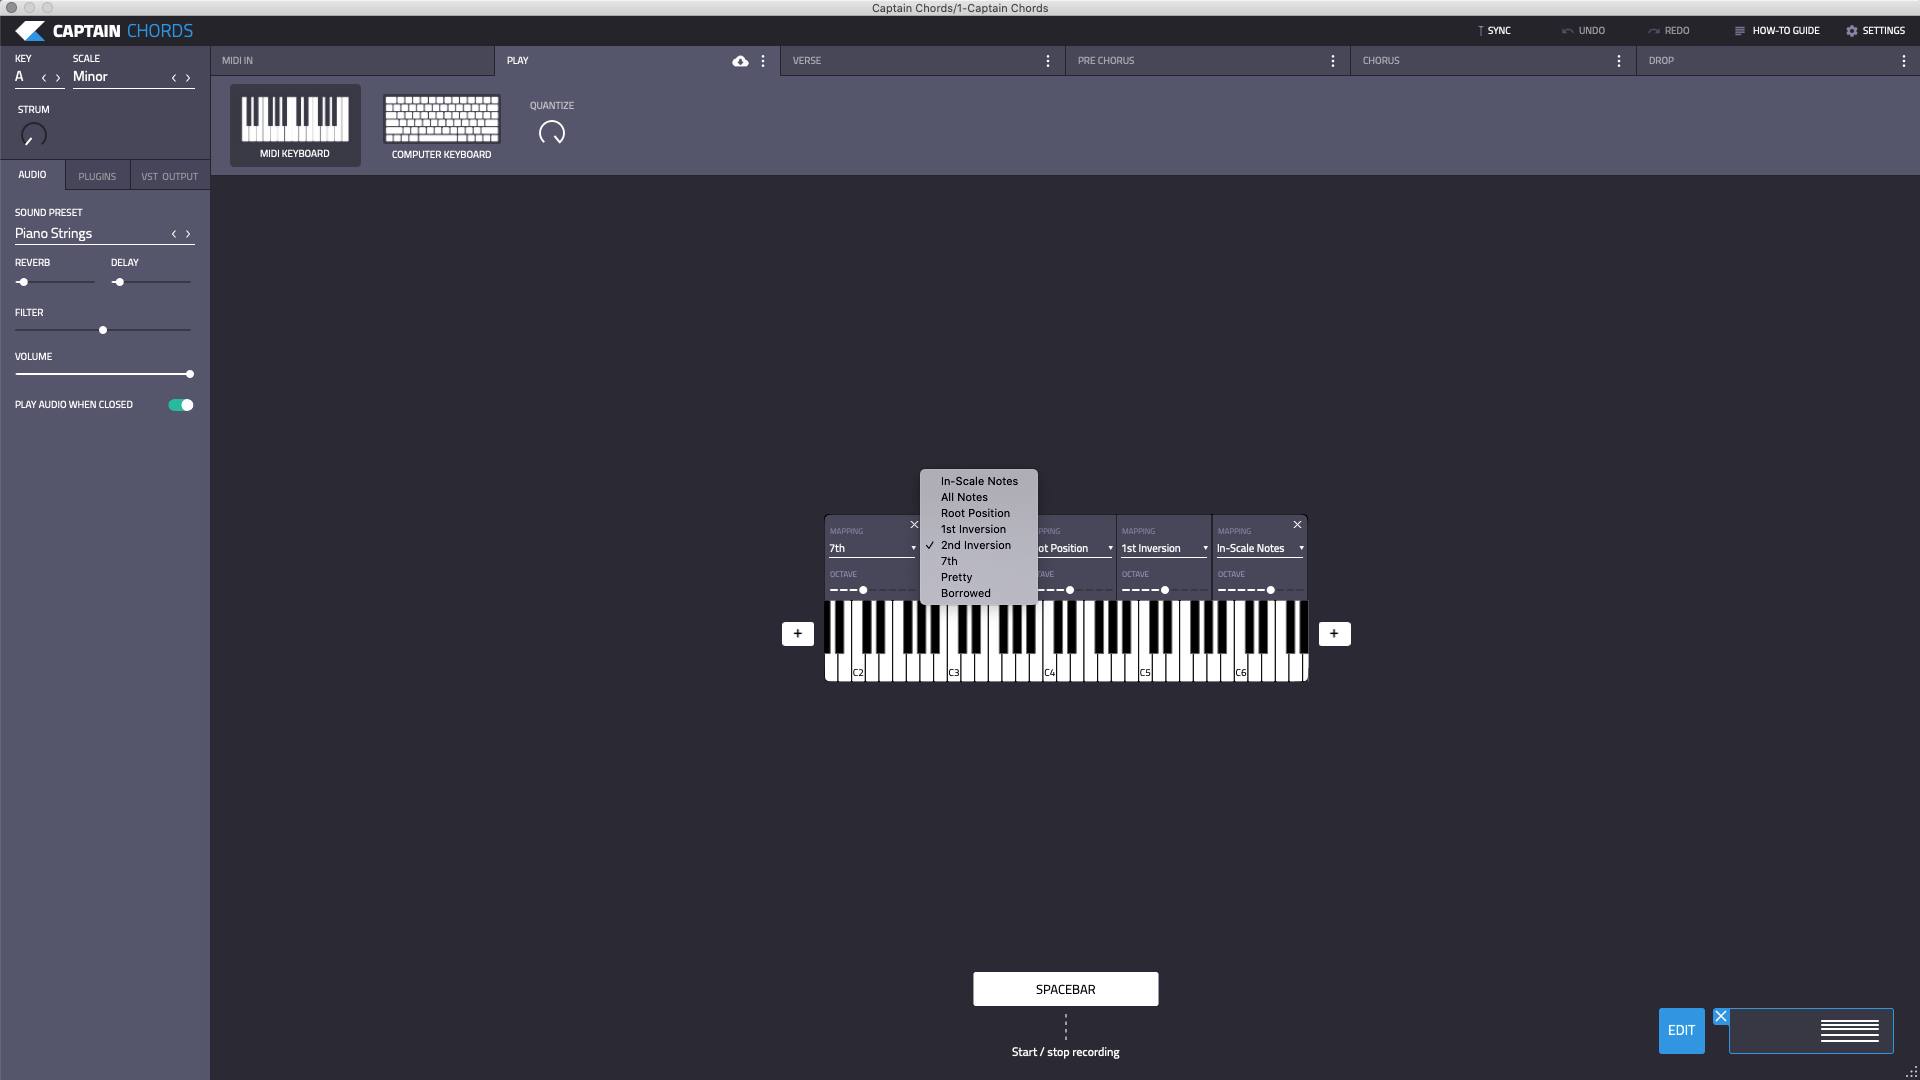
Using Captain Play with your MIDI keyboard:
When you select MIDI Keyboard from the Play window, 3 ‘chord boxes’ open up. These assign themselves to octaves on your MIDI keyboard
– C1, C2 and C3. Depending on the number of octaves on your MIDI keyboard, you add more boxes with different chord types.
Add or remove chord palettes using the ‘+’ icon.
Each chord box can be assigned to play an group fo chord types, in any octave.
You can also set a box to trigger ‘In-Scale single notes’.
Master controls in the Play window:
By pressing the spacebar Captain Chords will record each repetition of the loop – set in your DAW – and the chord progression that you input live.
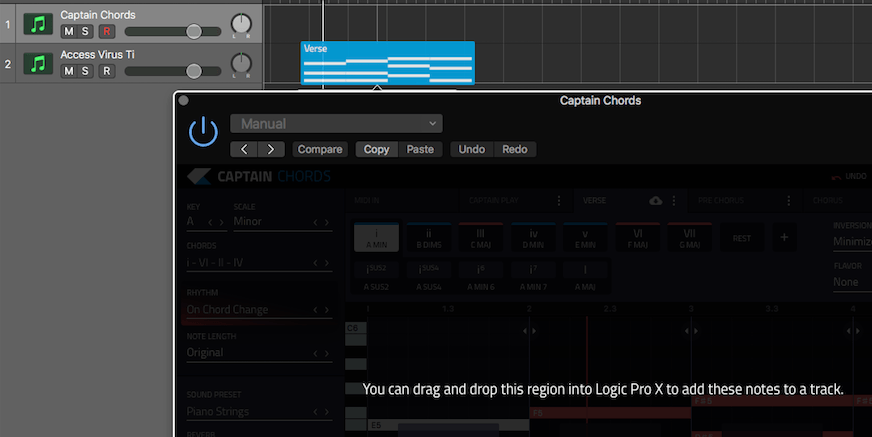
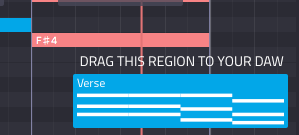
Displayed in a blue box at the bottom right of the UI, you can drag-and-drop this recorded MIDI region straight into the MIDI track of Captain Chords in your DAW.
Pressing EDIT allows yo to select which arrangement tabe to move the recorded chords into, for further editing.
Switch to the ‘MIDI IN’ tab in Captain Chords and your DAW’s sequencer will now trigger the chords you have recorded.
Captain Chords will continue to provide the sound source, even when Captain Chords’ UI is closed.
You can correct any timing errors from your live performance within the MIDI region, which is now in your DAW’s MIDI editor.
lightbulb_outline
Tip: Captain Play is independent of the other tabs and as such you can try new chord progressions on-the-fly, without changing the chord progressions within the other tabs.
lightbulb_outline
Tip: You can add Strum to your chords in Captain Play.
How to arrange your track in your DAW.
Once you have perfected your chords, it’s time to think about how they will be arranged in the full song. You may want to use different tabs in Captain Chords to host more chord progressions, such as Chorus, Pre-Chorus or Drop. This can be achieved by simply switching to a new arrangement tab along the top of the plugin.
Verse, pre chorus, chorus and drop tabs
To aid the arrangement of your song Captain Chords features grouping tabs located at the top of the UI. These tabs allow you to compose separate chord progressions for each section of your song: verse, pre chorus, chorus and drop. In doing so, you will only need to open a single instance of Captain Chords in order to compose all the parts.
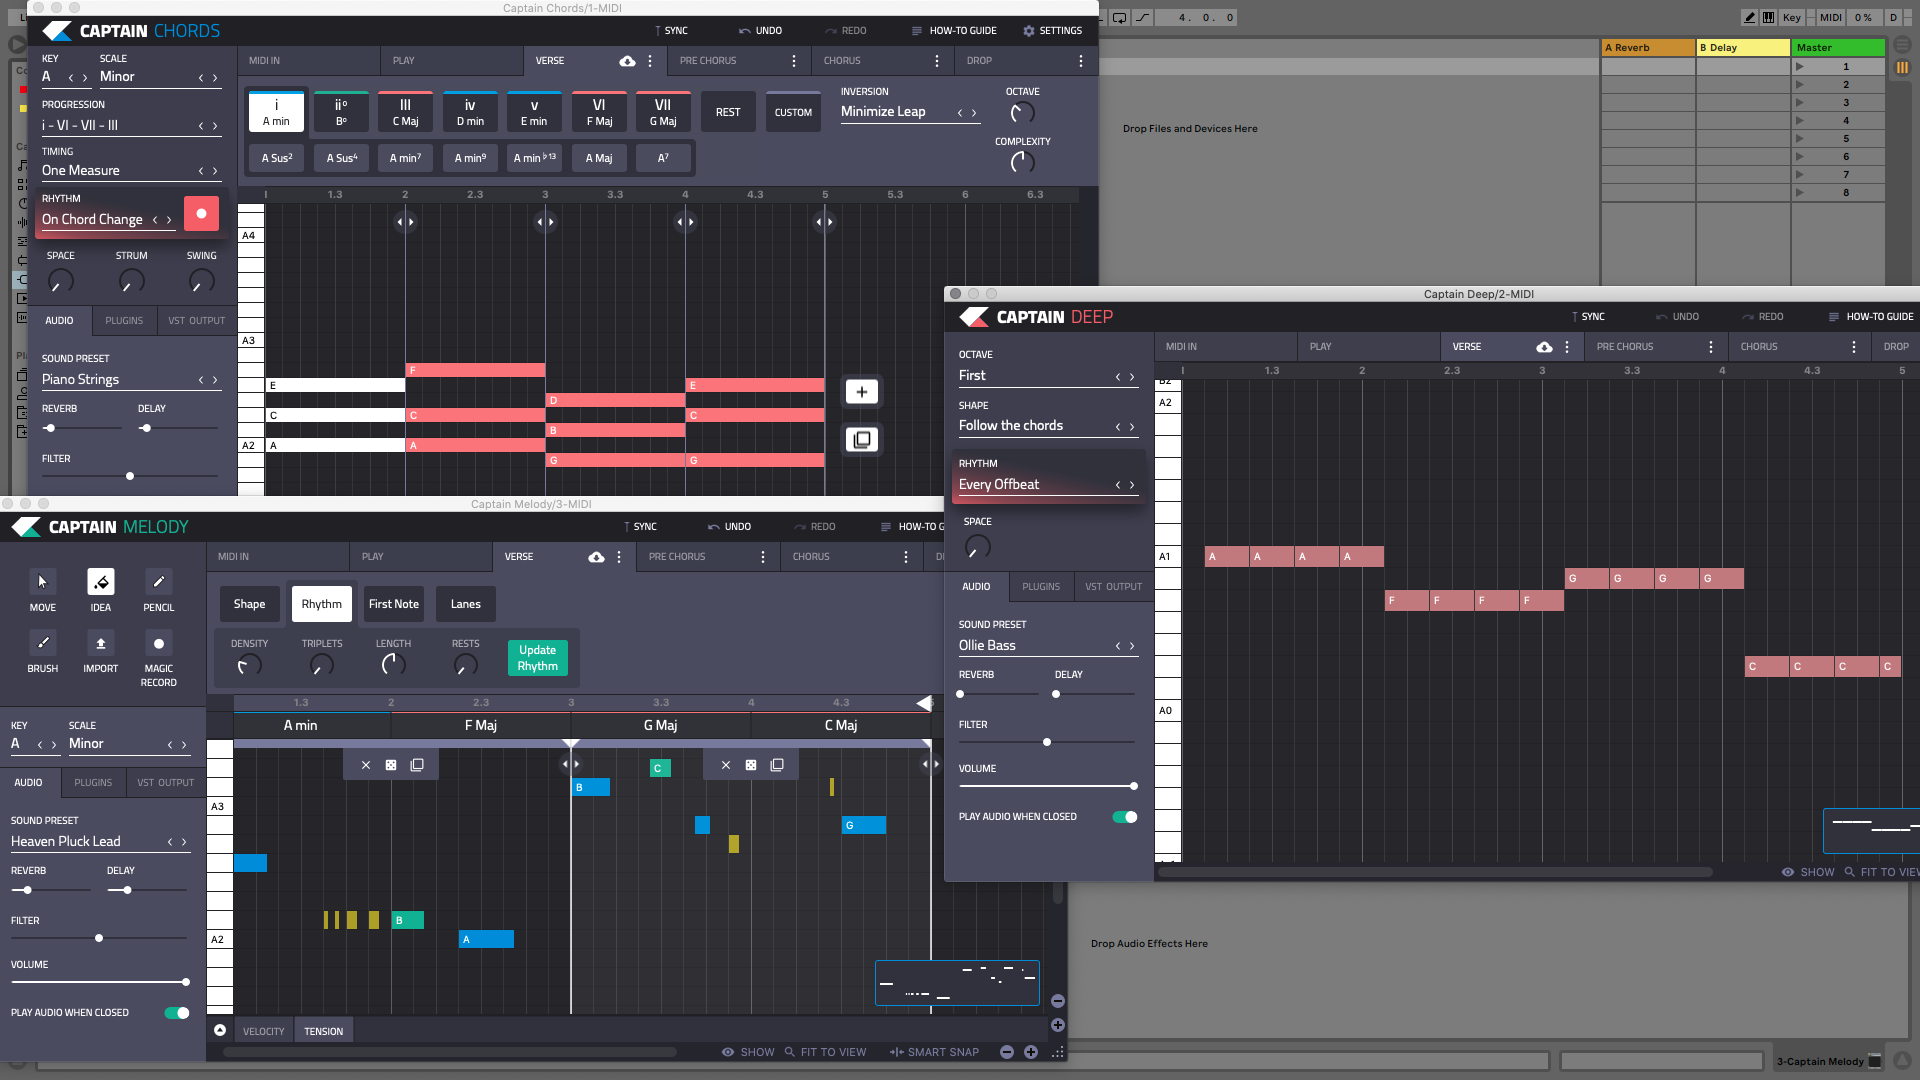
When adding either Captain Deep or Captain Melody at a later stage, the tabs within Captain Chords will communicate with the partner tabs within the other Captain plugins. This means Captain Deep and Captain Melody will use the relevant chord progression from Captain Chords in order to write the bassline and melody.
lightbulb_outline
Tip: You can copy and paste from one tab to another by clicking on the three dots within the selected tab. Additionally, you can choose to save your chord progression as an industry stand .mid (MIDI) file to your computer.
lightbulb_outline
Tip: If one of your progressions is playing unexpectedly, while you have Captain Chords closed, check that you have ‘Keep Playing Audio When Close’ disabled – if you’re using a 3rd party plugin, you’ll need to return to the Audio window, disable the button, and gp back to your 3rd party plugin tab.
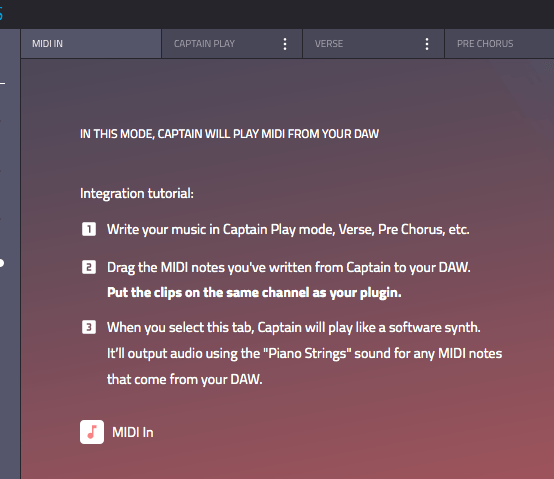
MIDI IN tab
When selected, the ‘MIDI IN’ tab allows the MIDI from the DAW’s sequencer to trigger the sound within Captain Chords, as opposed to Captain Chords playing the MIDI from within its own piano-roll/sequencer. This is useful if you want to use Captain Chords as a soft-synth to generate sound only.
Using Captain Chords with 3rd party instruments.
If you don’t want to use Captain Chords’ native VST Plugin hosting, it’s possible to route other sound sources, such as a 3rd party soft-synth or an outboard hardware synth connected to your DAW via MIDI, to generate the sound from your chord progression.
One method is to simply drag-and-drop the chord progression in the blue box from within Captain Chords to the relevant MIDI instrument track in your DAW.
However, if you want to continue editing your chords, you will need to route the MIDI out of Captain Chords to the MIDI In of your hardare or softare synth. This exact setup varies greatly between DAWs. Having said that, it is imperaitive to set Captain Chords to MIDI OUT before attempting the routing.
lightbulb_outline
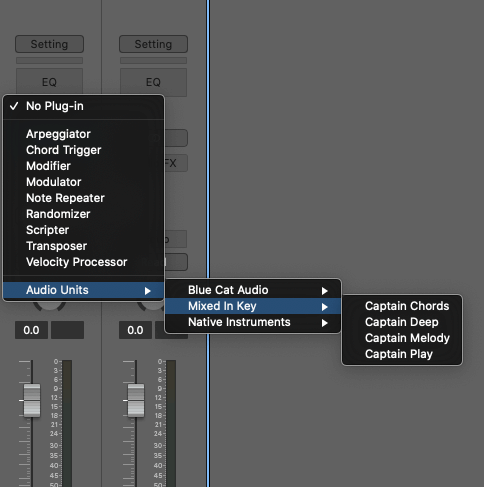
Tip: In Logic Pro, routing is achieved by using Captain Plugins as a MIDI FX insert, and adding your 3rd-party synth as an AU Instrument.
Your channel strip should look like this:
How to use Hardware Synths with Captain Plugins
You can route Captain to your hardware synths inside your DAW. Check out this handy guide explaining how to set it up.
Saving a preset
If you have created a custom rhythm arrangement or chord progression and want to recall it in another project, you can simply save it as a preset within Captain Chords.
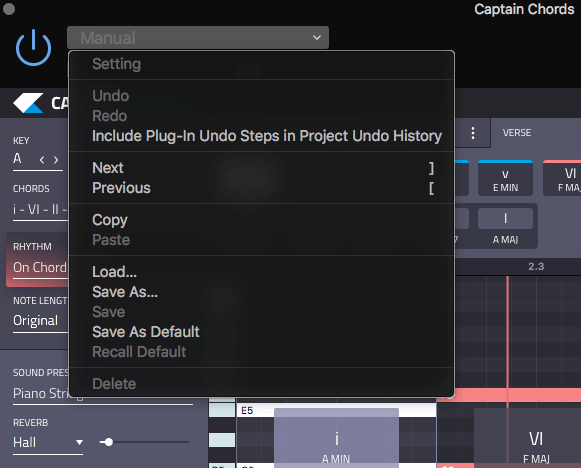
From the tab’s ‘3-dot’ menu menu, choose to ‘SAVE AS’ and name the preset you would like to save.
It can be recalled at any time by entering the same menu and choosing ‘LOAD’
Shortcuts
Mac
Function
Shortcut
Drag to copy
Option + Click + Drag
Cycle through Magic Buttons
Up & Down Arrows
Cycle through chords on canvas
Left & Right Arrows
Cycle through Magic Buttons
Z-M, A-J, Q-U (3 octaves)
Change chord octave
Shift + Up & Down Arrows
Move single chord note
Click to select note + Up & Down Arrows
Select all
Command + A
Delete Chord/Note
Select note/chord (click or marquee tool) Press Delete
Play/Stop
Spacebar
New/delete note
Double click on canvas/note
Windows
Function
Shortcut
Drag to copy
Control + Click + Drag
Undo
Control + Z
Cycle through Magic Buttons
1 – 7
Cycle through chords on canvas
Left & Right Arrows
Cycle through Magic Buttons
Z-M, A-J, Q-U (3 octaves)
Move single chord note
Click to select note + Up & Down Arrows
Select all
Use Marquee Tool
Delete Chord/Note
Select note/chord (click or marquee tool) Press Delete
Play/Stop
Spacebar
New/delete note
Double click on canvas/note
Additional settings
‘UNDO’/‘REDO’
Use these options to correct any mistakes or step forward if the ‘UNDO’ action is pressed an incorrect number of times.
This action can also be controlled by your DAW for increasing workflow, choose the option to ‘Include Plug-In Undo Steps in Project Undo History’
‘Keep playing MIDI notes when the plugin window is closed’
This option allows Captain Chords to continue to play the notes within its own sequencer when the user interface is closed.
Go to the settings option in Captain Chords and tick/untick the relevant box to your preference.


 to switch to the Rhthm Record screen. You can now see a blank screen with your chords displayed as ‘ghsot notes’ behind, with some simple controls in the piano-roll, and some additional controls above.
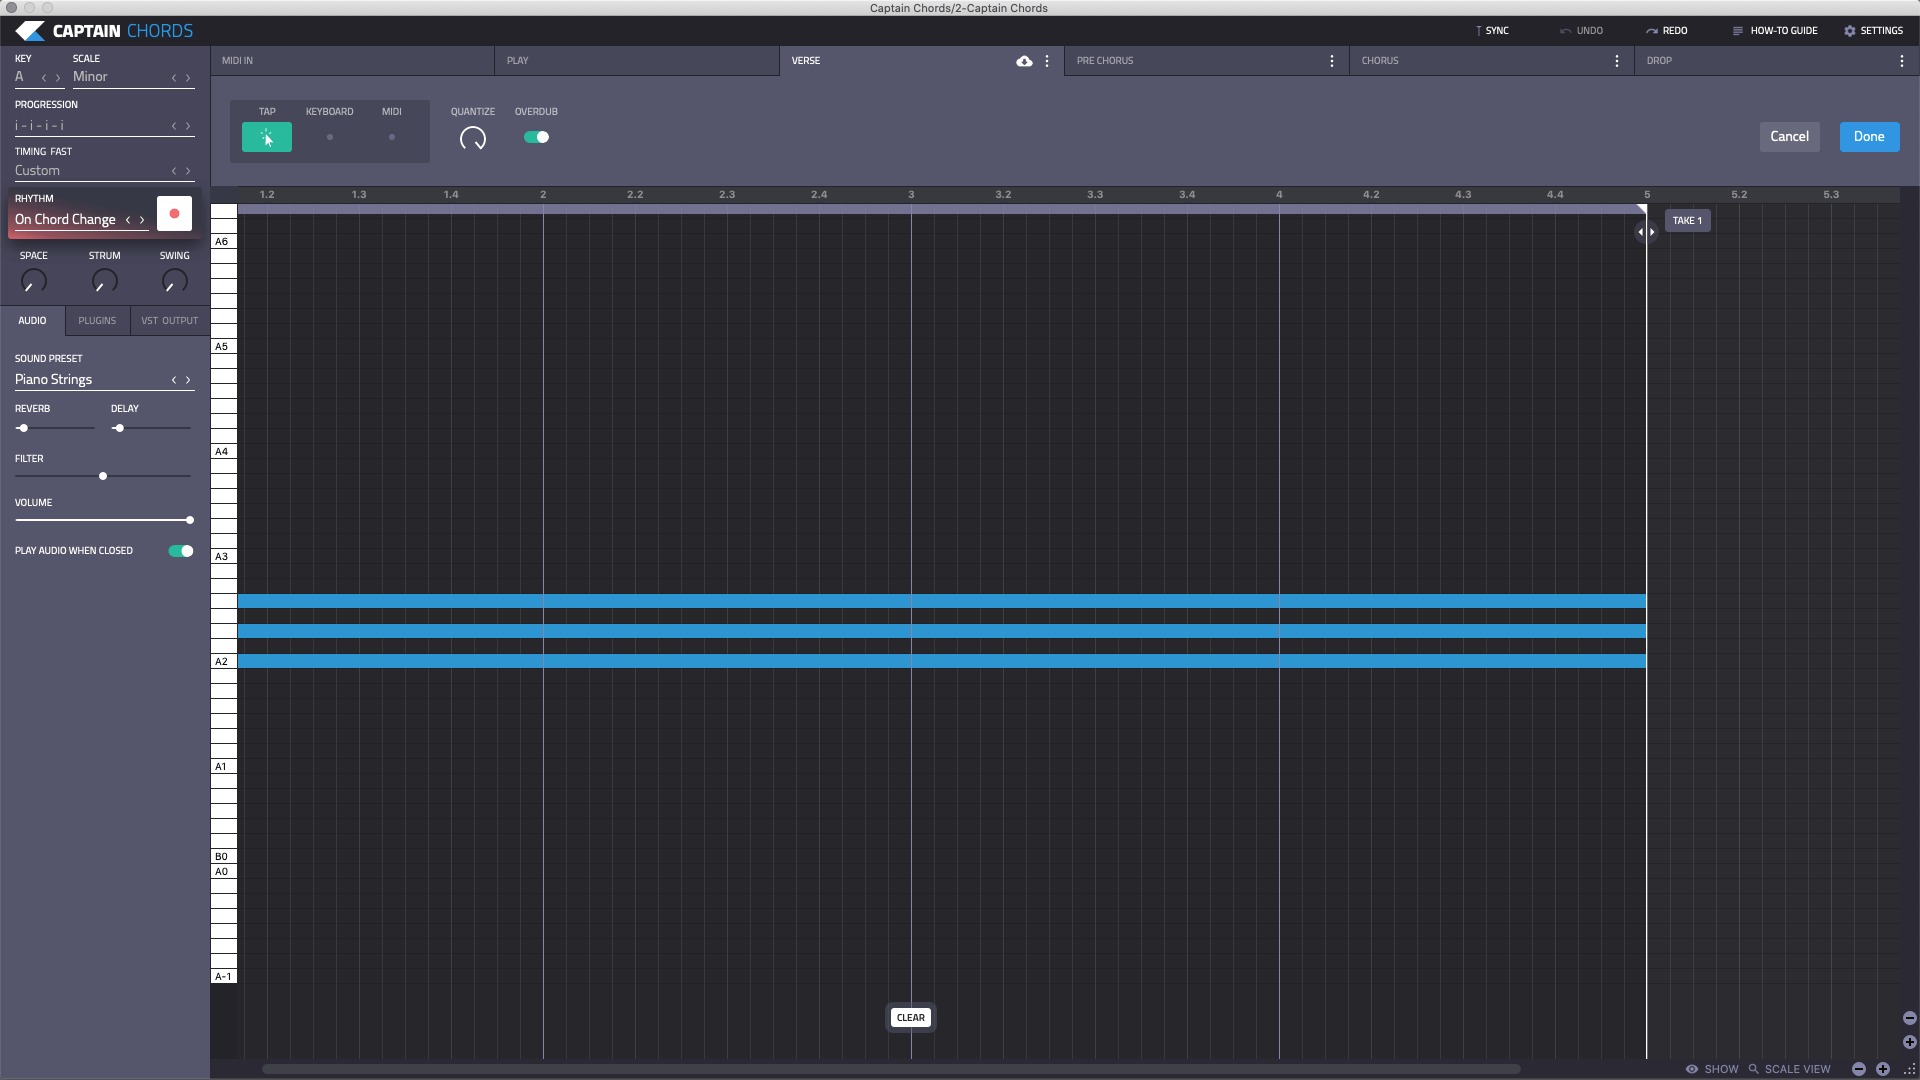


 within the selected tab. Additionally, you can choose to save your chord progression as an industry stand .mid (MIDI) file to your computer.
 – if you’re using a 3rd party plugin, you’ll need to return to the Audio window, disable the button, and gp back to your 3rd party plugin tab.