Your Cart
Your cart is empty
There are no items in your cart
Keep shopping

Included Software:
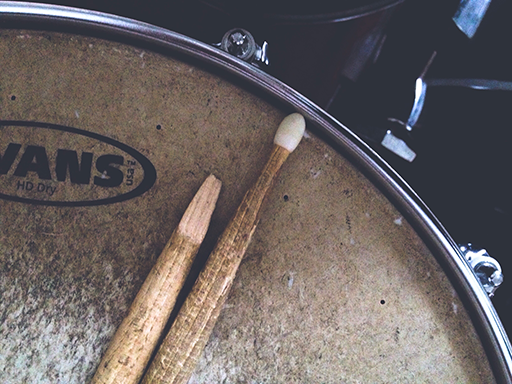
Drum and Bass, DnB, Drum’n Bass, Jungle, that really fast music in racing video games is a sample based music primarily focusing on the drums and the bass. Other elements like melody, chords and atmosphere tie the main body of a track together into one cohesive piece. First let’s quickly talk about a very important sample that started it all.
In 1969 a band called The Winstons released a track called “Amen Brother”, the b-side of the chart topping single “Color Him Father”. “Amen Brother” features a six-second drum sample (starting at 1:26) that was used extensively in early hip hop and sample-based music, and became the basis for drum and bass and jungle music. This short sample became known as the ‘amen break’ and spawned a plethora of entire subcultures like breakbeat, hip hop, trip hop, new age etc. which we still listen to today.
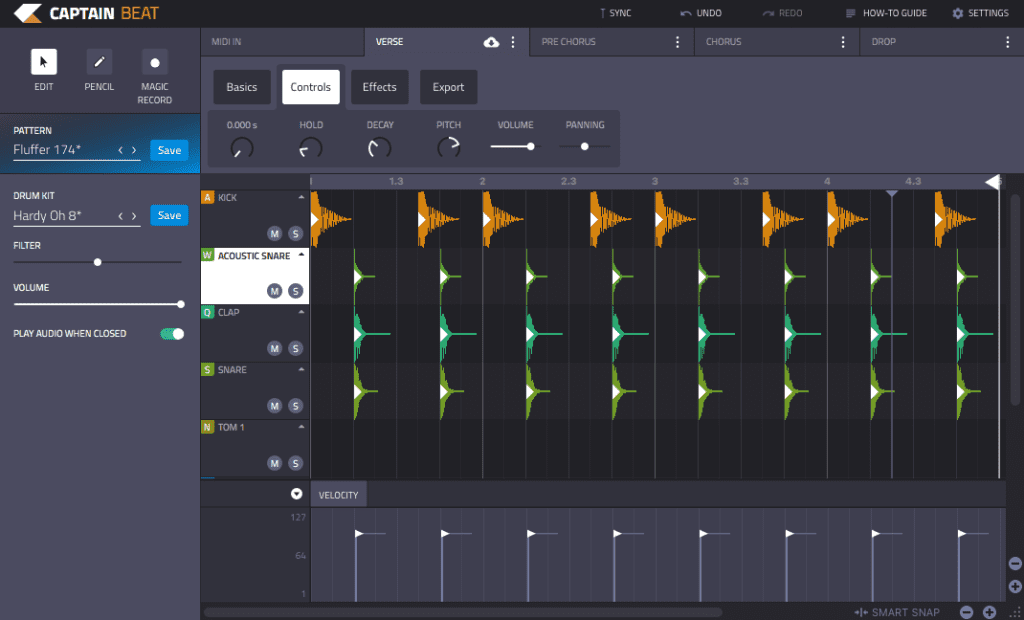
Create a four bar loop within Captain Beat consisting of a basic two step pattern for the kick and the snare. The snare is layered with an acoustic snare as well as a clap. Try playing around with the delay and hold on each element to make it relatively short and snappy. In the audio example below, the kick has enough weight to it that it can hold its own, but sometimes you might need to layer it with another kick and carve out any conflicting frequencies using an EQ.
The great thing about using Captain Beat is that you can edit the pitch, hold, decay, volume and panning of each sample easily by selecting the sample and using the controls tab at the top. Matching your kick and snare to the key of your song can add a very nice touch; this can be accomplished in Captain Beat by tuning the sample using the Pitch control.
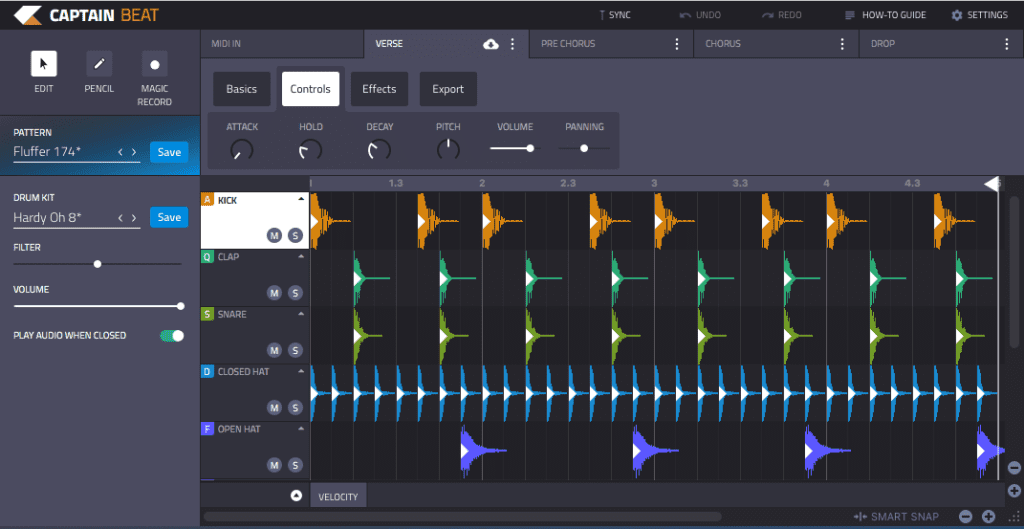
Continue to add Closed Hats, Open Hats, Ride Cymbal, Tambourine and Shaker to add some more movement to the loop. All of these types of drums samples can all be found within Captain Beat. There is also a Polaris Pattern Pack within Captain Beat specifically made for drum and bass. You can browse through the many templates already provided and switch out any drum sound and edit them to your liking. If you’d like, you can leave the drums as they are for a modern sound.
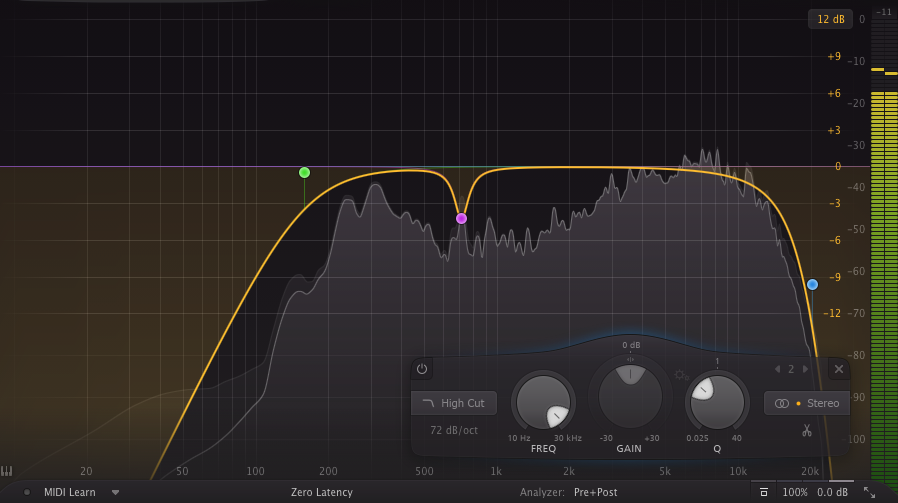
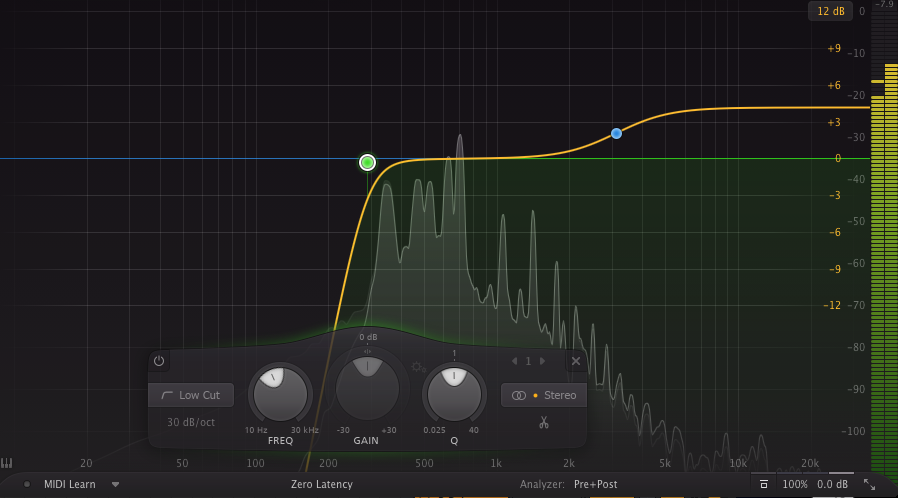
For this example we will be adding an amen break sample to the drums. You can find loads of free sample packs containing the amen break online. The amen break in the background adds a bit more glue to tie the drums together nicely. Treat the amen break with an EQ to clean it up so it fits just right. A low cut around 160hz will get rid of some of the low end muddiness, a steep high cut around 20Khz lessens scratchy and sharp frequencies, and a slight duck around 700hz makes room for our non amen break snare. A very important part of the process here is making sure all of the drum sounds compliment each other and nothing clashes or, as it could topple the whole thing over.
There are a very wide variety of styles within drum and bass and the sound to your drums is completely up to you. If you’d like to have a more “classic” sound, keep the amen break running in the background of your drums. If you’d like a quick-cut clean sound, focus on using modern sounding drum samples. Experiment and have fun with it!
Pro Tip: Group your kicks and snares together and route them to separate send channels where you can add some saturation, a transient plugin and a tiny bit of reverb to really make your kick and snare pop through the mix.
The bass is just as important within Drum and Bass as the drums are. The low end of a track drives the song forward and gives it some momentum. We will create a very simple but effective bass sound used in a lot of liquid drum and bass. The type of bass used in this genre is usually made up of a simple sine wave with a few plugins to really help push the transients up for a definitive sound.
Let’s start with the sub bass. In this example, we’ll use Ableton’s Operator.

We will only need to use one oscillator for this sound. Put the Attack up to about 10ms and the release to around 100ms to get rid of the clickiness of the sound.
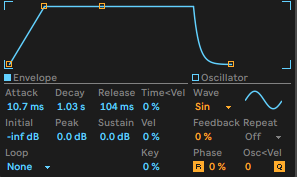
Next turn on the glide function which will tie the notes together nicely when played. Lastly, go in with a saturation/distortion plugin like iZotope’s Trash 2 to add some gentle saturation and smooth fuzz to the sub bass so that it fills out all of those low frequencies nicely.
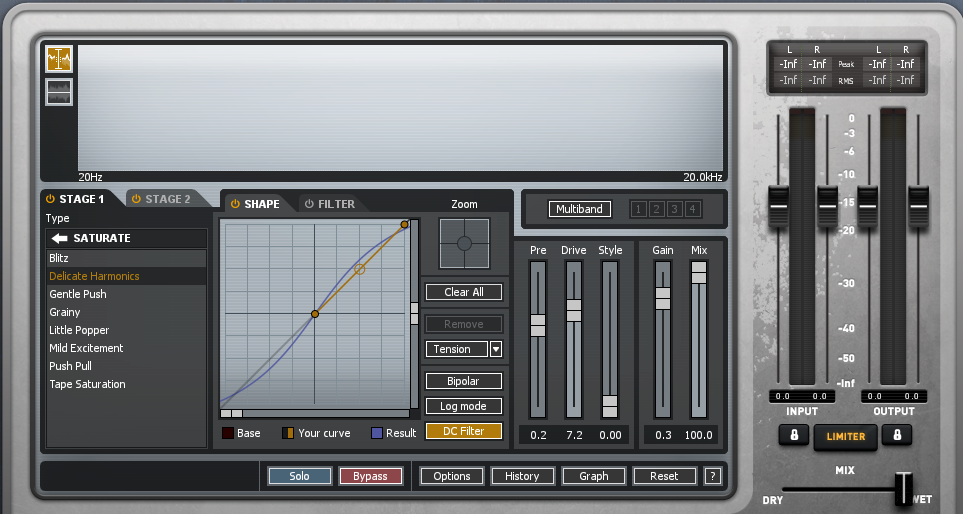
Now that we have a nice full sub, we will add a top layer to our sub to complete the bass sound. In this case, try using a synth like FM8 and make a simple rolling bass sound and layer it onto the sub using the same note pattern. Don’t be afraid to go in and really mess with the sound until you find something that you like.
Pro Tip: Use sidechaining to duck the sub when the kick drum comes in so that the mix sounds clean and precise. Try not to overdo it, as this will cause a pumping effect. A fast attack and release setting on the side chain compressor will do the trick.
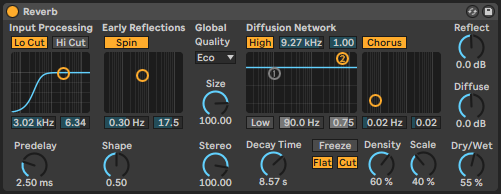
A little bit of atmosphere goes a long way. To build a chord progression, create a simple chord progression using Captain Chords. We can use this plugin’s built in reverb function and delay to add some magic to the sound, then take it one step further with a second instance of reverb. Insert any reverb plugin onto the channel with Captain Chords and play around with the decay time, stereo width, the size of the reverb and the density to create a really stunning sound. Sometimes you can take a very generic sound and turn it into a lush sounding pad by adding the right amount of reverb to it so the notes all slide into one another gently.
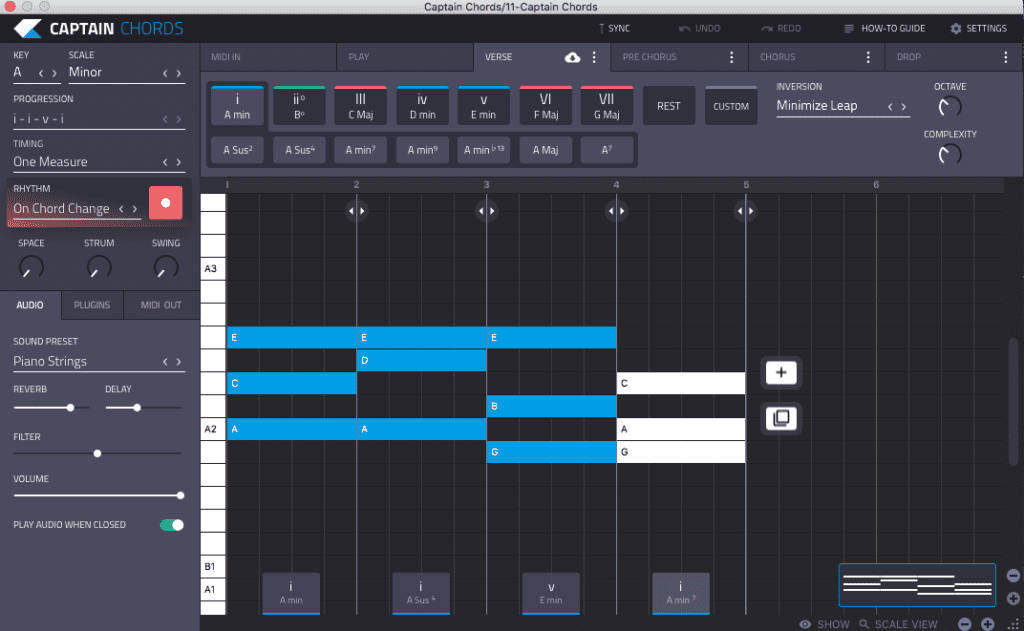
However, be careful with using too much decay time as it can make the sound very muddy and a little too busy with everything else going on. The idea here is to take a simple sound with reverb infused into it and just drape it over the track like a blanket. For an added effect, take a pad sound and sidechain it to the kick using a simple compressor to get a nice pumping effect everytime the kick comes in.
At the end of the process it will sound something like this.
Pro Tip: Experiment with layering many sounds together to form one cohesive unit. Use some reverb to glue them all together, group the sounds and sidechain them to the kick channel.
Last but not least we are going to create a melody line to move the track along nicely and add some phrasing to the music.
Something as simple as a piano with a touch of reverb and some EQ will do wonders for a track like this. You can also try using plucky sounds, violins or maybe a more digital synthesized sound tickles your fancy. In this example, you’ll hear a piano virtual instrument with added width along with some reverb and a little bit of compression within the plugin. You can do all of this with stock plugins, they just won’t be integrated into the VST of your choosing.
It’s very important when using pianos to be gentle with your compression and reverb. Don’t overdo it otherwise the sound will become very harsh and get lost in the rest of the track. You’ll want the piano to stand above everything as a melody; make sure you utilize the full spectrum of the octaves in order to really achieve a dreamlike sound. If you’re going for something a little more aggressive, try using a synth lead with a bit of distortion and saturation. Reverb can still be used in this instance but it will create an “epic” sound as opposed to the “dreamy” sound from the piano.
Next, add an EQ to the piano, get rid of some of the low end and brighten up the highs.
When everything comes together this is the end result!
So… what are you waiting for? Use this knowledge to create your own Drum and Bass tunes!