Mixing audio tracks until it sounds like music has been a staple ingredient of music production since the advent of recorded music. The technology has changed dramatically over the years, and nowadays you can achieve professional-grade mixdowns entirely ‘in the box’. Whether recording acoustic instruments or hardware synths, samplers or simply mixing tracks entirely created inside your DAW, quality mixing is crucial. These 10 steps for a better mixdown will help you level up your mixing down!
What is a mixdown?
It may be self-explanatory, but mixing the tracks in your project together until they sound good is known as a mixdown. In essence, it’s the simplest thing imaginable… like stacking cans of soup or putting marbles in a jar. In reality, as any music producer will tell you, it’s a fiendishly difficult thing to be great at. Somewhere between a science, an art, and, frankly, witchcraft, mixing down tests your skill, patience, hearing and stamina!
In some ways, it’s gotten a lot easier over the years, as we have all manner of visual aids, plugins for every possible eventuality, powerful DAWs and more ‘in the box’ instruments and sample packs than we could ever use. However, while many electronic produvcers never need to worry about the nuances of recording live orchestras, the bar has been set s high, that in order to make professional-grade music in any genre, the mixdown needs to be beyond perfect. That’s a fair amount of pressure!
Also, with home studio gear becoming increasingly affordable, many music producers are able to record live instruments, vocals and percussion to add into their mixes – without neeing a trip to a recording studio. This is awesome, as adding live instruments can really help your music stand out. But, it means additional concerns with recording quality, interfaces, conversion and pre-amps that purely in-the-box producers need not worry about.
Isn’t mixing down a mix engineer’s job?
It sure is! If you’re a major artist on a large, well-funded record label. The profession of mix engineer is as much of a craft now as it ever was, but the simple truth is that most of us, particularly those in electronic music genres, need to be our own mix engineers, producers, composers, marketers, promoters and more. Knowing how to mixdown effectively is essential – it’s also a lot of fun and will help you understand the other elements of your craft so much better.
Write Chords Faster with Captain Chords
Use Captain Plugins to write your own Chord Progressions, Hooks, Melodies and Basslines
It’s so important to work with high quality recorded material. If recording instruments, that means checking for noise floors, feedback, electronic hums or any other unwanted noise in the recording chain. You also need to check you’re not going into the red while recording, abnd have got good enough mics, pre-amps and interfaces to adequately transfer the recordings from your instruments to your DAW. While you can spend thousands of bucks on these things, there are some brilliant and affordable options, too.
If using samples, that means using high quality, well recorded ones. If using VST synths, it means making sure you’re not clipping when recording sessions.
As you can see it’s a bit more fiddly (and expensive) getting a good recording than identifying a good sample or not clipping your soft synth. The result, though, can be a unique, skilful, human performance in your electronic music.
2. EQ unwanted low frequencies.
EQ is one of the most important parts of mixing, and you could write a book on it. Many have, in fact, but if a book is a little daunting, check out our Ultimate Guide to EQ instead!
While there’s much more to say on the topic, one thing that is ubiquitous for good mixes is to EQ any nasty or unwanted frquencies out.
Mud, wool, noise, hiss, screeches… begone!
Unwanted souns can take any of the above forms, and a few more to boot. Knowing exactly how they manifest will involve investigating your audio, both solo and ensemble. Once identified, try filtering them out and see if the mix becomes clearer. This is a short answer to a big question, and there is much more to cover, so refer to the above article if you need more detail on EQ techniques.
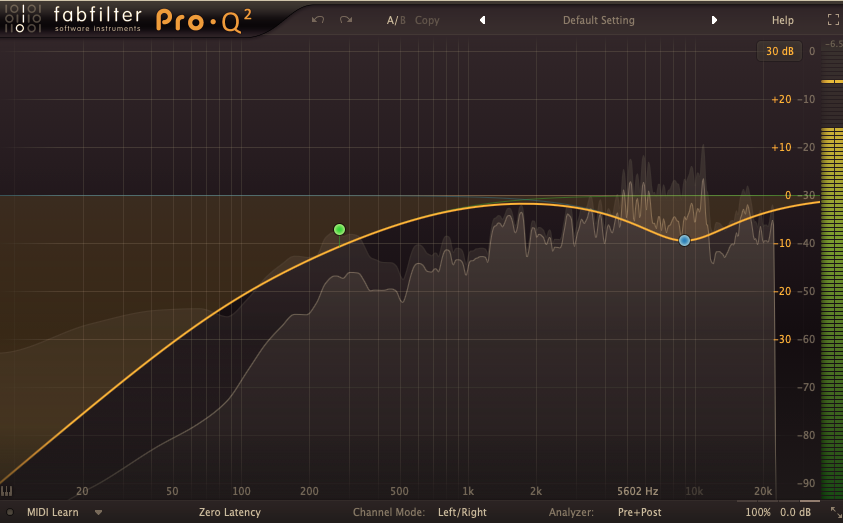
For this article, we want to talk about one of the biggest steps you can take to a better mixdown: filtering low end in non-bass sounds.
Try running a high-pass filter from the low-mids down on instruments such as (non-bass) synths, guitars, drums, just about anything in your mix. Any harmonic energy lower than around 100-120Hz is likely to add muddiness to the bass-shaping in your mix. It’s unlikely to add anything useful, so get rid of it.
Roll-off subs in bass sounds, too.
Frequencies below 30Hz can neither be heard by the human ear or reproduced on even the biggest sound systems. However, they can add harmonics to your audible sub lows, which may create muddiness too. Roll these off with a high pass, too.
3. Embrace the stereo field.
Left, Right, Centre. This is the stereo field. A sound can be panned anywhere from +/-50 Left or Right, or dead Centre. The closer to the centre, the more it is perceived by the listener as equally present in both left and right speaker. Sounds which are panned harder left sound quieter in the right speaker, and vice versa. And sounds panned very hard left or right also sound quieter overall than they would closer to the centre. So, if you’ve nailed your volumes but decide to pan things a little harder, remember to check your levels afterwards and adjust if necessary.
Ultimately, the stereo field helps the human brain to differentiate sounds, so it’s extra useful when trying to mix sounds with similar frequencies. Synths and guitars may contain many similar frequencies, and EQing may diminish the power of one or both sounds. Try panning one +20-30 left and the other the same on the right. It’s amazing how often this simple trick allows space for both to flourish.
It’s also important to remeber to maintain an overall balance to your stereo field. Therefore, whenever panning one sound left, try and balance it with another similar sound to the right. The sounds don’t need to be completely similar, but similar attack and decay values help us perceive balance, as do sounds with fairly similar harmonic content. But, don’t break the golden rule:
Fundamental sounds should stay in the centre.
We’re talking kicks, snares, and bass here. These soujnds carry the low end power of your mix, and they invariably need to be in the centre. That said, you can hapily widen the higher mids and above of a snare or bass instrument… but the lower end needs to be central. This is because the lower end frequencies take up the most room in your mix. Imbalancing these will cause all sorts of reproduction issues. Meanwhile, widening them or panning them, even if they achieve balance, will push out lots of other sounds in your stereo field.
Mono low end fundamentals for extra clarity.
For this reason, many producers choose to mono their kicks and sub-lows in the low end. Usually mono from around 120Hz and below is sufficient. This simple trick will help you avoid swimming bass issues that can mess up the impact of your low end and cause nasty phase issues.
4. Compression (but not too much).
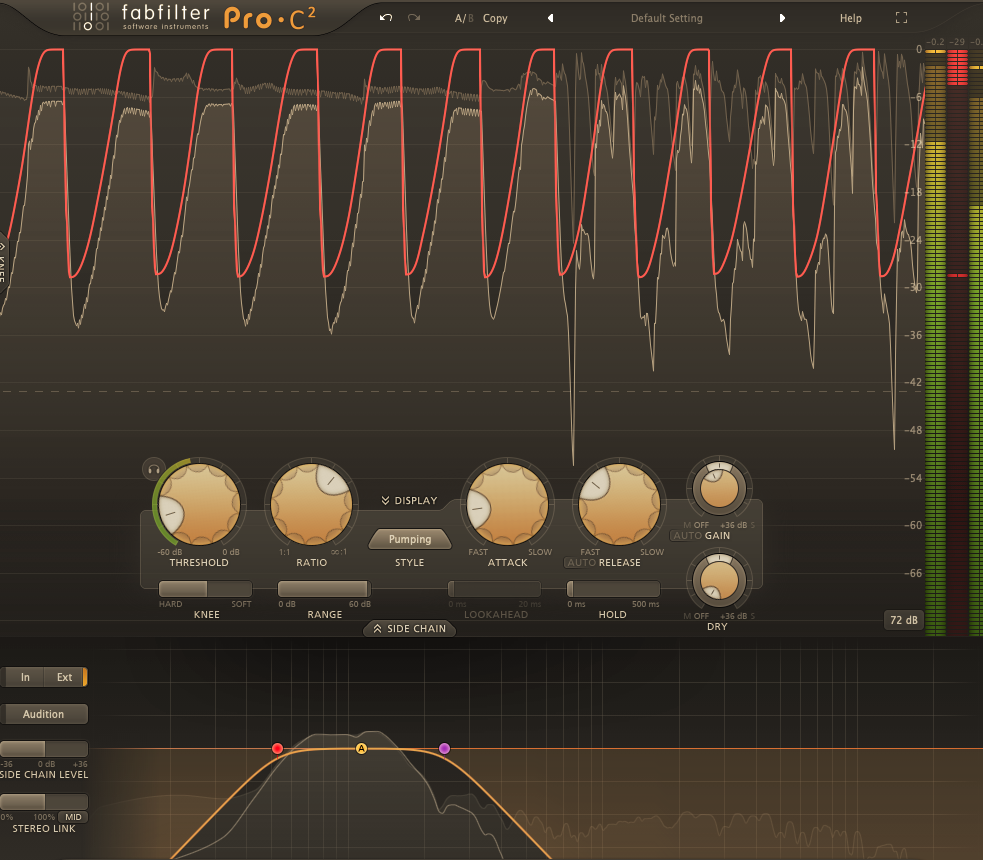
Compression is another gargantuan topic that we could talk about all day. However, we’ll try and narrow the conversation to the nuts and bolts of using it for better mixdowns. Fundamentally, compression is about volume. Normally, you use compression to control the peak volume of a sound ie the loudest part of the sound. By setting a maximum threshold, you can tell the compressor to squash anything that surpasses it. This kind of acts like folding the peak on top of itself; the resulting peak is no louder than the threshold level, but it’s denser, and therefore seems more emphatic. There are many other vital controls in a compressor, not to mention plenty of compressor types. Hardware compressors all achieve this ‘folding/squashing’ with subtky different sound qualities, which is why some units are so cherished. These units have all been recreated in VST form, while many other VST compressors have options to switch between classic compression models.
One major function of compression is as an effective method of balancing sounds in a mix. Balance being one of the most important considerations in the mixdown process, we can infer the power of compression to achieve better mixdowns. By controlling and thickening the attack of a sound, you can then turn the sound up without spoiling the mix with wild peaks. This also helps us hear more of the tail of the sound – since the overall volume is raised.
There are some other applications of compression that are particularly useful for achieving better mixdowns.
Advanced compression tricks for better mixdowns:
Parallel Compression.
Bus Compression.
Multiband Compression.
Parallel Compression.
Also known as New York Compression, this technique is particularly effective on kicks, snares and bass instruments. It can also be effective on a full drum bus. The principle is simple: Have an aggreesive compressor working alongside your regular compression on a parallel bus or send channel. This parrallel compression isn’t meantto be heard solo, and probably sounds way to abrasive. But, it will have intensely compressed peaks. In tandem with your regular compression, you get even greater definition of the attacks. The ultra-squashed signal on your parallel compression track only contributes to attack emphasis, while the main channel’s compression still carries the rich, natural tones you want to maintain.
Bus Compression.
Also known as Glue Compression, this is all about bindng your sounds together. Useful if, say, you have several guitar tracks, backing vocals, grouped percussion etc, and want them to sound unified. By creating a bus for the group of sounds, and adding a compressor to it, we can apply the same compression to all channels (without maxing out your CPU). This enables us to achieve a ‘glued together’, unified sound.
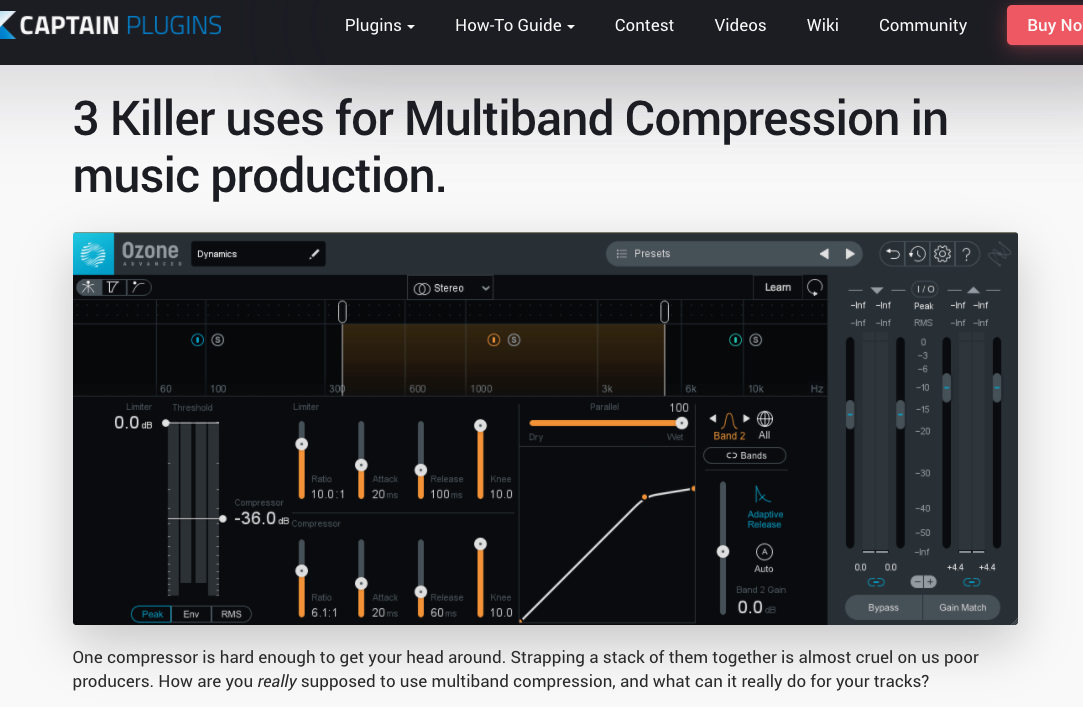
Multiband Compression.
Mainly used for fixing recording issues, this should be a last resort – if you can get better recordings, it’s always better (see above advice on polishing turds). However, if you have uneven vocals, muddy bass or lost transients, and can’t re-record, multiband compression can help.
While compression is certainly very powerful when used correctly, it can also ruin a mix. Most of the time, you’ll want to retain enough of the natural transient detail that things still sound ‘real’, and avoid squashing the life out of your sounds. Over zealous use of compression is one of the key indicators of an amateurish mix. If you’re trying to maintain some transient energy, try allowing 20ms or more of Attack before the compressor engages.
5. Doubling up.
When using recorded instruments, it can be extremely effective to layer recordings with additional takes of the same part. The performer will not play exactly the same twice, albeit close enough. By layering these takes together, a thicker sound is achieved, particularly if you use panning to send some takes left and right.
Doubling is better than duplicating the same signal, because you avoid any risk of phase cancellation, and slight timing/velocity discrepancies are often more natural-sounding to our ears. Remember, balance is the buzzword. If panning, you may want the overall sound to be weighted further towards one side, so use volume to reduce the loudness of one side signal. In most cases, you will want to use a centred take to give emphasised power.
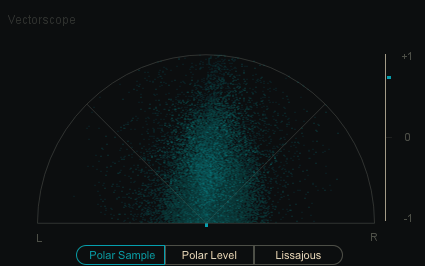
While doubling is generally preferable, you can achieve this effect with duplicated tracks too. If duplicating – for instance if you only have one recorded take – try making minor timing adjustments, or use a Haas effect. Then, check the overall effect in mono to identify any phase cancellation. You can also use tools such as Izotope’s Ozone 9 Imager to check for phase issues.
On the double…
Once you’ve got your lovely and thick doubled sound, you can either keep the whole group processing the same as the main take, or you can go wild with sound design. It’s really creative and a lot of fun to heavily saturate, reverberate, delay or modulate the side signals while the main take plays straight. There are no rules, or limits – experiment with different processes on the side signals and discover your own sound design magic tricks!
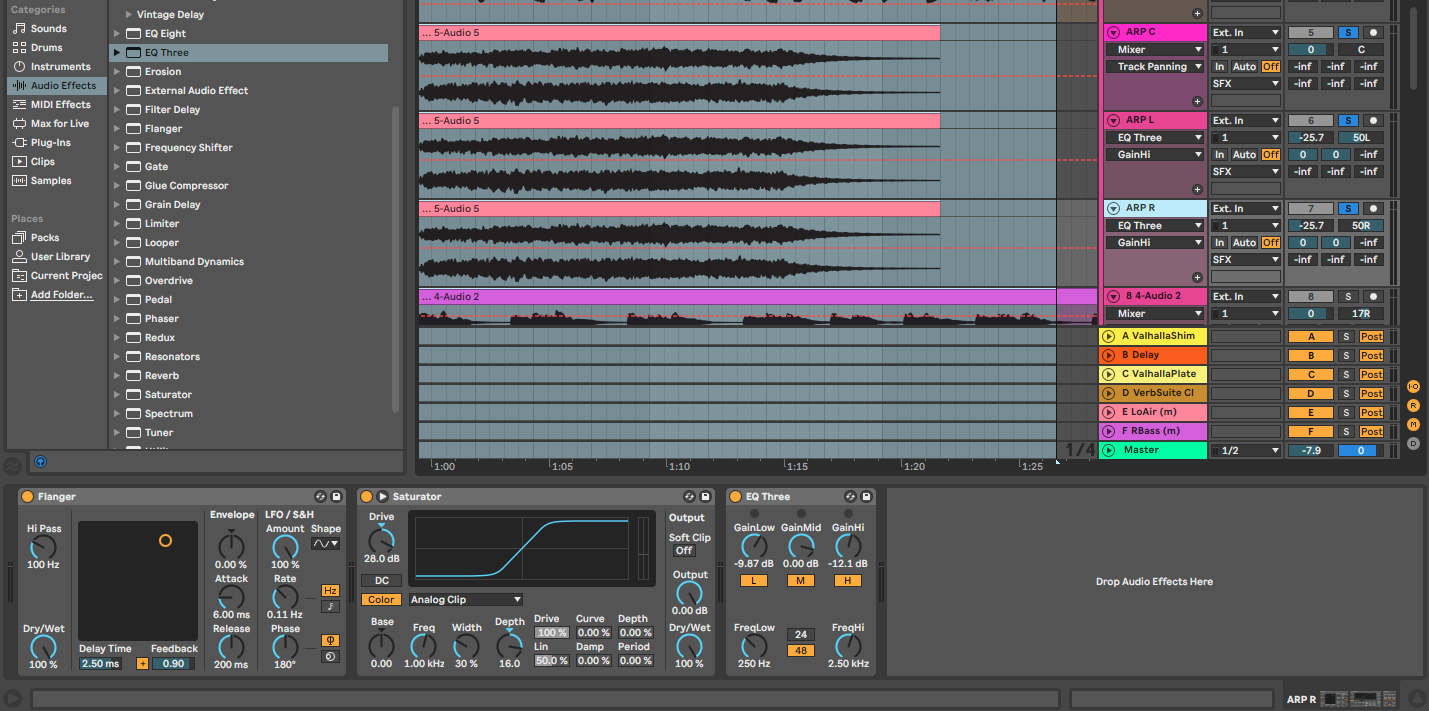
In the following example, we have a nice arpeggio synth line with no panning:
Twice duplicated, there is now one version panned hard left, one hard right and the original centred audio. Keeping the centre version clean, we can compress, saturate and echo the left and right channels. This completely transforms the aesthetic, and massively increases the stereo presence:
Note that in order to avoid phasing issues, I subtly shifted the start points of each version and checked in mono for issues.
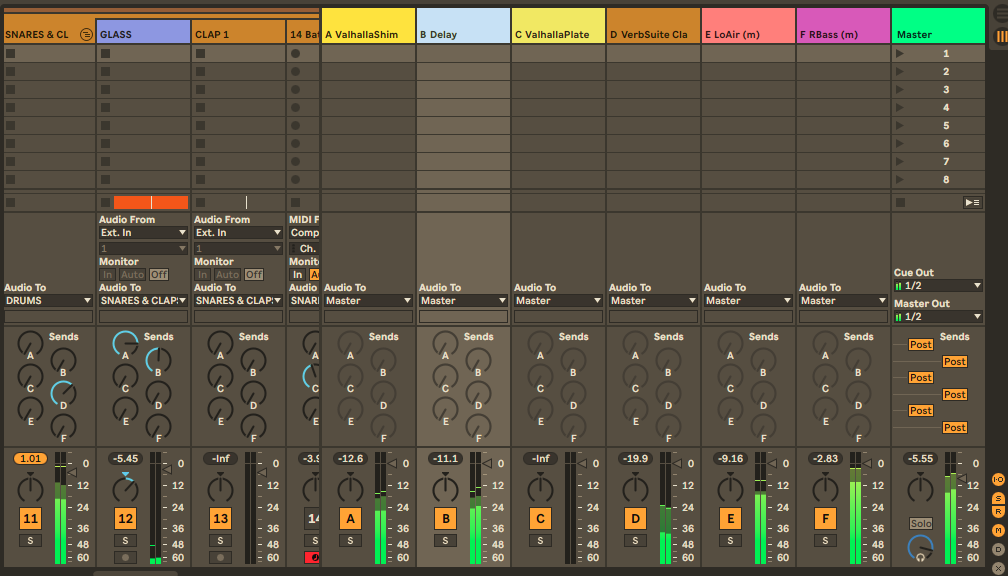
6. Busses and Sends.
To the left is a bus marked ‘Snares and Claps’ while the right of this image shows several Send channels, each with different effect units running.
On a purely practical level, using busses and sends with drastically reduce your CPU load. Anyone who’s suffered the frustration of a creaking, freezing project that can’t keep up with your CPU will know the pain I speak of. So, instead of using the same compression or reverb on several tracks, try grouping them and using one instance of the compressor or reverb instead. This is not just for comression and reverb, either… any processing that can be appliued to a bus instead of an individual channel and not negatively impact your mixdown is worth investigating.
What’s the difference between a bus and a send?
Busses.
Busses, AKA groups, are created by taking a group of channels and creating a bus/group for them all. Imagine you have some pieces of paper in your hand. You might find them manageable enough, but as you start adding more paper, keeping them all organised can get tricky. A bus is like a folder for your pieces of paper. 20 sheets of peper in a folder is much easier to control. You can apply processing to all your channels in the bus, simply by adding one processor to the bus itself. The individual channels can still be processed separately, but they won’t reach the main mix until theyve gone through their bus first.
Busses are super useful for reducing CPU load, glueing sounds together, and controlling mix levels. It’s far easier to get a sub-mix perfect, such as hi-hats and cymbals, on its own, and then adjust the overall level to suit the main mix. Without a bus you’d be individually tweaking levels of multiple channels to achieve the same result. Save your brainpower for the rest of the mix!
Sends.
Sometimes called ‘Send and Return’ or just ‘Return’ channels, these are similar to busses in that they send information from multiple channels to one destination channel. In both cases, you can dial in the precise amount of channel that is sent to any given Send/Return or Bus, from 1-100%. This has a profound effect on the depth of processing achieved.
So how do I choose which to use?
Busses are great for grouping channels together into categories or for equal processing. They are super useful for sub-mixing, perfecting levels and keeping track of your mixdown. Send/Return channels are awesome for applying different amounts of the same process to different instruments, or for using a super powerful effect, but controlling exactly how much gets returned to the mix. It comes own to workflow, and you’ll find your own method that works for you. I tend to use busses for grouping similar sounds, such as snares, or hi-hats. Then I might make a new bus for the ensemble drums, and process that in such a way that the drums bind together – they sound more like a drum kt than a disparate collection of drum sounds.
Similarly, I like to group synths with similar timbres together, or vocals, guitars and SFX sounds. Applying bus processing can often make the group fit together more naturally.
I tend to use Send/Returns for reverbs, delays and other sound effect processing, so I can dial in the exact amount I want, but am not restricted to only processing the sounds in one bus or group. I can send a small amount of hi-hats, percussion and claps through a reverb return, for instance, but ial it up more for the nare, should I want a heavier reverb on the snare. I can also use the exact same reverb on other instruments, and don’t need to create duplicate reverbs – thus saving on CPU and making my life easier.
7. Gain-Staging/Headroom.
In Ableton Live, meters clearly display the signal level as it passes through each plugin in the effect chain. Here. the drum bus has plenty of signal, but no red lights means no digital clipping.
The silent killer of many a mixdown – gain-staging is seemingly simple, but prone to catch out even seasoned engineers. It’s essentially the process of ensuring a good amount of signal goes into your channel, then on to your effects chain, through each effect without clipping, and then into the sub-mix. It’s key to leave enough headroom to avoid clipping, and to ensure that none of the processors receive too little or too much signal. Too little signal can force the processor to boost too much, and potentially amplify undesired things like any floor noise, channel hiss etc. Too much and we have digital clipping. One day, someone will invent a way of making digital clipping sound warm and overdriven, like analog clipping often is. But until then, it’s a robotic crackle that every mixdown needs exactly none of.
Volume is probably the single most important aspect of mixing down. Even when using compression or EQing out unnecesary frequencies, we’re ultimately trying to get all the sounds in our track to sit together at the right volume. Mixdowns quickly get busy and can feel like hard work. If you feel the onset of fatigue, or just want to reset your ears, this technique works wonders: Turn everything down, and build up your mix again.
Start with the most important sounds – drums (starting with kick and snare, then bring in the rest), then bass, then chords, vocals and backing instruments. Bring them in one by one from the fader zero position. As each group enters the mix, you’ll be acutely conscious of it and hear it in greater detail. Trust your judgement and find the sweet spot for each sound. Voila! A decent mix is forming!
9. Reference.
Did you hear the story about the mix engineer entering a client’s studio, paid by the hour, and spending the first 40 minutes listening to a mixtape? The client was furious. How could this so-called expert come in and waste nearly an hour listening to his own music?
The reason was simple, and ultimately saved much more wasted time down the line. If the engineer didn’t know exactly how the room reproduced his favorite songs, how could he accurately mixdown the client’s song? By using music the engineers was intimately familiar with as a reference, they were able to fully understand the mixing environment, and thus work faster and sarter thereafter.
The moral of the story is, understand your mixing environment as best you can, and compare what you’re doing to professional music in the same genre. It helps to take occasional breaks to check your mix against pro mixes. Likewise, if there’s any doubt about how your mix environment reproduces sound, reference against music you’re familiar with.
One of the most common issues I come up against in my mastering work, is clients with bass-heavy mixes lacking midrange. They probably have a less than ideal mix environment and hear more midrange than there really is, and less bass. As a result, they can’t mixdown accurately.
10. Take breaks.
Even full-time, professional producers need to keep smiling as they go – otherwise what’s the point? If you’re not loving it, take a break and come back to it. Likewise, your ears will get fatigued during long sessions, so go do something else for a bit if you start losing focus. It can be a different musical task, or, probably better, something completely different. A breath of fresh air can be a real, er, breath of fresh air for your music production!
About the author:
Adam Hignell is a music producer, mastering engineer, DJ and label-owner based in Brighton, UK. When not providing content and tech support for Mixed In Key, he produces music under the alias Don Dayglow, provides professional mastering and mixing services, and runs the independent Disco/House label Particle Zoo.