Captain Melody can integrate seamlessly with Captain Chords, or function as a standalone compositional tool.
You can connect it to Captain Chords or choose your own Key and Scale.
Pegasus Workflow in Captain Melody
Connecting Captain Melody with your DAW
Select Captain Melody from your VST or AU plugins menu. Add it to a MIDI channel as an Instrument. Logic users can also add it as a MIDI FX unit. Melody integrates with your DAW exactly the same as the other plugins.
Connecting to Captain Chords
Choose option to ‘CONNECT’ to Captain Chords.
Standalone Mode
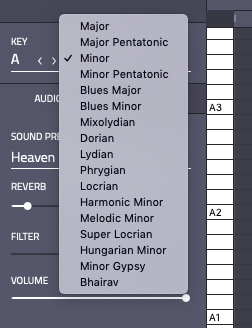
Select the key and scale.
Arrangement tabs link with Captain Chords
Captain Melody is designed to follow the chord progression created in Captain Chords for each individual tab, ‘VERSE’, ‘PRE CHORUS’, ‘CHORUS’ or ‘DROP’.
Alternatively you can create your own in standalone mode.
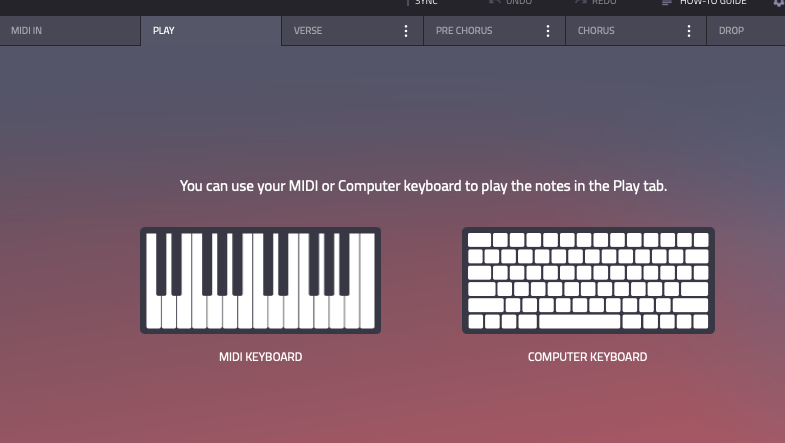
Jamming live with Captain Play
Similar to Captain Chords, Captain Melody can also be played live and recorded using the Captain Play tab.
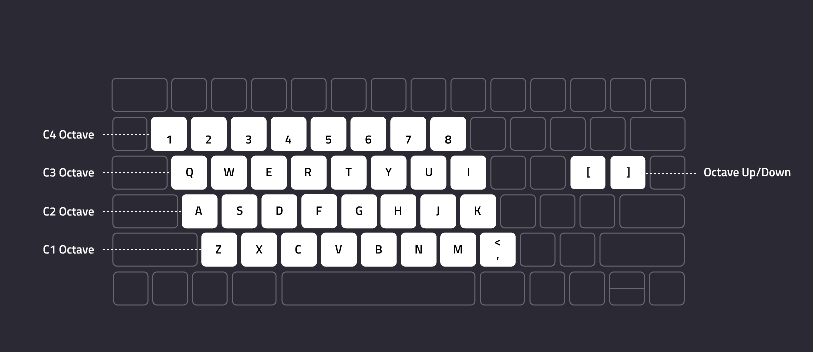
Use keys A – J to trigger individual notes (pitches) within your chosen key & scale.
Keys above and below row A – J will trigger the notes an octave above or below.
Bracket keys [ ] will move the four octave range up or down.
Choose to play Melodies or Chords.
Choose to use your Computer Keyboard or MIDI Keyboard.
Using Melody with 3rd party instruments
In Captain Melody 5, we introduced native 3rd-party plugin hosting. Since Plugin Hosting is a brand new feature, we have deliberately only allowed certain plugin instruments to work in this feature as they have been tested and shown to cause no issues.
We will be adding more features within plugin hosting and also whitelisting more 3rd party instruments as we develop the feature.
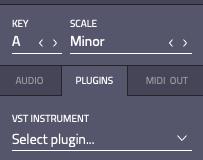
To enable 3rd party hosting, simply open Captain Melody, and select Plugins > VST Instrument, and press Scan. Captain Melody will scan your directories and add all whitelisted plugins to the VST Plugins menu inside Captain Melody.
Once the scan is complete, you will find all whitelisted plugins available in the VST Plugins menu. Simply press ‘Select Plugin’ to open the menu window.
3rd-party Plugin Hosting requires plugins to be located in the following locations on Windows machines: (On Mac OS, file location is not important.)
C:\Program Files\Steinberg\VSTPlugins
C:\Program Files\VSTPlugins
C:\Program Files\Common Files\VST2
C:\Program Files\Common Files\Steinberg\VST2
If your VST instruments are not in any of these locations then they will not be found, regardless of whether they are supported.
3rd-party Plugin Hosting: General operation.
Once you have selected your 3rd-party plugin, whatever you have composed in Captain Melody will be played directly through your selected plugin. Any adjustments you make in your 3rd-party plugin will be instantly reflected.
Dragging your MIDI clip to the Captain Melody channel timeline in your DAW will now result in the melody being played via your 3rd-party plugin.
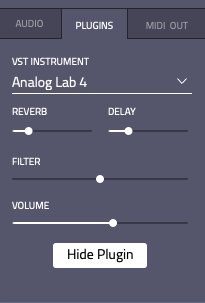
To change plugin, simply click in the name of your currently selected plugin to open the plugins menu.
‘Hide Plugin’ will close the 3rd-party plugin window without disabling the instrument itself.
‘Show plugin’ reopens the plugin interface.
Captain Melody’s Reverb, Delay, Filter and Volume controls can be engaged at any time while using 3rd-party plugins, and will be applied on top of any effects inside the 3rd-party interface.
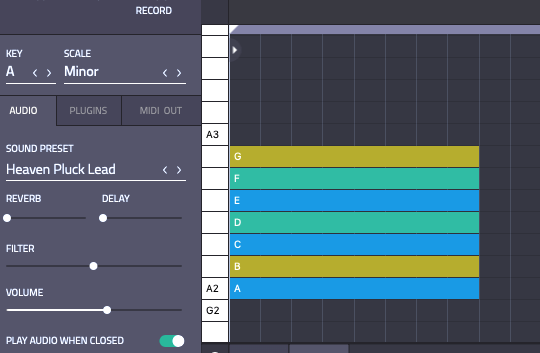
Should you need to disable or enable ‘Keep Playing Audio When Closed’, click ‘Audio’ next to the ‘VST Instruments’ tab, and toggle the button.
Note: When ‘Audio’ is selected, the 3rd-party Instrument will cease to be engaged, and sound will revert to the selected sound in Captain Melody’s sound library. However, to re-enable the 3rd-party instrument, re-select ‘VST Instruments’ after toggling the ‘Keep Playing Audio When Closed’ button.
lightbulb_outline
Tip: We have added compatibility with most well-known VST Plugin Instruments, from manufacturers such as Arturia, Native Instruments, U-He and more. This list will continually reviewed, so if a plugin of yours isn’t displaying, please email us at [email protected] and we’ll look into it.
3rd-Party Plugin Hosting will be refined and improved in due course. In the meantime, if you have any issues please use the legacy method, detailed below:
Similar to Captain Chords, Captain Melody can also use the generated MIDI to allow the sound source to come from a 3rd party soft-synth, or external hardware instrument.
Sound Presets and FX
When working inside tabs ‘VERSE’, ‘PRE CHORUS’, ‘CHORUS’ or ‘DROP’, the Sound Preset, Reverb, Delay, Filter and Volume can be adjusted
Tension View/Note colors
When notes are entered onto the canvas, they are either shown as Blue, Yellow, Green or Red. This is a visual representation of their relative ‘tension’ with the corresponding chord or root key.
Blue = Chord Tones
Yellow = 2nd and 7th Notes (Nonchord Tones)
Green = 4th and 6th Notes (Nonchord Tones)
When Captain Chords is connected, the relationship of notes’ tension color relates to the corresponding chord. When Captain Chords is not connected, the notes’tension color relates solely to the selected root key.
Chord Tones, Nonchord Tones and Out-of-Scale Notes.
Blue notes, or chord tones, are notes which are directly present in the default triad of the corresponding chord or root key. So, in the case of A Minor, chord tones would be A – C – E.
Yellow notes are nonchord tones that are either the 2nd or 7th scale degree. In A Minor, this is B or G.
Green notes are also nonchord tones, only this time they are either 4th or 6th scale adegrees of the chord or root key. In A Minor, this is D or F.
Chord tones tend to sound ‘pure’ and match the chords or scale perfectly.
Nonchord tones add tension to the melody and are good for drama and surprise.
Yellow and Green nonchord tones have different degrees of tension in different chords and scales, so there is not one perfect definition of what each color does. Instead, simply be aware that they both carry a sense of tension in varying degrees.
Tension View
When Tension View is selected, Captain Melody charts the relative tension of your melody as a color-coded graph. Some composers may find this useful for estimating the overall degree of tension in their melody.
Generating Notes
Captain Melody does NOT auto-populate the plugin. Instead, you have several options for generating notes, detailed below.
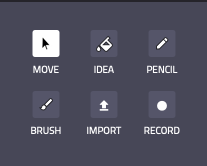
‘MOVE – Grab notes to move, arrange and resize them on the piano roll. Double-click to add or delete notes.
The Idea Tool has multiple parameters that will generate notes and influence the melodic composition. These can be combined in infinite ways.
To get started, click the ‘Plus’ icon to view your initial idea.
Notes will be auto-populated. If you are connected to Chords they will be influenced by your chord progression. Otherwise, they will be influenced by the selected key and scale.
There are 4 tabs within the Idea tool: SHAPE, RHYTHM, FIRST NOTE and LANES.
SHAPE
This tab controls the number of Steps and the Leaps within the melody using 0-100% rotary knobs. You can affect the overall shape of the phrase and transpose it in Octaves 1-8.
Step knob determines how much your melody will rely on stepwise motion for intervals between notes. Stepwise motion means traveling in single note steps up and down the scale.
Leaps dictate how many sequential notes will include a leap of a 3rd or more. The absence of Step or Leap is note repetition.
RHYTHM
Density controls the total number of notes in the Idea box.
Triplets controls the frequency of triplets.
Length controls note length . (Notes will not overlap unless you manually alter them in PENCIL mode.)
Rests is how many sections exist where no notes are present.
FIRST NOTE
Select which note related to the Chord your Idea Box is residing over will begin your melody.
LANES
Each note in the selected scale is represented from 1st (Root) through to 7th
Higher percentage values mean greater representation within the progression.
eg 50% ratios of 1st and third notes will result in a roughly equal split of 1st and 3rd notes only. If you have Follow Chords enabled then the intervals will be related to the chords from Captain Chords.
ADDITIONAL FUNCTIONS
The Update button within each tab updates the melody only within the settings of that tab. For instance if you click Update Rhythm then you will get a new rhythm based on your settings, but your shape will stay the same.
The Dice Icon is the equivalent of clicking all four Idea tool updates simultaneously.
You can also duplicate the current Idea Box at any time.
You also have the ability to select notes using the Move tool and convert them to an Idea Box at any time. This reverse engineers the information in the selected notes and adjusts the settings in the Idea tool to reflect the selected melody.
PENCIL
Add notes by clicking the mouse on a selected note and time position. Edit the note length by dragging the sides.
Delete by Ctrl-Clicking the note.
You can change the selected note’s position in the scale by choosing a Tension value from 1-7. You can also move it up or down by octave. These effects can also be achieved by manually dragging notes with your mouse.
BRUSH
Click and hold your mouse to start drawing. Release to enter note(s). You can choose the note by dragging it up or down the keyboard. New notes will be created when you drag the mouse along the timeline.
You can change the Note Length. You can also ‘Allow polyphony’ to enable multiple notes to write on the same beat, and allow notes to overlap.
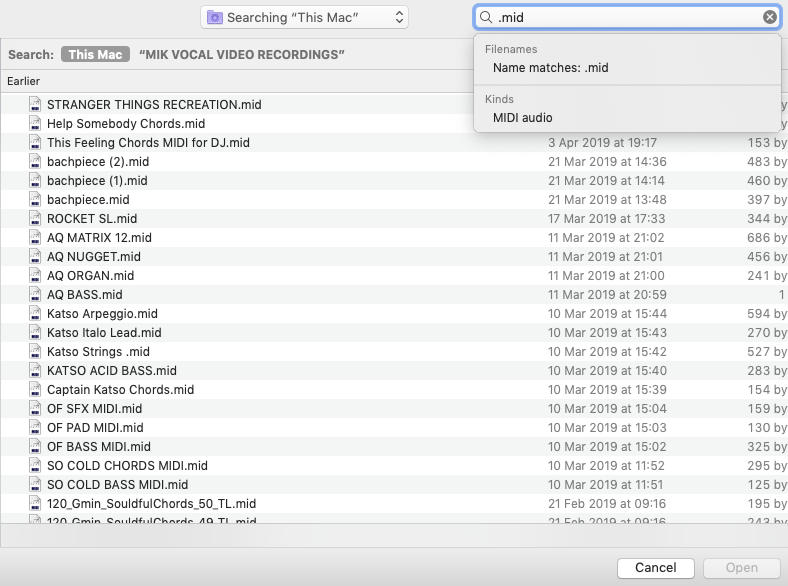
IMPORT
Import MIDI files from your computer library. They will display inside Melody as editable MIDI notes.
You can then decide if the imported file should keep its current key and scale or transpose to Melody’s current key and scale. You can also change the whole project to match your MIDI file. If the imported midi file is larger then desired, select desired notes and right click “Crop Notes to Selection”.
RECORD
Record notes in real-time with your computer keyboard or MIDI keyboard. Press Spacebar to begin and end recording. Enter to save.
You can disable/enable a metronome to help you play in time.
After recording, you can adjust quantization, and overdub your recording. When you’re hapy with it, press Done to enter it to the timeline. Clear to start over. You can also press Esc to clear at any time.
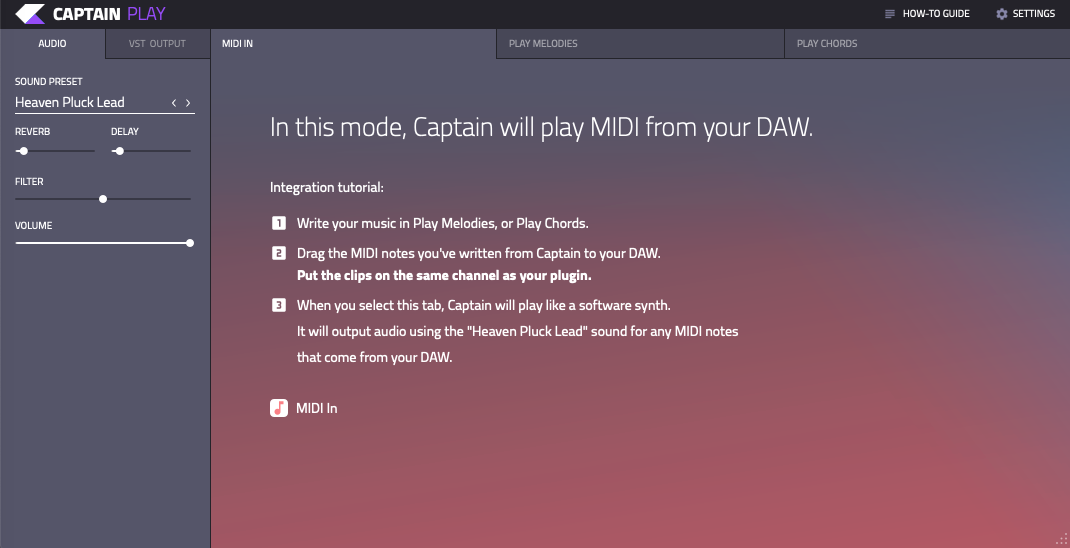
Using the MIDI Input tab
You can use Captain Plugins’ on-board sound pallette as a soft-synth by using the MIDI Input tab. Incoming MIDI signals, whether from a MIDI clip or keyboard, will trigger Captain Plugins’ sounds. You can choose the sound, adjust FX, volume and filter. However you cannot use Captain Plugins’ core functionality.
Shortcuts
Mac
Function
Shortcut
Drag to copy
Option + Click + Drag
Undo
Command + Z
Cycle through scale degrees (move tool)
Up & Down Arrows
Move note on canvas
Left & Right + Up & Down Arrows
Change note octave
Shift + Up & Down Arrows
Select all
Command + A
Delete note
Select note (click on or use marquee tool) Press Delete
Play/Stop
Spacebar
New note
Double click on canvas
Cycle through tools
1-6
Change octave up/down (when in Play tab)
[ ]
Trigger notes (when in Play tab)
Z-M, A-K, Q-I, 1-8
Windows
Function
Shortcut
Drag to copy
Control + Click + Drag
Undo
Control + Z
Cycle through scale degrees (move tool)
Up & Down Arrows
Move note on canvas
Left & Right + Up & Down Arrows
Change note octave
Shift + Up & Down Arrows
Select all
Control + A
Delete note
Select note (click or marquee tool) Press Delete
Play/Stop
Spacebar
New/delete note
Double click on canvas/note
Cycle through tools
1-5
Move note w/o snap (horizontal)
Shift + Left & Right Arrows
Copy/paste note
Control + C / Control + V
Change octave up/down (when in Play tab)
[ ]
Trigger notes (when in Play tab)
Z-M, A-K, Q-I, 1-8
SETTINGS
Connect or Disconnect to/from Captain Chords.
Keep Playing MIDI Notes when the plugin window is closed
Include MIDI In from the DAW while in the Play tab