Get special upgrade deals!Sign in to see if you qualify for deals.
Your cart is empty
There are no items in your cart
Taxes:Calculated at checkout
Subtotal:$0.00
Keep shopping
You own this software | Purchased on
Included Software:
Get special upgrade deals!Sign in to see if you qualify for deals.
Join Mixed In Key
Please log in again to continue.
Please sign in to view your owned products.
or
Email address
Please enter a valid email address.
By signing in, you consent to receive marketing emails and text messages from Mixed In Key. You may opt out at any time.
To verify your email, we've sent an email to . This code will expire in
You can resend your code in ()
Didn't get a code?
You've entered an invalid code. Please try again
Your code has been resent, check your inbox. If you're having trouble check your junk mail.
Tell us about yourself
Please enter your first name
Mixing Low End Like a Pro: How to mix Kick Drums and Bass.
The most volatile part of any mixdown is usually the low end. Big-hitting instruments fighting for clarity at extremely low frequencies is a battleground. Adam Hignell has some killer tips for low end mixing to help you win the war.
This article assumes a competent understanding of compression and EQ. It also assumes you have access to suitable referencing equipment.
Contents:
1. Establish which bass sound you want to lead with.
2. Cut unnecessary low frequencies.
3. Low end in mono.
4. Sidechain kicks to bass.
5. Multiband compression for level bass.
6. Dynamic EQ to spot-fix issues.
7. Try filtering mids in bass instruments and drums.
8. Releases/sound tails – particularly kick and bass.
1. Establish which bass sound you want to lead with.
First and foremost, it’s important to know in advance whether you want your bass to lead, or your bass drum. This is an important consideration, because only one can take centrestage. When this isn’t identified, the producer doesn’t know whether, or where, to roll off bass to allow space for bass drum, or other way around. They don’t know whether to create space in the sub lows for a huge bass sound or a fat kick. This may lead to messy mixes, or worse – mixes with processing that actively contradicts itself.
While of course both bass and kick should be clear and present, you’ll want to give one supremacy in the sub lows, to avoid muddiness or frequency masking.
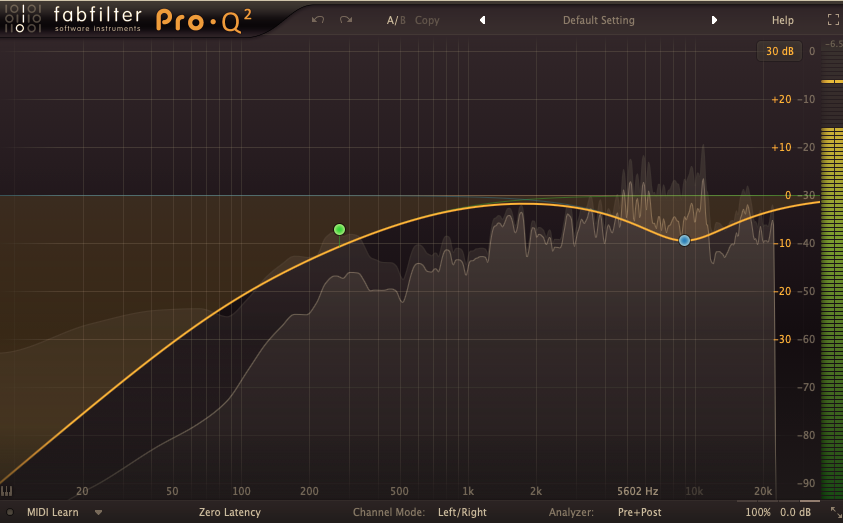
2. Cut unnecessary low frequencies.
Bass frequencies weigh heavier in a mix. This means instruments take up more space the lower they register. There is less room for competing frequencies in the low-end, partly due to their relative size, and partly because the human ear is geared towards perceiving mid-range and high frequencies with more clarity. Bass sounds tend to be ones we feel more than hear. This is why we often talk about warmth coming from lows and low-mids.
Any sounds which register in these lower frequencies add color to the mix. Sometimes, this is desirable, but when the sound’s low frequencies don’t actively enhance the mix, it’s a good idea to filter them. In fact, these undesirable frequencies actively spoil things. They may have atonal noise and subharmonics that add rumble to the mix. Removing them leaves more room for the impactful lows, such as your bass, kick and sub bass.
There are a couple of things to remember, though, when filtering low frequencies:
1. Sharp cuts (-28db per millisecond and sharper) can introduce phase artefacts. Check the results in mono and compare to stereo for such artefacts. It may be better to cut with a softer curve such as -12db or -6db.
Shelving can create a more natural, musical sounding mix. Cutting often seems logical, to eradicate all traces of low end in non-bass instruments, but try shelving sometimes for a smoother mix.
Some instruments need a degree of low end. While snares, vocals, guitars and non-bass synths usually don’t need any sub-lows, they often have desirable body in the bass frequencies. Be careful not to filter too much and lose this warmth.
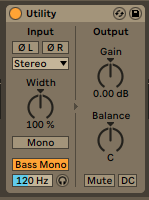
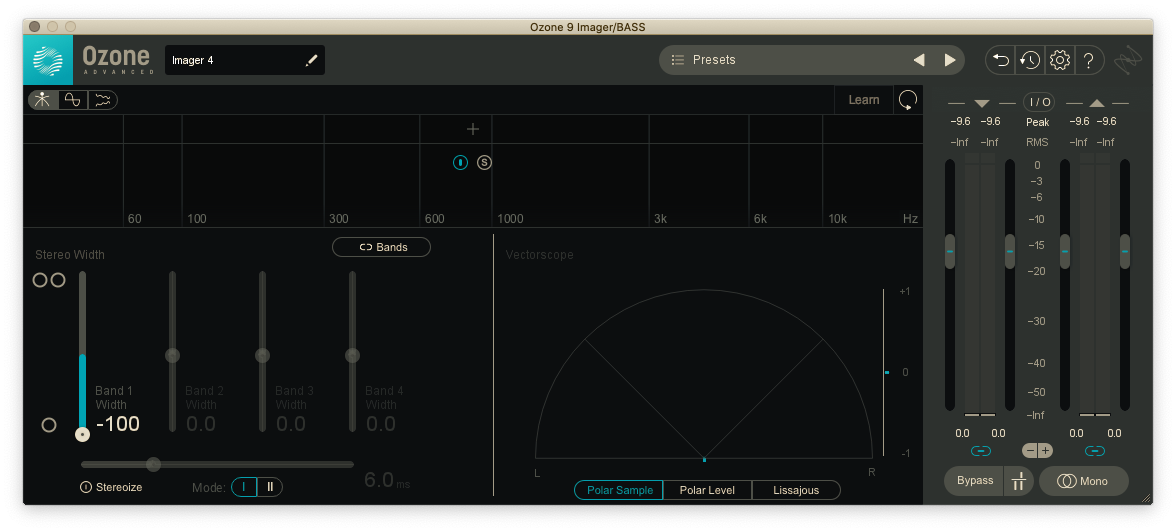
3. Mono your low end.
Big, bassy frequencies don’t need stereo imaging, as a general rule. All stereo imaging will achieve is widening the mix, leaving even less space in those lows. You can also end up with a hollow sound as the bass loses its presence through the centre of the mix by spreading itself across two stereo channels. Finally, as you process a stereo bass sound, you can start introducing phase cancellation and other bass-killing issues.
Fortunately, it’s relatively easy to make low-end mono. For starters, you can record in mono in the first place. However, if you plan to add some stereo effects to the higher frequencies in your bass sounds, you may prefer to use a stereo channel but actively mono the lowest parts.
Ableton and Logic have stock plugins that can achieve this, as do many other DAWs. Alternatively, 3rd party plugins such as https://www.izotope.com/en/products/ozone.html Ozone 9’s Imager can go further. It can mono a signal from any amount between 1 and 100%, or turn a mono signal into a stereo signal. It also offers more controls for precision, multi-band stereo imaging. It can also tell you whether your mix is suffering any phase cancellation.
Write Chords Faster with Captain Chords
Use Captain Plugins to write your own Chord Progressions, Hooks, Melodies and Basslines
This technique is now so commonplace, it’s likely any competent mix engineers are already doing it on most tracks.
It’s becoming hugely important in all kinds of music, because it helps the kick drum stand out from bass, which often occupies very similar frequencies.
By carving out space for the bass drum, the bass instrument can avoid fighting for supremacy.
Setting up the sidechain is simple:
1. Add a sidechain-capable compressor to the bass instrument channel (or bass buss).
2. Set the compression source to External.
3. In Sidechain settings, set the sidechain source as Bass Drum.
4. Adjust Threshold, Ratio, Attack & Release to taste.
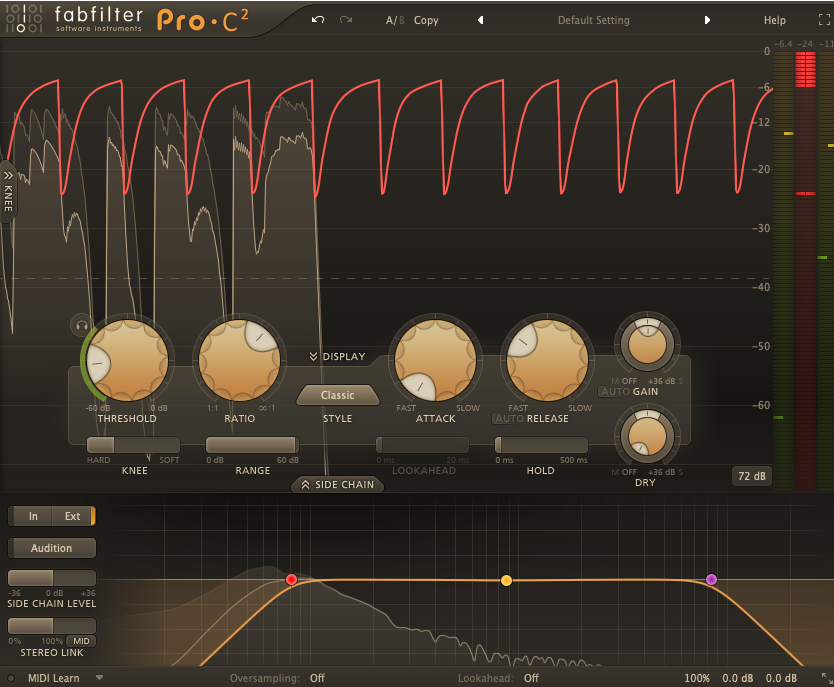
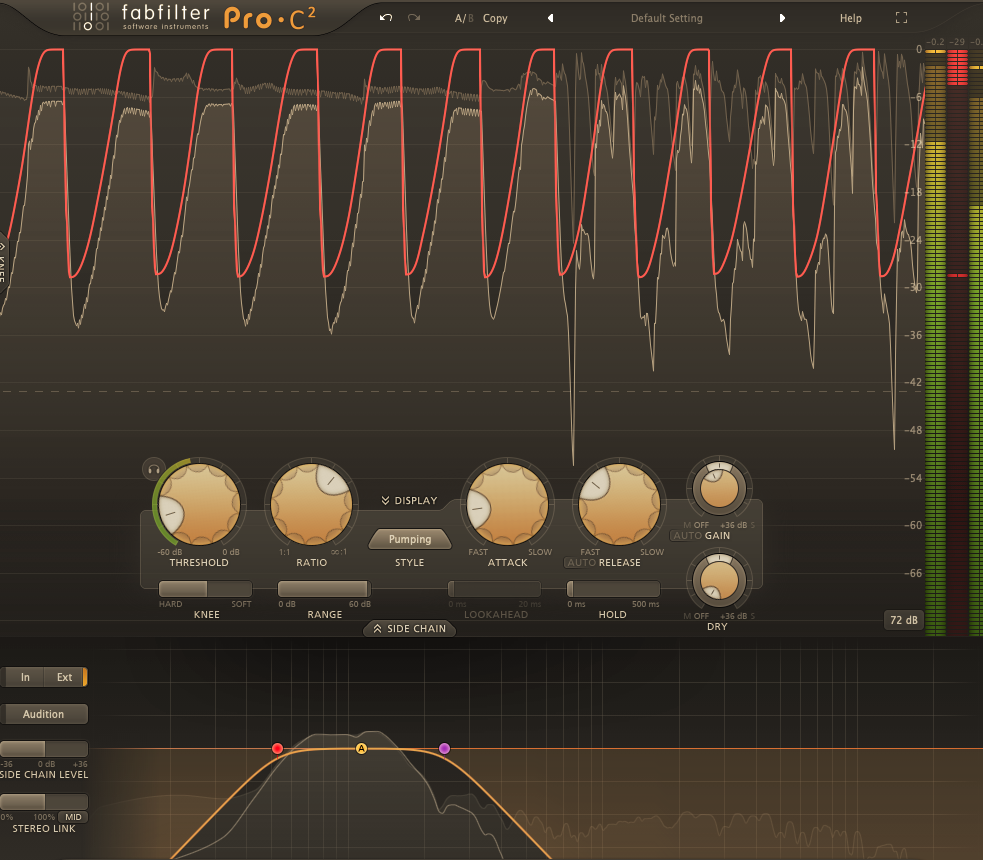
If your intention is to sharply duck the bass whenever the bass drum plays at the same time, use a fast Attack setting. You’ll need to solo bass and bass drum to check for pops or unwanted artefacts which can creep in. Often these can be mitigated against by adjusting the Release (try a slower release). Playing with the threshold, compression ratio and release can elicit very different results. For example, the ‘sucking/pumping’ bass effect made popular by French House artists like Daft Punk came from very aggressive, fast sidechain compression on the bass. By this method, a definitive pumping motion was applied, which had previously been considered ‘wrong’. Which goes to show how there are no real rules other than ‘if it sounds good, it is good!’
This clip has bass and bass drum lightly side-chained together. It’s fairly transparent, but the kick drum is still dominant.
This technique has been applied aggressively here, with much higher threshold, ratio and a super fast attack. This creates a much more pronounced pumping effect.
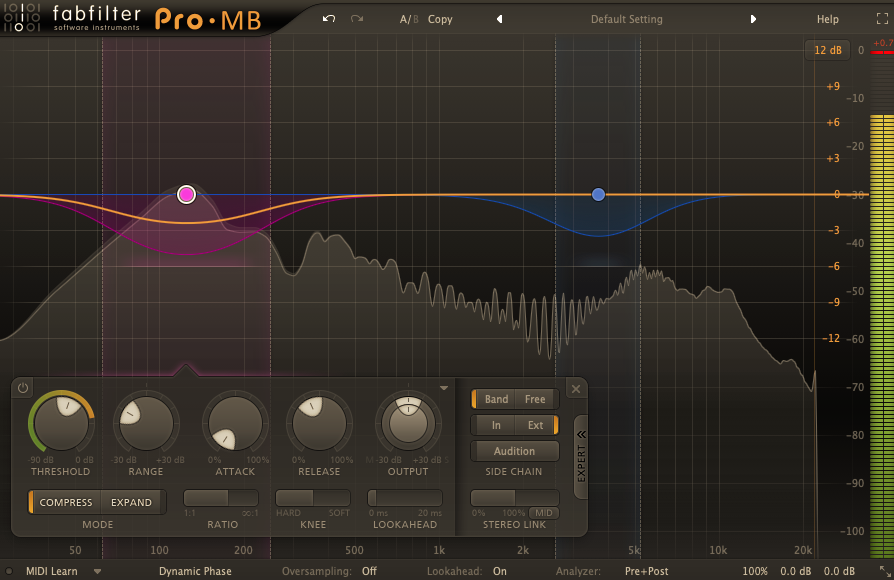
Sidechain with Multi-Band Compressors for more focused sidechaining.
Applying the sidechain principle to Multi-Band compressors can be useful when trying to allow particular frequencies to bypass the sidechain. For example, if your kick drum is mainly sub, such as an 808, you may wish to allow the bass to flourish in the midrange frequencies. You may, however, also want the bass to duck at the exact point of the 808’s ‘click’. Since the 808 click is relatively quiet, this may need to be extreme. By using a multi-band compressor, you can set different strengths of compression at different frequency positions.
Sidechain alternatives.
Sometimes, setting up sidechains for multiple groups and/or channels can be problematic. It may drain your CPU, or result in more compression than you desire, when the intention is ultimately merely ducking in volume to accomodate other sounds’ mix positions. In instances such as this, volume automation can do a serviceable job. However, that is also a messy solution. Lots of automation can gnaw away at CPU, and there is huge potential for errors. Volume-Shaper from Cableguys offers a more elegant solution. While it does have capabilities for lots of interesting volume modulations, it can simply duck volumes when triggered by a kick drum, for instance. It’s fast and CPU-efficient, but do be careful that your shape, frequency filtering and mix amount don’t introduce pops or clicks.
Another way to achieve this is using Trackspacer by Wavesfactory. It is more like a dynamic EQ, so can also offer the option of allowing certain frequencies while cutting others. Both these plugins have similar potential to duck frequencies and volume when triggered by another source. Great for kick drums, and also very good for bass instruments to mix with others. For instance, you could try allowing your bass to dominate in low areas while allowing other instruments to flourish in upper-mids and highs. By using ducking tools, rather than sidechain compression, you can achieve the same effect with subtly different characteristics and more preservation of the bass’ natural tone.
5. Invest in your low-end.
I’m a huge advocate of stock plugins in many DAWs. They often do a comparable job to many, more expensive 3rd party plugins. Not being able to afford additional plugins shouldn’t be a barrier to good mixing. However, one of the areas it’s probably prudent to invest in additional software is low-end mixing. Tools such as https://www.izotope.com/en/products/ozone.html Ozone 9 or https://slatedigital.com/virtual-analog-bundle/ Slate Digital’s Virtual Mix Rack are far advanced of anything a DAW can offer, and as a result can offer unrivalled precision and definition. With low-end mixing being such an important part of a good mix, this can only be a good thing.
6. Use Multi-Band Compression on uneven bass sounds.
When mixing bass instruments, it’s important to pay attention to bass consistency. Synth bass sounds commonly have a fairly even bass consistency. However bass guitar parts, or synth parts with lots of higher notes, can have an uneven consistency. Lower notes may be full-bodied and beefy, but higher notes, or notes played more softly, may be lacking the same body.
We want to achieve a consistently full-bodied bass sound, and one way to achieve that is to use multi-band compression.
Multi-band compression is a method by which we can apply compression in differing degrees to different parts of the frequency spectrum. It’s a little like having separate compressors for lows, mids and highs.
By aggressively compressing the lower frequencies while still allowing higher frequencies dynamic range, we can achieve a consistently present low end, while mids and highs can continue their more expressive dynamism. Bass frequencies can be compressed more aggressively since we like to perceive them as a thick blanket of sound. The articulation in bass sounds comes from the low-mids, mids and higher frequencies.
Dance to the beat of a different drum machine.
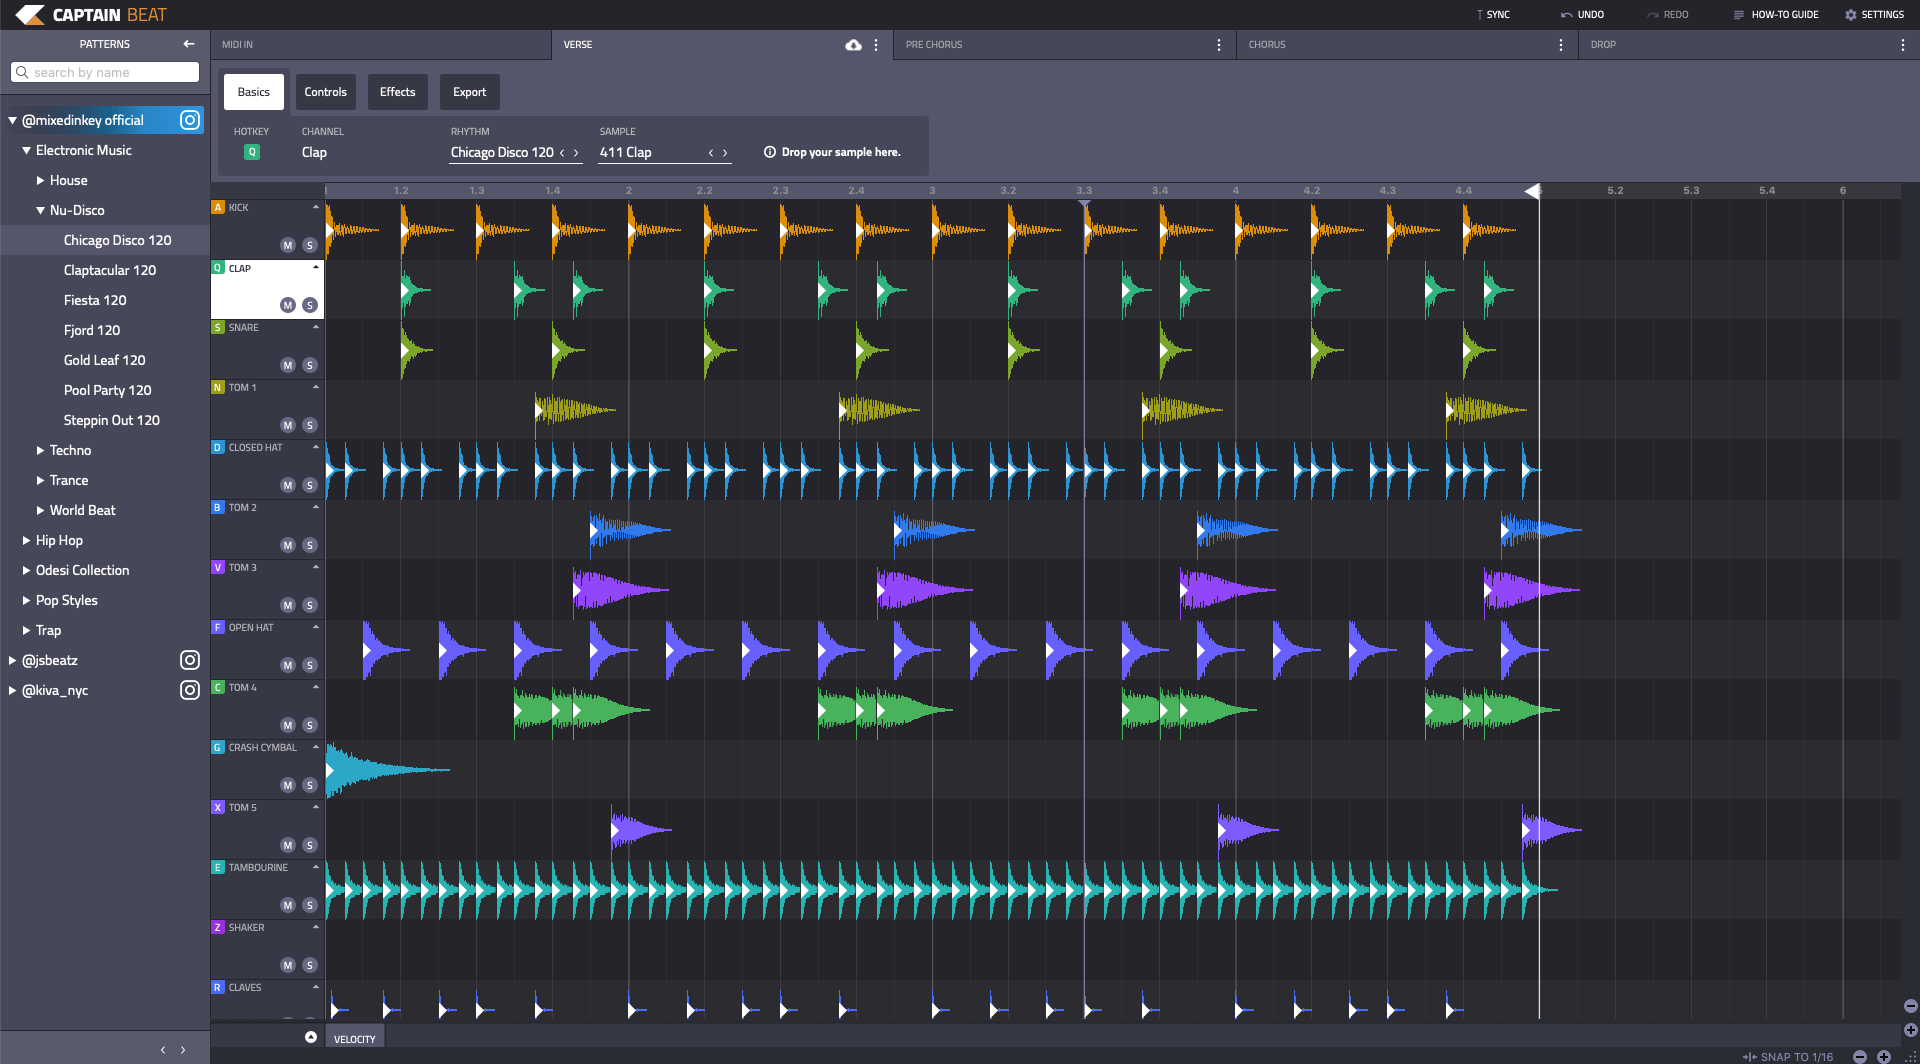
Captain Beat 5.0: The Ultra-Modern Beatmaking Plugin
Mix and match rhythm patterns per-channel
Hundreds of high-quality drum sounds
Play and record rhythms with computer keyboard or MIDI controller
You’ve got your bass and kicks working together beautifully, but you notice that whenever your snare hits at the same time as the kick, it’s drowned out. What do you do?
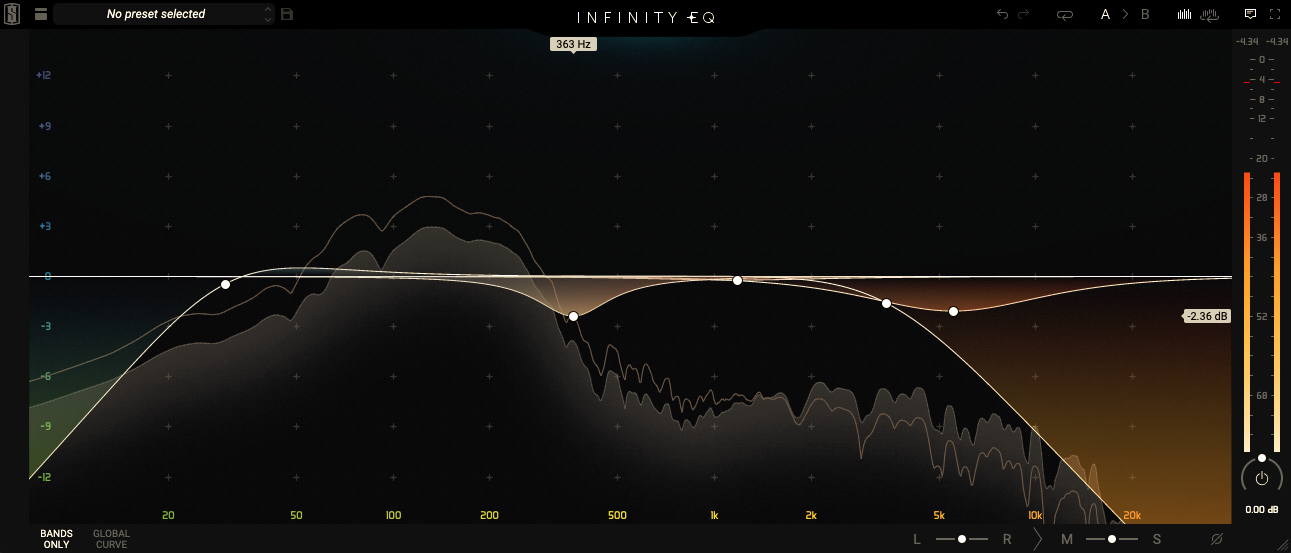
You could tweak the snare’s EQ profile, or sidechain it to the kick. But if you’re happy with your mix this may not be appropriate. Instead, you could use a Dynamic EQ, such as this great free one, Nova from Tokyo Dawn. Sidechaining a dynamic EQ on the kick to the snare will open up a new possible fix: ducking the kick in the snare’s key frequencies, only when the kick and snare hit together.
8. Try filtering low mids in bass instruments and drums.
Bass sounds, when analysed, often look like one long sausage in the low and mids. This is due to the sheer power and presence of bass tones. However, not all of these frequencies are necessarily helping your mix. While bass and kick sounds, subs aside, have a lot of their tone and accent in the upper mids, there is often a wooly area between the sub lows and lows, and the mids. Try a medium/wide, shallow bell curve around 350-400Hz on bass and kick drum. Reference against the ensemble mix, and you might be surprised to hear a new degree of clarity. Midrange frequencies, particularly snares and low melodics, pads etc, may suddenly have a little more space, while the important bass tones remain intact.
9. Releases and sound tails – particularly kick and bass.
Compression releases.
Compression releases and the natural tails of sounds in the low-end have a very important relationship. When a sound tail is longer than the compressor’s release setting, a flapping/pumping action is often introduced. This can be desirable, such as in the Daft Punk sidechain pump effect detailed above. But sometimes it can simply create unnatural sounding popping or clicking sounds.
Similarly, if a release tail is much longer than the sound tail, it’s often working long after the bass has stopped. This is usually not so destructive but you may find the bass sound could have reverted to a louder volume with a shorter release. Unless you want the bass quieter for some reason, it would be wise to look into that.
These two opposite ends of the spectrum should give a good insight into why we need to get the right releases for our bass sounds. Soloing them and then testing the compression and sidechaining should reveal any need to tweak here.
Sound tails
This is particularly important for kick drums, but can also be an issue for bass sounds. When a kick drum tail is long, it can fight with the bassline. It’s important that the kick has the right overall effect for your track and in relation to the bassline.
About the author:
Adam Hignell is a music producer, mastering engineer, DJ and label-owner based in Brighton, UK. When not providing content and tech support for Mixed In Key, he produces music under the alias Don Dayglow, provides professional mastering and mixing services, and runs the independent Disco/House label Particle Zoo.