Get special upgrade deals!Sign in to see if you qualify for deals.
Your cart is empty
There are no items in your cart
Taxes:Calculated at checkout
Subtotal:$0.00
Keep shopping
You own this software | Purchased on
Included Software:
Get special upgrade deals!Sign in to see if you qualify for deals.
Join Mixed In Key
Please log in again to continue.
Please sign in to view your owned products.
or
Email address
Please enter a valid email address.
By signing in, you consent to receive marketing emails and text messages from Mixed In Key. You may opt out at any time.
To verify your email, we've sent an email to . This code will expire in
You can resend your code in ()
Didn't get a code?
You've entered an invalid code. Please try again
Your code has been resent, check your inbox. If you're having trouble check your junk mail.
Tell us about yourself
Please enter your first name
10 Ultimate EQ Tips.
EQing is somewhere between an art and a science; it’s effect on sound is so dramatic that using it well can be the difference between a good and a bad mix.
While no single peice of advice should ever be taken at face-value, Adam Hignell provides 10 tips to help your mixes sound clearer and cleaner:
PRO TIP
The following tips are all as important as each other!
1. Cut more than you boost.
Boosting can be great for many reasons. Using an EQ plugin with a characterful, warm tone to boost broad frequencies can sound wonderful. But, it also runs the risk of introducing artifacts and distortion to the mix. Furthermore, it has the potential to push the channel volume too far and ruin all your careful gain-staging.
By contrast, cutting can carve space for other sounds, remove unwanted frequencies and accentuate the detail in your mix.
Of course, there’s a chance you might remove too much and leave sounds thin or imbalanced. As ever, test different settings and trust your ears.
2. Boost, then cut (or vice versa.)
Whether you’ve boosted or cut first, go back to the sound and decide if you wanted to boost ALL those frequencies… maybe you need to apply a surgical EQ to remove a narrow range of sour frequencies from that sweet boost. Or, perhaps you cut a bunch of muddy frequencies out, but now find the overall sound is a bit thin – maybe boosting low/low-mids here might bring the power back.
Write Chords Faster with Captain Chords
Use Captain Plugins to write your own Chord Progressions, Hooks, Melodies and Basslines
Different EQs have subtly different characteristics, so layering different EQ types can have a pleasant effect on the overall tone. For example, rather than aggresively high-shelving with a single plugin, try layering EQ plugins with different characteristics, and applying several softer shelves. Each plugin will shelve in a slightly different way, which can add subtle nuances to the tone of your sound.
Another good reason to use multiple EQs is that, if you’ve nailed your EQ settings but want to add final touches, an additional EQ can work wonders. And sometimes, it just sounds better by chance, which is totally fine!
4. EQ your effects.
Whether on a reverb send or after a distortion plugin in your channel’s insert chain, applying retrospective EQ can work wonders. Taking out low, muddy parts of a reverb can add clarity, while EQing out any nasty frequencies brought in by distortion can be a mix-saver.
You can add EQ before effects, too. For example, you might only want to send the mid-range through a distortion plugin and keep the lows and highs intact.
5. Find troublesome frequencies with a narrow Q boost.
Any given sound can have sweet-sounding parts and not-so-sweet sounding parts. Very often, it’s particular harmonics or room resonances that cause the problem. When this happens, you’ll want to use a surgical EQ to find and clear them.
Play the sound, while sweeping a Bell filter with a narrow Q up and down the spectrum. Boost it as far as it will go, and nasty frequencies should become very appararent! Once you’ve isolated them, either change the filter type to Notch, or drop the gain by as much as you feel does the job. Et voila, a nice and clean mix!
PRO TIP
There may well be more than one troublesome frequency band in your mix, so keep sweeping until you’ve found them all. Then refer to Tip #2!
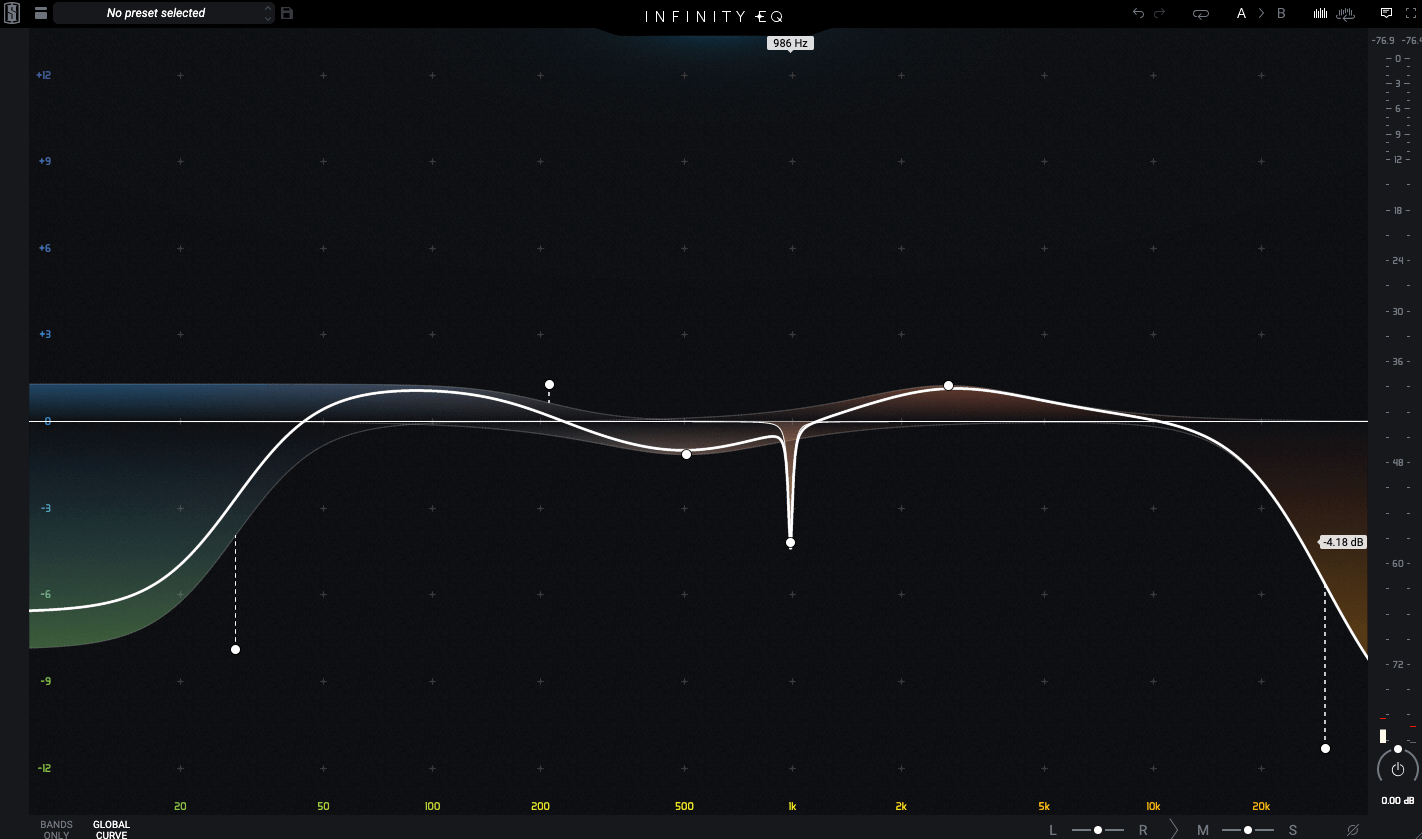
Finding nasty frequencies using a sharp Q boost, then reducing gain and using a notch filter.
6. Cut narrow, boost wide.
We’ve already covered this in an earlier part of the article, but for those of you who’ve skipped straight to the Tips section, it’s worth saying again. Narrow cuts remove less of the body of a sound, which is generally desirable. However, narrow boosts often sound unnatural and can cause ugly pops and spiky sounds in your mix. Instead, using a broad boost gives a subtle, evenly spread emphasis to that part of your frequency spectrum.
PRO TIP
Using the technique in Tip #4, find the natural peak of your snare or kick drum by looking for a pre-existing spike in the EQ range. It’s usually quite easy to see a snare’s peak, as it has a dominant spike somewhere between 100-240Hz.
Bass drums are trickier, and it doesn’t always sound good to boost them. But, some producers swear by it. Bass-drums can have many peaks, since they are usually made up of a single tone and the ensuing harmonics or sub-harmonics. Find a peak around 165-185Hz – that can often be boosted to bring the kick impact up in the mix.
7. Ensemble is king!
Do you want to be EQing every sound individually, to get the very best tone you can at every stage of the mix? Of course you do. But always defer to the ensemble mix as your defining sound. If the sounds don’t sound great together, you’ve still got work to do.
Which brings us onto…
8. Bus mix EQing is your friend.
By EQing the bus mix of a similar sounding group, such as guitars or synths, you can make the sound cohesive while retaining distinction where it counts.
This is where you can carry out extra sculpting, and look at the way each sound group interacts with each other. For instance, say your snare is drowning out your kick when, you could try adding a dynamic EQ onto the snare bus and sidechain it so that it ducks shared frequencies whenever the kick strikes.
You could also consider using automation to give, say, added presence to a vocal during a breakdown, and then reverting to the ensemble mix when the full instrumentation comes back.
Most commonly of all, two groups of instruments sound great on their own but compete when played together. EQ can carve out a little space in one for the other to fill.
9. Mono for reference.
You should be referencing your EQ at regular points, to check on your progress and ward off episodes ‘going down the wormhole’ and losing your way. This is standard behavior for any engineering process.
But, when EQing, if you want to know what’s really happening, switch to mono and listen. Any hase issues will instantly become plain as day. And in any case, mono is everywhere! Cell phones, laptops and tablets all output in mono, as do many radio stations. If your mix doesn’t sound good in mono, it could fall apart when it goes outside your studio.
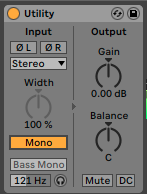
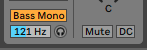
10. Mono your sub-bass.
Whether bass drum or bass instrument, there’s almost never any value in a stereo signal below about 120 Hz. The human ear can’t distinguish enough of it to recognise anything more than a mono sound at that range, and any phase issues are likely to cause swampy, flappy subs… which nobody wants. Plus, many PA systems designed to playback audio with that much low end are setup to play mono below 120 Hz, so why fight for stereo?
As an added bonus tip, you should almost always keep your low and sub bass in the centre of the stereo field anyway, so mono to be on the safe side.
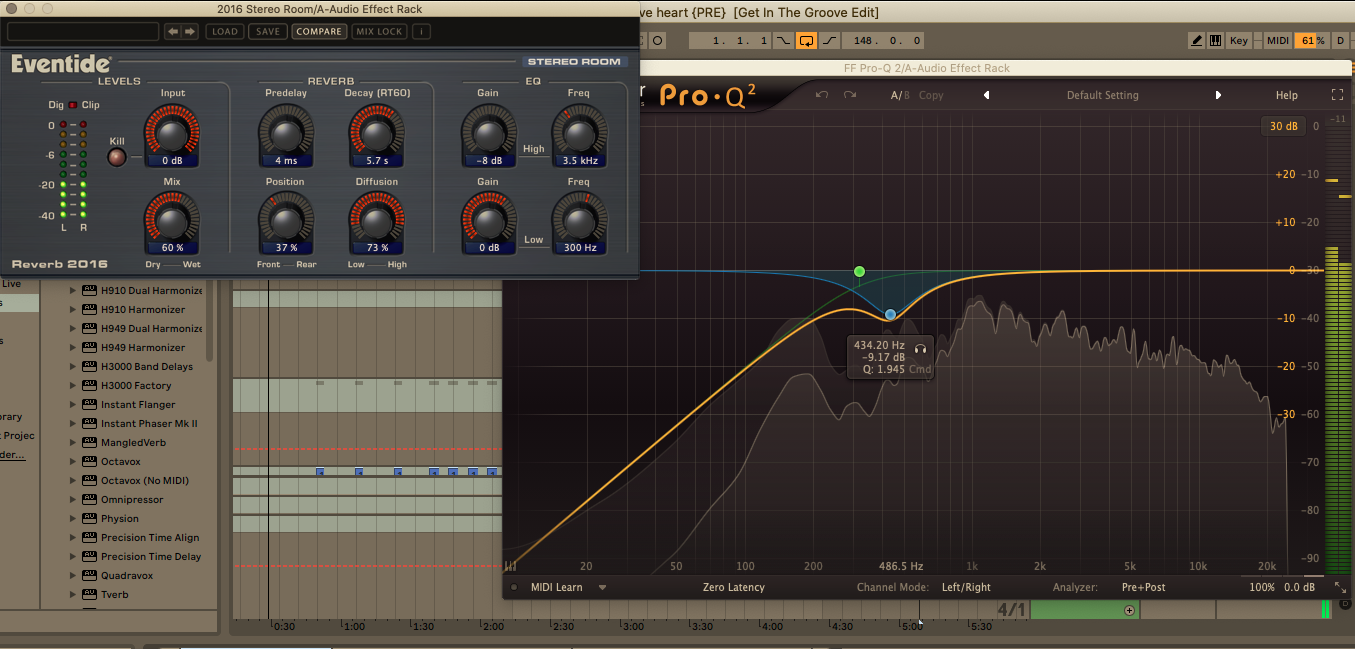
Here’s an example of EQing that demonstrates a number of the tips listed above:
The original sound is an electric guitar riff. It sounds pretty good, but it’s a bit hissy and lacks body.
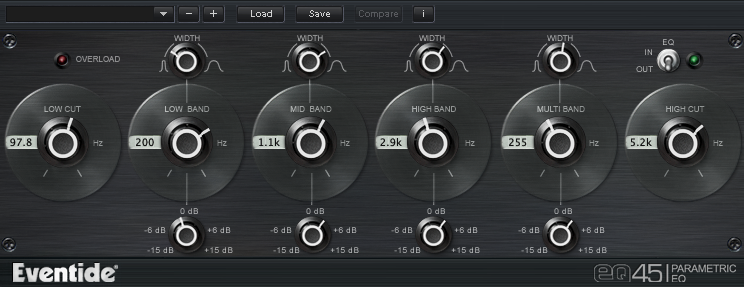
First, I try an analog-emulating EQ from Eventide, the EQ45, and add some broad boosts and a low-pass filter:
It sounds fatter, the hiss is reduced to an acceptable level, yet there are some nasty sounding harmonics in the low-mids.
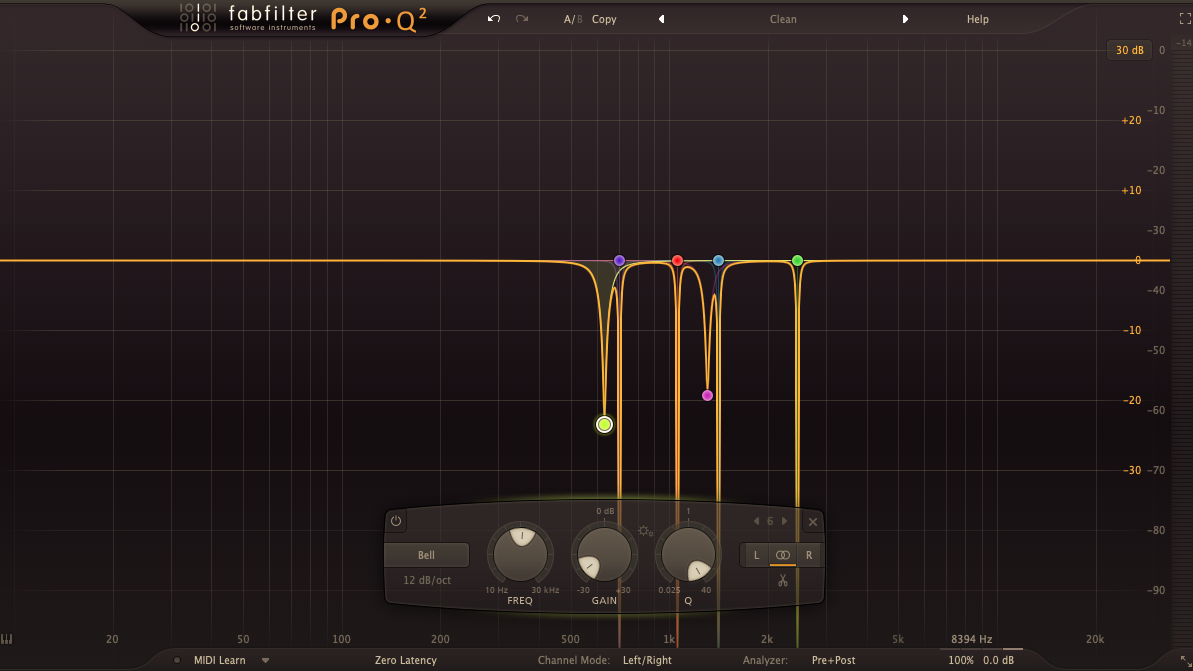
By using a linear phase EQ (Fab-Filter Pro-Q) directly after the EQ45, I notched out the troublesome frequencies. The riff sounds pretty good now.